Change Blade Honda Lawn Mower: Step-by-Step Guide
Learn how to safely change the blade on a Honda lawn mower with this comprehensive, brand-backed guide from Mower Help. Find compatible blades, essential tools, safety tips, and detailed steps to keep your mower cutting evenly and efficiently.

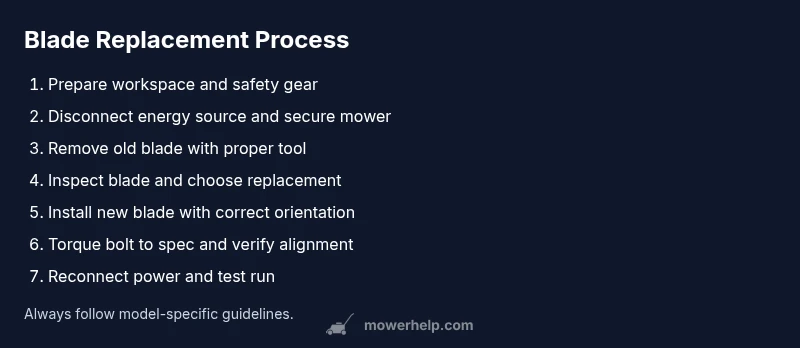
This guide shows you how to safely change the blade on a Honda lawn mower, with model compatibility checks, proper safety steps, and a clear step-by-step process. You’ll learn how to select the right blade, secure the mower, remove the old blade, install the new one correctly, and re-test the mower for optimal performance. Follow these steps to prevent vibration and uneven cuts.
Why Blade Changes Matter for Cutting Quality and Safety
A sharp, undamaged blade slices cleanly through grass, delivering even height and a tidy lawn. Dull edges or bent blades pull, tear, and leave ragged turf that invites disease. For Honda lawn mowers, blade quality directly affects balance and spindle health. The Mower Help team finds that timely blade changes reduce engine load and improve cut quality, making mowing safer and more enjoyable for DIY homeowners.
Blade Compatibility and Options for Honda Mowers
Honda mowers use blades that match a specific mounting pattern and length. OEM or OEM-equivalent blades are designed to fit the spindle height, bolt hole pattern, and blade weight distribution of most Honda models. When selecting a blade, verify the mower model number, blade part number, and orientation arrows on the blade. Avoid generic blades that do not state model compatibility, as they can compromise balance and safety. If you’re unsure, consult the manual or Mower Help’s compatibility guidance to avoid buying the wrong blade.
Safety Gear and Prep Before You Begin
Put on heavy-duty work gloves, safety glasses, and sturdy closed-toe shoes. Work on a flat, dry surface and engage a wheel chock or block to prevent movement. If you’re working outdoors, ensure no bystanders are nearby. Always disconnect the spark plug wire on a gas mower (and remove the battery on electric models) before touching the blade. Keeping tools organized minimizes the chance of accidentally dropping a tool into the blade area.
Inspecting the Old Blade and Choosing a Replacement
Examine the blade for cracks, chips, bending, or excessive corrosion. If you notice any of these signs, replace the blade rather than attempting to sharpen a compromised blade. Compare the old blade’s shape and hole pattern with the replacement to confirm compatibility. If you discover mounting hardware that’s damaged or corroded, replace it as well to ensure a secure fit and proper torque when reassembling.
Orientation, Balance, and Installation Basics
Most Honda blades have an arrow indicating correct orientation. Mount the blade so the curved face faces the direction of mowing and the sharpened edge points downward toward the grass. Hold the blade steady while tightening the mounting bolt with a wrench to prevent it from rotating. If your mower requires a balance check, use a simple balancing method using a pendulum or balance tool to ensure even weight distribution.
Torque, Alignment, and Final Checks
Tighten the blade bolt to the manufacturer’s specification. If you don’t have a torque spec handy, snug the bolt firmly with a wrench and give it a final quarter-turn, stopping if the blade stops moving when you try to rotate it by hand. Recheck that the blade sits flat and isn’t wobbling. Reconnect the spark plug (or battery) and perform a brief test without engaging the blade to confirm nothing is loose.
Post-Installation Maintenance Tips
After changing the blade, clean the underside of the mower deck, check for grass buildup, and inspect the blade for proper edge alignment after the first few passes. Store spare blades in a dry, accessible location. Schedule regular blade inspections at the start of mowing season and after hitting hard objects like rocks or roots. Proper maintenance reduces the risk of vibrations and improves mower longevity.
toolsMaterialsEndedWithNull":null}
toolsMaterialsJSONPlaceholderEnd":null
stepByStepContentPlaceholder":""
tipsListPlaceholder":""
mainTopicQueryConfigured":""
faqSectionPlaceholder":""
brandMentionsNotes":null,
Tools & Materials
- Safety gloves(Leather or cut-resistant; protect hands during blade removal and installation.)
- Safety glasses(Protect eyes from chips or debris.)
- Socket wrench or ratchet(Needed to remove and tighten the blade mounting bolt; size varies by model.)
- New blade compatible with Honda mower model(Use OEM or OEM-equivalent blade with correct hole pattern.)
- Blade removal tool or wooden block(Use to hold blade still when loosening mounting bolt.)
- Torque wrench (optional)(For precise torque according to manual.)
- Rag or degreaser(Clean the deck and wipe down the blade before reinstall.)
- Shut-off device or battery disconnect (for electric mowers)(Disconnect power source before starting.)
Steps
Estimated time: 45-60 minutes
- 1
Prepare workspace
Clear the area, place the mower on a flat surface, and gather all tools. Put on gloves and eye protection, and ensure the engine is off and cool. Use a chock or block to prevent any movement during the procedure.
Tip: Organize tools before starting to avoid searching mid-step. - 2
Disconnect power and secure the mower
For gas mowers, disconnect the spark plug boot to prevent accidental starts. For electric mowers, unplug the power cord or remove the battery. Secure the mower so it cannot tip during blade removal.
Tip: Always confirm there is no energy source connected before touching the blade. - 3
Remove the old blade
Expose the blade mounting area, insert a blade removal tool or wooden block to hold the blade, and loosen the mounting bolt with the socket wrench. Carefully lift the blade away, noting its orientation for replacement.
Tip: Keep hands clear of the blade’s sharp edges and avoid prying with bare hands. - 4
Inspect blade and choose replacement
Check for cracks, chips, or bending. If the blade shows damage, replace with an identical or OEM blade. Compare length, width, hole count, and orientation indicators between old and new blade.
Tip: If unsure about compatibility, consult the manual or Mower Help guidance. - 5
Install the new blade
Position the new blade with the correct orientation; align bolt holes and seat it flat against the spindle. Hand-tighten the mounting bolt to hold the blade in place, then proceed to tightening.
Tip: Do not overtighten; ensure the blade sits flush against the mounting surface. - 6
Torque and verify alignment
Torque the mounting bolt to the manufacturer’s specification. If you don’t have the exact spec, snug firmly and add a quarter-turn while preventing blade movement. Recheck alignment to ensure the blade is not wobbling.
Tip: A misaligned blade can cause vibrations and uneven cuts. - 7
Reconnect power and test
Reconnect the spark plug or battery. Start the mower briefly with the blade guard in place to verify smooth operation and absence of unusual noises. Turn off and inspect for any looseness or debris.
Tip: If you hear grinding or see vibration, recheck bolt tightness and blade flatness. - 8
Clean up and dispose of old blade
Wipe tools and deck, store the spare blade in a dry place, and dispose of the old blade as scrap metal per local regulations.
Tip: Do not leave sharp blades where children or pets can reach them.
Got Questions?
Do I need to remove the spark plug before changing the blade?
Yes. Disconnect the spark plug wire on gas mowers or remove the battery on electric models to prevent accidental starts.
Yes—disconnect the spark plug or battery before touching the blade to avoid unexpected starts.
Can I sharpen the blade instead of replacing it?
You can sharpen if the blade is not bent, cracked, or heavily worn. If there are nicks, corrosion, or warping, replace the blade for safety and performance.
Sharpen only if it’s not bent or damaged; otherwise replacement is safer and more effective.
How do I know which blade fits my Honda mower model?
Check your mower model number and blade part number in the owner’s manual or on Honda’s official site. Use an OEM or OEM-equivalent blade with the correct hole pattern.
Look up the model number in the manual or Honda’s site to find the exact blade, then buy that match.
Is balancing the blade necessary after installation?
Balancing helps reduce vibration and wear. Many blades are balanced from the factory, but you should check for wobble and address any imbalance before mowing.
Balancing reduces vibration and wear; check for wobble after installation.
What safety gear should I wear during blade replacement?
Wear gloves, safety glasses, and sturdy footwear. Keep loose clothing away from moving parts and tie back long hair.
Wear gloves and eye protection, and keep clothing secure to prevent entanglement.
How should I dispose of the old blade?
Wrap the old blade in thick cardboard or cloth and recycle as scrap metal according to local regulations.
Wrap the old blade securely and recycle it as metal per local rules.
Watch Video
The Essentials
- Verify blade compatibility before replacement.
- Use proper safety gear and disconnect energy sources.
- Install with correct orientation and torque to spec.
- Test the mower carefully and clean up after maintenance.