Electric Lawn Mower Fix: A DIY Troubleshooting Guide
A comprehensive, step-by-step guide to diagnose and repair common electrical faults in electric lawn mowers, with safety tips and maintenance to prevent future failures. Learn how to test batteries, switches, wiring, and power sources for cordless and corded models.

By following these steps, you will diagnose and fix common electrical faults in electric lawn mowers (corded and cordless). You’ll learn how to test the battery or power supply, inspect wiring and safety switches, and perform safe, basic repairs with common tools. This guide also covers when to replace components.
Understanding the electrical mower landscape
Electric lawn mowers come in two main flavors: corded and cordless. Corded models draw power from a wall outlet; cordless models run on rechargeable batteries. In either case, the problem often boils down to power delivery, safety interlocks, or worn electrical contacts. According to Mower Help, electric mower troubleshooting starts with understanding the power system and the interlocks that prevent accidental starts. With that frame, you can diagnose problems before you reach for tools. In this guide, electric lawn mower fix means identifying if the issue is supply related (a dead battery, a tripped outlet, a faulty charger), a control fault (a bad switch or exposed wiring), or a mechanical snag (a jammed blade triggering a safety circuit). Start by noting model type, age, and whether the issue happens every time or only under load. This information keeps your diagnosis focused and minimizes unnecessary parts replacement.
Safety first when fixing an electric mower
Safety is non-negotiable when working on powered tools. Always unplug or remove the battery before touching any internal components. Wear eye protection, gloves, and non-conductive footwear. Work on a dry surface away from water, and keep metal jewelry out of reach to avoid accidental short circuits. If you must test live contacts, use insulated tools and a non-contact voltage tester to confirm power status before any contact is made. Remember that some components, like the blade brake and safety interlock, are designed to shut the unit off during maintenance—never bypass them. These precautions protect you and extend the life of your mower.
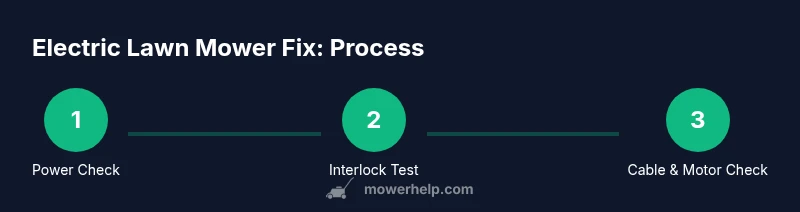
Diagnostic flow for common electric mower issues
A practical flowchart helps you avoid guesswork. Start by disconnecting power (cord unplugged or battery removed). If the mower still behaves oddly when reconnected, inspect the power source: outlet, extension cord, and charger. If power is present but the unit won’t start, move to safety interlocks and switches, then wiring harnesses. If there is any sign of buzzing, heat, or strange smells, stop and re-check connections. This sequence—power source, safety interlocks, wiring, motor—reduces wasted effort and points you toward the right component to replace.
Battery and charging system checks for cordless mowers
Cordless models rely on battery health and charging integrity. Begin with a voltage check: measure the pack voltage with a multimeter when the battery is rested. If voltage is low or readings drift, the battery or charger may be the culprit. Inspect the charger for warm tips, corrosion on contacts, or damaged cables. Store and charge batteries according to the manufacturer’s guidelines, avoiding exposure to extreme temperatures. If you notice rapid discharge after a full charge, consider load testing the pack or replacing it. Maintaining proper charging cycles can dramatically extend the usable life of cordless mowers.
Corded power source and extension cord checks
For corded mowers, the issue often lies in the power pathway. Test the outlet with another device to ensure it is working. Inspect the extension cord for cuts, kinks, or damaged insulation, and ensure the connector pins are clean and secure. Some units rely on a built-in GFCI or circuit breaker; if it trips repeatedly, do not bypass it—address the underlying fault, which could be a short or water ingress. Keep cords off wet grass and never run a damaged cord through heavy traffic or under stacked tools. A good cord and outlet setup prevents a surprising shutoff mid-mow.
Inspecting switches, relays, and fuses
Interlocks and switches control the mower’s ability to start and run. A worn or dirty switch can fail to complete the circuit, while relays may chatter or fail under load. Check for loose terminals, corroded contacts, and melted insulation. Some models have inline fuses; if a fuse is blown, inspect for a short or overcurrent condition rather than simply replacing the fuse. Use a multimeter to verify continuity when the switch is engaged and ensure that each position yields the expected resistance reading. Replace components only with compatible parts from the manufacturer.
Wiring harness and motor basics
Damaged wiring is a silent killer of mower reliability. Look for cracked insulation, pinched wires, and loose connectors along the harness that runs from the power source to the motor. Damaged wires can cause intermittent starts or erratic behavior. If you see charred insulation or melted sleeves, replace the harness or affected sections. The motor itself may have worn windings or brushes in older models; while many motors are sealed, some small electric mowers use carbon brushes that wear out over time. If you’re unsure, consult the manual or a professional rather than attempting risky disassembly.
Safe, basic repair actions you can perform at home
Some fixes are repeatable and safe with proper precautions. Clean and reseat all connections, replace damaged fuses, and replace a frayed extension cord or a burnt charger. Tighten terminal screws to the recommended torque and apply dielectric grease to moisture-prone contacts where applicable. If you suspect a faulty switch, swap in a compatible replacement and test the start sequence. For cordless models, swap in a known-good battery and test. Always re-check for heat buildup after a test run and stop if anything smells burnt or looks deformed.
When to replace parts or call a professional
Not every problem is economical to fix at home. If the battery is swollen, the motor shows signs of seizing, or you notice persistent overheating, it’s safer to consult a pro or replace the component. Major repairs, such as rewiring large sections or motor replacement, often require specialized tools and schematics. If you are unsure about any step, pause and seek professional guidance. Timely, professional service can prevent further damage and improve overall safety.
Maintenance habits to prevent future faults
Prevention beats repair. Regularly clean the chassis and contacts, store batteries at moderate temperatures, and inspect cords for wear. Keep the air vents clear and the blade free of debris—proper cooling and lubrication reduce stress on electrical components. Schedule annual inspections if you rely on your mower for frequent mowing. A small upfront maintenance routine can dramatically reduce the odds of unexpected failures during peak mowing season.
Tools & Materials
- Screwdriver set (Phillips and flathead)(Phillips #2 and flathead medium)
- Multimeter(DC voltage check and continuity testing)
- Needle-nose pliers(For gripping and bending small wires)
- Wire strippers(For cleanly exposing conductors)
- Electrical tape(Insulate joints and damaged areas)
- Allen wrench set(Remove blade guards or motor mounts if needed)
- Replacement fuse (if your model uses one)(Check model specifications)
- Replacement battery (for cordless models)(Only replace with compatible pack)
- Safety gloves(Protection when handling components)
Steps
Estimated time: 60-90 minutes
- 1
Unplug power and remove the battery
Begin by disconnecting the power source from corded models, or removing the battery from cordless units. This eliminates the risk of accidental starts during inspection. Verify there is no residual charge by attempting to press the safety switch after disconnecting.
Tip: Always disconnect power before touching any internal components. - 2
Inspect the power cord and charging plug
Examine the cord for cuts, kinks, or exposed conductors. Check the plug for bent pins or corrosion and test the outlet with another device. A damaged cord is a common cause of intermittent power loss.
Tip: Replace damaged cords immediately and avoid using damaged adapters. - 3
Test the safety interlock and start switch
With power removed, check for smooth operation of the interlock and switch. Use a multimeter to verify continuity across the switch when engaged. If the switch sticks or fails continuity tests, replace with a compatible part.
Tip: Avoid forcing a switch; improper reuse can create a short. - 4
Check wiring harness continuity
Trace the harness from the power source to the motor, looking for loose connectors, broken strands, or pinched insulation. Use a multimeter in continuity mode to confirm each segment conducts electricity.
Tip: Look for heat damage where wires bend around corners. - 5
Measure battery voltage (cordless models)
Place the meter probes on the battery terminals and record the voltage. Compare readings to the manufacturer’s rated voltage. A significantly low voltage indicates a weak or dead pack requiring replacement.
Tip: Charge the battery fully before retesting if voltage is borderline. - 6
Reassemble and perform a test run
Reconnect all components, reseat connectors, and reinstall the battery. Power up in a safe, open area to observe normal operation. Listen for unusual noises or overheating during the test.
Tip: Test in a clear area away from obstacles to monitor performance.
Got Questions?
What are the most common causes of an electric lawn mower failing to start?
The most common causes are a dead or sulfated battery (cordless), a tripped safety switch, a blown fuse, damaged wiring, or a faulty plug/extension cord in corded models.
Common causes are a dead battery, a tripped switch, a blown fuse, or damaged wiring.
Is it safe to repair a battery-powered mower yourself?
Yes, if you follow basic precautions: disconnect power, use insulated tools, and avoid puncturing the battery. For swollen or leaking cells, replace the battery and consult a professional.
Yes, with safety precautions; avoid swollen cells and seek professional help for complex issues.
How do I test the interlock switch?
With the power disconnected, verify continuity across the interlock switch when engaged using a multimeter. If continuity is inconsistent, replace the switch with a compatible part.
Test with a multimeter; replace if inconsistent.
What should I check if the mower stops mid-cut?
Check for overheating, a tripped breaker, or a loose connection in the harness. Inspect the blade area for debris that could cause a stall and ensure the safety interlock isn’t engaged by debris.
Check for overheating, loose connections, and debris-induced stalls.
How can I prolong battery life in cordless mowers?
Charge on a schedule that avoids deep discharge; store at moderate temperatures; avoid leaving the battery in extreme heat or cold and avoid charging when the pack is damaged or swollen.
Charge regularly, don’t deep-discharge, and store at moderate temperatures.
When should I replace the motor rather than repair?
If the motor shows signs of seizing, excessive noise, or persistent overheating after all checks, replacement is often more cost-effective and safer than extensive repairs.
If the motor seizes or overheats persistently, replacement is usually best.
Watch Video
The Essentials
- Disconnect power before service
- Test power supply and safety interlocks
- Replace damaged components promptly
- Maintain battery health for cordless models