Electric Lawn Mower Repairs Near Me: A DIY Guide by Mower Help
Master local electric lawn mower repairs with a practical, safe DIY guide. Diagnose battery, charger, and wiring issues, and know when to call a pro. Clear steps, checklists, and safety tips from Mower Help.

This quick answer shows you how to diagnose and repair electric lawn mowers near you. You’ll learn the most common failure points—battery health, charging circuitry, and power connections—and how to safely test and decide whether a DIY fix is feasible or if a professional repair is warranted. Local, informed diagnostics save time and money.
Why Electric Lawn Mower Repairs Near Me Matter
For homeowners and DIY enthusiasts, local repair options for electric lawn mowers are often more economical and faster than mail-in service. When you search for 'electric lawn mower repairs near me', you want technicians who understand battery health, charging circuits, and motor control—areas where most failures occur. According to Mower Help, quick, accurate diagnostics start with a focus on batteries, wiring, and the charging system. The advantage of nearby shops or mobile repair techs is the ability to show you—with your own device—what failed and how it was addressed, so you can learn for the next time. This guide helps you identify when a repair is feasible, what to expect in the process, and how to prevent future breakdowns. You’ll also learn how to handle simple maintenance tasks yourself, saving downtime and extending the life of your equipment. By choosing local expertise, you support quick turnarounds, easier warranty alignment, and safer repairs in a familiar environment.
Common Symptoms and Diagnoses
Electric lawn mowers exhibit a handful of telltale symptoms when there’s a fault in the battery, charger, wiring, or motor. If the mower won’t start at all, check the battery charge, verify the charger is delivering power, and inspect connectors for corrosion or loose pins. If the motor hums but the blades don’t spin, investigate motor control wiring and safety switches. A charger that won’t move from a blinking or steady LED often points to a failing charger circuit or an incompatible battery pack. Smelling burnt plastic or hearing crackling sounds is a clear warning—turn off power immediately and inspect for damaged insulation or melted components. In many cases, the root cause is a combination of weak battery health and degraded electrical connections. By systematically testing each subsystem, you’ll narrow the fault to one area and decide whether a DIY repair is feasible or professional service is warranted.
Safety Essentials Before You Begin
Safety comes first when handling electric lawn mowers. Always unplug the mower from its charging source and remove the battery before any inspection. Wear insulated gloves and eye protection when you access exposed terminals or battery cells. Work in a dry, well-lit area away from water and curious pets. If your model uses a removable battery, store it in a cool, ventilated place away from heat sources. Never use metal tools to probe live connections, and avoid bending or pulling on wiring harnesses. Finally, consult the user manual for model-specific safety cautions and the recommended sequence for powering down before maintenance. Following these precautions reduces the risk of electric shock and equipment damage.
Understanding Electric Components: Batteries, Chargers, and Motors
Electric lawn mowers rely on three core subsystems: the battery, the charging system, and the motor. Lithium-ion packs are common in modern units and can degrade in capacity over time, reducing runtime and performance. The charger must deliver a consistent voltage and may include overcharge protection that can fail with age. Motors and their control boards manage the start/stop and speed, and faulty windings or weak solder joints can cause intermittent faults. Wiring harnesses and connectors are a frequent source of trouble, especially if exposure to moisture or vibration loosens pins or creates corrosion. When diagnosing, test battery voltage under load, verify charging current, and inspect motor terminals for cleanliness and secure connections. Keeping the charging port dry and free of debris helps extend life.
Tools, Components, and Replacement Parts You Might Need
While some electric mower repairs are straightforward, others require specific parts. Common items include a multimeter for voltage and continuity checks, a screwdriver set (Phillips and flat-head) to open housings, and electrical contact cleaner for connectors. A spare battery pack or replacement cells can be essential if capacity has dropped significantly. An inline fuse or fuse holder compatible with your model may protect circuits during a repair. Keep safety gear (gloves, eye protection) handy. Always use manufacturer-approved parts when possible and verify compatibility with your mower’s model number before purchasing. Document part numbers and warranty terms to simplify future maintenance.
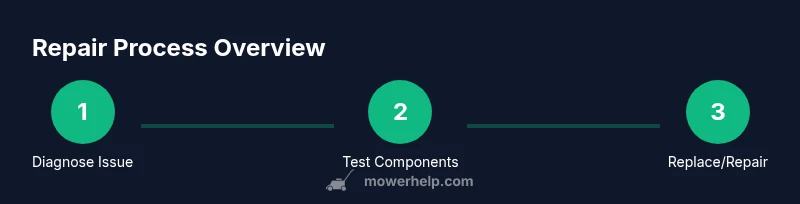
Troubleshooting Flow: A Practical Diagnostic Approach
A methodical approach helps you avoid unnecessary parts replacement. Start by confirming the power source: is the battery charged, and is the charger functioning? Next, test the battery and charger with a multimeter to verify voltage and current delivery. Inspect connectors for corrosion or loose pins, then check the motor's continuity and safety switches. If the system passes basic electrical tests but still won’t operate, the issue may reside in the control circuit or relay, which often requires professional diagnostics. Finally, reassemble only after verifying all tests, then perform a slow, supervised test run outdoors. A written checklist can help you track each test and prevent missing steps.
Maintenance to Extend Life and Prevent Breakdowns
Routine maintenance is cheaper and easier than emergency repairs. After every use, wipe down the deck and remove grass clippings to improve cooling. Store the mower in a dry place and avoid exposing it to moisture or temperature extremes that could affect battery life. Periodically calibrate or check the safety switches, inspect wiring harnesses for wear, and clean or replace air filters if your model has them. Battery care is critical: avoid deep discharges, store at partial charge in off-season, and monitor swelling or heat during charging. Lastly, keep spare parts on hand for critical wear items (contacts, fuses, connectors) and replace them before they fail to minimize downtime.
Finding Help Near You: Choosing the Right Repair Shop
Locating a reliable repair shop near you starts with research and accountability. Look for technicians who specialize in electric mowers and understand your model’s battery chemistry and safety requirements. Check license and warranty policies, request written estimates, and ask about diagnostic fees and turnaround times. Compare options by reading independent reviews and contacting shops to confirm they can handle battery or controller repairs. If your mower is still under warranty, verify whether service by a local shop affects coverage. Bring your mower’s model number, serial, and a concise list of observed symptoms to aid the technician’s assessment.
Authority Sources and Practical Advice
To ensure safety and accuracy, consult authoritative sources before attempting repairs. OSHA provides general electrical safety guidelines for home environments, while the CDC/NIOSH pages discuss electrical safety principles relevant to DIY projects. For more model-agnostic safety tips and best practices, refer to major publications and standard guidelines from recognized bodies.
Frequently Asked Considerations for Local Repairs
- If in doubt, consult a certified technician rather than attempting risky repairs, especially when a battery or controller is involved.
- Consider the total cost of repair versus replacement, factoring in parts, labor, and downtime.
- Preserve warranty protections by following manufacturer guidelines and obtaining written quotes.
Tools & Materials
- Multimeter (voltage and continuity tester)(Essential for diagnosing battery and motor health)
- Screwdriver set (Phillips and flat-head)(For battery compartments and housing panels)
- Electrical contact cleaner(Clean corrosion from connectors)
- Electrical tape(Insulate repaired connections)
- Replacement battery pack or cells(Only if tests show degraded capacity)
- Spare fuses or inline fuse holder(Model-specific; check manual)
- Safety gloves and eye protection(Personal protective equipment)
- Soft brush or cloth(Remove debris from deck and vents)
Steps
Estimated time: 60-90 minutes
- 1
Disconnect power and access battery
Unplug the charger, remove the battery, and ensure the mower is in a safe, dry area before touching any internal parts. This prevents accidental shock and short circuits.
Tip: Always confirm there is no residual charge before opening the casing. - 2
Inspect exterior and connectors
Visually inspect the power cord, battery terminals, and connector pins for wear, corrosion, or loose fittings. A damaged connector is a common cause of intermittent operation.
Tip: Look for bent pins or melted insulation and replace damaged parts. - 3
Test battery health with a multimeter
Measure battery voltage and compare it to the spec in your manual. If voltage is significantly below nominal, the battery may need replacement or internal cell balancing.
Tip: Test under load if possible to simulate real operating conditions. - 4
Check charger function and leads
Plug the charger back in and verify the output matches the charger’s rated voltage. Inspect the charging indicator LEDs for expected patterns.
Tip: If the charger won’t power up, test with a known-good charger if available. - 5
Assess motor and controller continuity
With power disconnected, test motor terminals for continuity and verify the controller is sending signals when the switch is actuated. Look for arcing or damaged insulation along the wires.
Tip: Damaged insulation or burnt smells indicate a higher-risk repair. - 6
Reassemble and perform a controlled test
Reinstall the battery and reconnect the charger. Run a slow, controlled test in a clear area to confirm proper function and wind-down safety features.
Tip: If anything feels off during test, stop and re-check connections.
Got Questions?
Can most electric lawn mowers be repaired locally?
Yes, many common issues such as battery health, charging circuitry, and simple wiring faults can be diagnosed and repaired by a qualified technician near you. Complex controller faults may require specialized equipment. Always verify the shop’s experience with your mower model.
Yes, most electric mowers can be repaired locally for battery, charger, and wiring issues. Complex controller faults may need specialized service.
What should I look for when choosing a repair shop near me?
Look for a shop with experience in electric mowers, clear warranty terms, and transparent pricing. Request written estimates and ask about parts availability for your model. Check reviews and verify they honor manufacturer safety standards.
Choose a shop with electric mower experience, clear warranties, and transparent pricing; read reviews and verify parts availability.
Is it more cost-effective to repair or replace an electric mower?
It depends on the fault and the mower’s age. Minor battery health issues or faulty wiring are often cost-effective repairs, while major controller failures or frequent battery replacements may justify replacement.
Cost depends on the fault; small fixes are usually cheaper, while major parts or many replacements may favor replacement.
Are there safety concerns I should know before DIY repairs?
Yes. Always unplug the charger and remove the battery before opening the housing. Use insulated tools and wear protective gear. Avoid working on hot components and in damp environments.
Yes. Unplug power, remove the battery, use insulated tools, and avoid wet or hot conditions.
What external signs indicate a failing battery?
Short runtime, rapid voltage drop under load, swelling, or excessive heat during charging all indicate degraded battery health and possible replacement needs.
Short runtime, voltage drop under load, swelling, or overheating suggests a failing battery.
Watch Video
The Essentials
- Diagnose before replacing parts to avoid unnecessary costs.
- Prioritize battery and charging issues as common failure points.
- Follow safety protocols to prevent electric shock and fire hazards.
- Document observations and maintain a repair log for future reference.
- Know when to seek professional help, especially with battery and controller faults.