Lawn Mower After Rain: Safe Drying and Maintenance
Learn how to safely handle your lawn mower after rain, from drying and inspection to fuel checks and storage tips. A complete, step-by-step guide for homeowners.

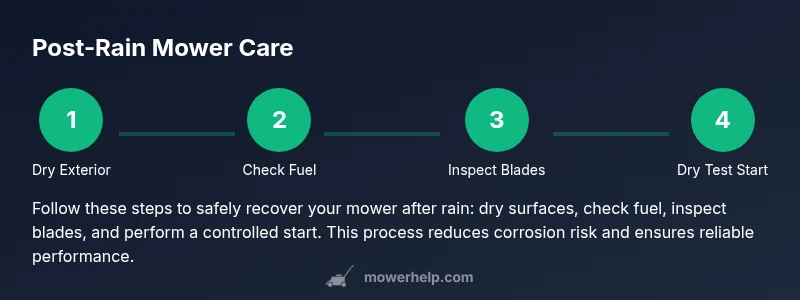
You will learn how to safely inspect, dry, and restart a lawn mower after rain. This guide covers identifying moisture risks, drying methods, blade care, fuel and electrical checks, and storage tips to prevent rust and corrosion. You'll know exactly what to do before the next mowing session and how to avoid common mistakes.
After Rain Realities: Moisture Risks to Your Lawn Mower
According to Mower Help, moisture exposure after a rain event is one of the top hidden culprits behind sudden starts, sluggish performance, and creeping rust on mower components. Wet conditions can wick water into the deck, engine housing, fuel lines, and electrical connections. Even a brief drizzle can leave damp surfaces that invite corrosion, mold, and debris buildup. Homeowners often mistakenly assume a quick wipe-down is enough, but water can hide in hidden crevices, under belt guards, and inside air intakes. By understanding where moisture tends to hide, you can plan a thorough dry-down routine, reduce the risk of damage, and extend the mower’s life. Expect a longer, safer mowing season when you treat post-rain care as a standard maintenance step.
In this article, we’ll lay out a practical, field-tested approach with clear steps, safety considerations, and cost-effective tips that help you stay productive without rushing back to work with a wet machine.
Immediate Safety Steps Before Handling a Wet Mower
Before you touch a damp mower, power it off and remove the key or disconnect the battery if available. If you have a gas mower, disconnect the spark plug boot and ground the spark plug to prevent accidental starting. Wear non-slip, rubber-soled shoes and avoid wet grass or puddles. Working in a dry, well-ventilated area is essential—mowers produce heat and can emit fumes, so proper airflow reduces the risk of heat buildup and fumes in confined spaces. Keep kids and pets away while you inspect and dry the machine. A simple safety pause now prevents costly mistakes later and aligns with standard mower safety practices recommended by the Mower Help team.
Key takeaway: moisture plus electricity equals risk, so isolate power and moisture first.
Drying Techniques: Removing Moisture Safely
Effective drying begins with removing standing water from the exterior and using airflow to reach hidden moisture. Begin with a dry towel to wipe the deck, blade housing, and cooling fins. Use a blower or a leaf blower set to low, blowing air into critical areas like the underdeck, muffler, and air intake to dislodge trapped moisture. If a compressor is available, a short blast of clean, dry air accelerates drying. For stubborn moisture in crevices, use a paintbrush or soft brush to loosen moisture-laden dust and debris before wiping away. If conditions permit, place the mower in a sunny, breezy spot for 1–2 hours, turning the blade to expose both sides.
Pro tip: avoid direct heat sources like space heaters or propane heaters; excessive heat can warp belts or degrade plastics.
Fuel and Carburetor: Protecting the Fuel System from Water Contamination
Rain can introduce moisture into fuel if the tank isn’t sealed, or if water-laden condensate enters through a vented cap. Start by checking the fuel for signs of water separation or a sour smell. If you suspect water in the fuel, drain the tank and run fresh gasoline through the system after cleaning the carburetor bowls. Replace old fuel with a fresh supply, and consider using a fuel stabilizer to reduce moisture-related issues in the future. Ethanol-blended fuels can absorb moisture more readily, so run the engine long enough to evaporate any residual water after refueling. Keep the fuel cap gasket clean and dry, and store gasoline in approved containers away from heat sources.
Caution: never spray water directly into fuel lines or carburetors; moisture in those parts can cause hydro-locks or varnish buildup when it dries.
Deck, Blades, and Belts: Inspecting for Rust, Damage, and Debris
The post-rain period is an ideal time to inspect the critical underdeck area where moisture tends to accumulate. Remove the blade or blade cover to inspect for nicks, dull edges, cracks, and rust spots. If you find rust on the blade, do not attempt to sharpen it immediately—remove and replace if pitting or deep corrosion is present. Check the belts for cracks or glazing; a wet belt can stretch unevenly or slip when it dries. Clear any grass clippings, mud, and sap from the belt path and pulleys to prevent future wear. Wipe the underside with a dry cloth and apply a light coat of lubricant to moving parts as recommended by the owner’s manual. This preventative maintenance helps avoid imbalance, vibration, and reduced cutting performance after a rain event.
Note: always disconnect power and allow the blade to cool before handling.
Electrical System and Batteries (For Electric Mowers)
Electric mowers require special attention to moisture-sensitive components. Inspect the battery terminals for corrosion or white, powdery residue; if present, clean with a dry cloth and, if needed, a small amount of petroleum jelly on terminals after drying. Check the electrical connectors for moisture or condensation; unplug and reseat connectors to ensure a tight fit. Wipe control panels and switches with a dry microfiber cloth; avoid spray cleaners that can seep into switches. If your model includes a battery cooling system or vents, ensure they are clear of debris and not blocked by damp leaves. After removing visible moisture, give the mowers’ electrical system time to air-dry before attempting a test start.
Safety note: never operate an electric mower with a wet power cord or exposed terminals; water plus electricity creates a shock hazard.
Dry Start: Testing the Mower After Drying
With the mower completely dry, reattach the spark plug boot or reconnect the battery and perform a controlled start in a clear area. Listen for abnormal sounds, sputtering, or smoke; if anything unusual occurs, shut down and re-check the fuel and electrical connections. Start the engine at idle and allow it to warm up for 3–5 minutes without engaging the blades. If the mower remains stubborn, perform a quick diagnostic cycle, like engaging the choke (for carbureted engines) or the start/stop button (for electric models) to ensure systems engage smoothly. A deliberate, patient test run avoids creating hazardous startup conditions that could burn components.
Pro tip: a short, low-Revs test helps validate performance before a full mowing session.
Storage and Long-Term Care After Wet Weather
After you’ve dried and tested the mower, store it in a dry, well-ventilated space away from direct sunlight and damp walls. Keep a desiccant near the engine or battery compartment to reduce humidity, and consider covering the mower with a breathable tarp to minimize dust buildup while still allowing moisture to escape. Check the oil and filter after storage, and rotate the blade every few weeks to prevent seizing from rust. Finally, keep the fuel system empty or nearly empty if you expect extended downtime, topping off with fresh fuel just before the next mowing session. Routine post-rain storage care protects components and preserves value over time.
Authoritative sources: For safety and maintenance guidelines, see official safety resources from OSHA, University Extension programs, and state agricultural agencies.
Authoritative sources and Quick Troubleshooting
Authoritative sources:
- OSHA: https://www.osha.gov
- University Extension: https://extension.illinois.edu
- University Extension: https://extension.umn.edu
Troubleshooting quick tips:
- If the mower won’t start after rain, re-check for water in the fuel or moisture on the spark plug and air intake.
- Persistent rust or corrosion on metal parts indicates a need for replacement or treatment using approved products.
- Regular inspections after rain prevent minor issues from becoming costly repairs.
Key Takeaways and Practical Recommendations
- Immediate safety steps, thorough drying, and careful inspection protect both you and your mower after rain.
- Drying techniques and fuel management reduce corrosion risk and starting problems.
- Regular checks of blades, belts, and electrical components help maintain cutting performance and extend the mower’s service life.
By following these steps, you’ll improve reliability, minimize rust, and keep your lawn mower ready for the next mowing session.
Tools & Materials
- Drying towels or lint-free rags(Variety of sizes; microfibre preferred)
- Leaf blower or shop blower(Low to medium blast; avoid high heat)
- Soft brush or old toothbrush(Loosen debris in crevices)
- Screwdriver/torque wrench set(To remove blade or covers safely)
- Socket wrench set(For blade removal and belt checks)
- Fuel container and fresh gasoline(If fuel needs replacement; use approved can)
- Oil and oil filter (if applicable)(Check level after drying; replace if dark)
- WD-40 or light lubricant(Light lubrication on moving parts)
Steps
Estimated time: 45-60 minutes
- 1
Power down and isolate
Turn off the mower and remove the key or battery. If it’s gas, disconnect the spark plug boot and ground the spark plug to prevent accidental starting.
Tip: Always start with safety isolation of power before any inspection. - 2
Move to a dry work area
Shuttle the mower to a dry, well-ventilated space away from children and pets. Allow components to cool if recently used to avoid burns.
Tip: Ventilation reduces fumes and heat buildup. - 3
Inspect exterior and accessible areas
Wipe down the exterior, inspect the deck, muffler, and handles for moisture, corrosion, or debris. Remove loose mud with a brush.
Tip: Pay attention to underdeck and cooling fins where water hides. - 4
Dry internal components
Use a blower and towels to dry hard-to-reach areas; ensure air intake and vents are clear.
Tip: Do not use high-heat sources that could warp parts. - 5
Check the fuel system
If fuel looks contaminated, drain and replace with fresh gasoline. Clean carburetor float bowls if you notice varnish.
Tip: Avoid running ethanol blends if you suspect moisture. - 6
Inspect and service blades
Remove the blade to inspect for dullness or damage. Sharpen or replace as needed, and check for cracks.
Tip: Balance the blade after sharpening to prevent vibration. - 7
Assess belts and pulleys
Examine belts for cracks or glazing; replace worn belts. Clean pulleys of debris to prevent slippage.
Tip: A clean belt path improves efficiency and longevity. - 8
Electrical check (if applicable)
Inspect battery terminals and connectors for corrosion. Dry all exposed electronics before reassembly.
Tip: Use dielectric grease on terminals after cleaning. - 9
Dry start test
Reinstall safety devices, reconnect power, and start at idle in a clear area. Listen for unusual sounds or odor.
Tip: If there is any smoke or sparking, stop and recheck connections. - 10
Storage and future care
Store in a dry area; rotate blades to prevent sticking. Note fuel level if storing long-term.
Tip: Use a breathable cover to prevent moisture buildup.
Got Questions?
Is it safe to mow with a lawn mower right after rain?
Mowing immediately after rain is not recommended. Wet grass can clog the deck and reduce traction, while moisture can cause slipping or electrical issues in some models. Wait until the lawn is dry and the mower is fully dry before mowing.
It's safer to wait for dry grass and a completely dry mower before mowing.
What should I do if water got into the fuel tank?
Water in the fuel can cause engine problems or failure to start. Drain contaminated fuel, clean the carburetor bowls, and refill with fresh gasoline. Consider using a fuel stabilizer to minimize future moisture-related issues.
Drain contaminated fuel, clean the carb, and refill with fresh gas.
How long should I wait after rain before starting the mower?
Wait until all visible moisture is dry, ad dry to the touch, and the mower’s critical components are warm and dry. A safe rule is to wait at least 15–30 minutes after heavy rain, longer for humid climates, then perform a controlled start.
Wait until everything is dry, then perform a controlled start.
Can rain cause rust on mower blades and deck?
Rain can accelerate rust on exposed metal surfaces if moisture sits on the metal for extended periods. Dry promptly, lubricate moving parts, and store in a dry area to minimize corrosion.
Yes, moisture can cause rust if not dried and stored properly.
Should I remove the battery before storing after rain?
If your mower is electric, remove the battery and dry terminals thoroughly before storage. Store the battery in a cool, dry place and check terminals for corrosion before use.
Yes, remove and dry the battery before storage.
What maintenance helps prevent future rain damage?
Regular cleaning, drying, blade care, and fuel management, plus storing in a dry place, substantially reduces rain-related wear. Keep a simple post-rain checklist as part of your routine.
Keep up with cleaning, drying, and proper storage.
Watch Video
The Essentials
- Avoid starting a wet mower; prioritize thorough drying.
- Check fuel, ignition, and air intake for moisture before startup.
- Inspect blades, belts, and electrical components after rain.
- Store in a dry, ventilated space to prevent rust and corrosion.
- Use fresh fuel and stabilizers to protect the system from moisture damage.