Reel Lawn Mower Push: A Complete How-To for Maintenance and Use
A practical guide to reel lawn mower push maintenance, blade care, height settings, and safe operation for homeowners seeking quiet, eco-friendly lawn care.

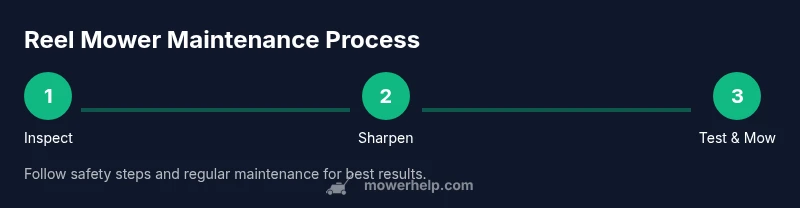
With a reel lawn mower push, you will learn to inspect, adjust, sharpen, and safely operate a manual reel mower for precise, chemical-free cuts. This quick answer outlines where to start: check blade alignment, set the cutting height, sharpen or replace blades, and test on a small patch before mowing your whole lawn.
What is a Reel Lawn Mower Push?
A reel lawn mower push is a hand-powered tool that uses a rotating cylinder of blades (the reel) that shear grass against a stationary bed knife. When you push, the blades rotate and cut with a precise, clean edge. Unlike gas-powered mowers, a reel mower emits no fumes, runs quietly, and promotes a healthier lawn by encouraging a light, consistent cut. For homeowners and DIY enthusiasts, reel lawn mower push models offer a satisfying mix of control, sustainability, and low maintenance. According to Mower Help, reel lawn mower push systems are simple, quiet, and budget-friendly for small to medium yards. When choosing one, look for a sturdy frame, solid bearings, and a bed knife that sits flush with the reel. A well-tuned mower delivers even, realistic cuts and soil-friendly performance, provided you keep blades sharp and height set correctly.
Assessing Your Lawn Before Mowing
Before you choose cutting height or start the push test, take a quick look at your lawn's conditions. Mower performance improves on flat, even ground with short, evenly distributed grass. Based on Mower Help research, reel mowers excel on well-maintained lawns but require extra attention on tall or uneven terrain. Scan for rocks, roots, or debris that could damage blades, and note the lawn size to determine whether a reel mower's width suits your yard. If you have soft, damp soil after rain, wait until it dries to avoid leaving ruts. Finally, decide on a cutting height appropriate for your grass species and season.
Safety First: PPE and Mower Prep
Safety comes first when handling metal blades. Always wear sturdy gloves, safety glasses, and closed-toe shoes. Inspect the mower's handles, wheel bearings, and blade mounting before each use to avoid unexpected failures on the way. If parts feel loose or damaged, do not mow until you fix or replace them. Keep children and pets away during setup and operation. A quick safety checklist at the start of each session reduces the risk of injuries and blade contact.
Cleaning and Prepping the Deck and Blades
Remove grass clippings and dirt from the deck, reel, and bed knife with a stiff brush or rag. Cleaning prevents buildup that can hinder cutting quality. Wipe the blade edges to remove moisture, then inspect for nicks or burrs. If you find nicks, you can file them carefully; burrs can cause uneven cuts and speed up dulling. Dry all parts thoroughly before sharpening or reassembly to reduce corrosion.
Blade Sharpening and Bed Knife Alignment
Sharpening a reel mower blade requires care: work on a stable surface, wear gloves, and use a suitable sharpening tool. For most home users, a dedicated blade sharpening file or fine stone yields the best convex edge. After sharpening, check the gap between the blade reel and bed knife; too much space causes poor cuts, while touching can risk damage. Reassemble and test gentle cuts on scrap material to verify alignment.
Cutting Height and Mowing Technique
Set the cutting height to the recommended setting for your grass type and season. For most cool-season grasses, a height of about 1.5 to 2 inches is ideal, while warm-season grasses often prefer 1.75 to 3 inches. Use smooth, steady pushes, overlapping passes to avoid missed strips, and avoid forcing the mower through thick growth. Keep the blades rotating by pushing and avoiding backward pulls, and guide the mower with your hips rather than your wrists to maintain balance.
Troubleshooting Common Reel Mower Issues
If you notice uneven cuts, check blade sharpness, reel-bed knife gap, and wheel alignment. Debris under the deck or worn bearings can slow the reel or cause snags. If the mower pulls to one side, verify wheel height and axle wear. For sputtering or poor cutting, inspect the top edge of the bed knife and ensure the reel is properly secured. Regular maintenance prevents most problems.
Maintenance Schedule and Long-Term Care
Create a simple maintenance calendar: blade sharpening every season or after a defined number of mowing hours, deck cleaning after every use, and lubrication of pivot points monthly or as needed. Store the mower in a dry place, dry the blades after use, and keep cutting edges sharp. Periodically check mounting bolts and bearings and replace worn parts early to avoid bigger repairs. A consistent routine keeps a reel mower push performing at peak for years.
Storing Clippings and End-of-Season Tips
With reel mowers, clippings are often left on the lawn and act as natural mulch in small amounts, but remove heavy buildup if you see matting. After mowing season ends, clean and dry the mower, lubricate moving joints lightly, and store away from moisture. Re-tune the blade and bed knife before next use, and consider a light rust-preventive coating on metal parts. This care extends the life of your reel mower push and ensures readiness for spring.
Tools & Materials
- Gloves (work-grade)(Leather or thick fabric; protect hands from sharp edges)
- Safety glasses(Goggles with side shields)
- Flat-head and Phillips screwdrivers(For blade mounting and quick adjustments)
- Wrench set (adjustable)(Tighten nuts and bolts)
- Blade sharpening file or sharpening stone(Use a fine / convex edge file)
- Stiff cleaning brush(Remove debris from deck and blades)
- Lubricant or light oil(Apply sparingly to pivot points)
- Replacement blades or bed knife (optional)(For worn parts)
- Scrap material for test cuts (cardboard)(Test cuts to verify sharpness)
Steps
Estimated time: 1.5-2 hours
- 1
Inspect for damage and secure parts
Place the mower on a stable surface. Check wheels, blade mounting, and handles for wobble or looseness. Tighten any loose bolts and replace damaged components before mowing to prevent sudden failures.
Tip: Use a flashlight to inspect hidden screws and the blade edge. - 2
Clean the deck and blades
Remove grass clippings and dirt from the deck, reel, and bed knife. Cleaning prevents buildup that can degrade cut quality and cause jams. Dry thoroughly before sharpening or reassembling.
Tip: A quick brush with a stiff bristle brush makes reassembly easier. - 3
Prepare sharpening tools and PPE
Put on gloves and safety glasses. Set up a stable work area and lay out your sharpening tool so you can work smoothly without the mower slipping.
Tip: Secure the mower with a clamp or helper to keep it steady. - 4
Sharpen blades or replace as needed
Using a sharpening file or fine stone, create a smooth convex edge on the blade. Check the gap between reel and bed knife after sharpening and adjust if necessary.
Tip: Work slowly and test on scrap material before mowing the lawn. - 5
Check bed knife clearance and height
Ensure a consistent, small gap between the reel and bed knife. Set the cutting height according to grass type and season to avoid excessive resistance.
Tip: If unsure, start at a higher setting and gradually lower after a test pass. - 6
Lubricate pivot points
Apply a light coat of oil to pivot joints and moving parts. Wipe away excess oil to prevent dirt attraction and staining on the lawn.
Tip: Avoid over-lubricating, which can attract grass clippings. - 7
Test cut on scrap material
Make a few light passes on cardboard or scrap turf to confirm sharpness and height settings. Re-adjust if the cut is uneven or pulling.
Tip: A successful test cut saves time on the actual lawn. - 8
Calibrate with a small patch of lawn
Mow a small area to verify evenness, adjusting height and technique as needed. Maintain a steady pace and allow the blade to shear rather than chop.
Tip: Keep a relaxed grip and use your hips to guide movement. - 9
Post-mow cleanup and storage
Clean the mower again, dry fully, and store in a dry place. Note any wear for future maintenance and plan the next sharpening cycle.
Tip: Keeping it dry prevents rust and extends blade life.
Got Questions?
What is a reel lawn mower push?
A reel lawn mower push is a hand-powered mower with a rotating blade reel that cuts grass by shearing against a stationary bed knife. It is quiet, emission-free, and ideal for small to medium lawns.
It's a manual mower with a rotating blade reel that cuts grass without electricity or fuel.
Can I use a reel mower on uneven ground?
Reel mowers perform best on flat, even lawns. On uneven or rocky terrain, you may experience uneven cuts or blade strikes; consider leveling the area or using a different mower.
Best on flat ground; avoid rough areas if possible.
How often should blades be sharpened?
Check blade sharpness after several uses and sharpen or replace when cutting becomes ragged or requires extra effort. A seasonal check is common for many homeowners.
Check and sharpen when cuts become ragged or harder to push.
Are reel mowers effective on tall grass?
Reel mowers are less effective on tall grass; mow in stages, trimming down the height gradually to avoid overloading the blades.
They work best on shorter grass; for tall grass, cut in stages.
Do I need oil for a reel mower?
Most reel mowers are manual and require minimal oil. Lubricate pivot points and moving parts periodically, but avoid heavy oil that attracts debris.
Usually not, but you should lubricate the moving parts.
What cutting height should I start with?
Start around 1.5 to 2 inches for many cool-season grasses and adjust based on grass type and regrowth patterns.
Start roughly 1.5 to 2 inches and tweak as needed.
Watch Video
The Essentials
- Sharpen blades regularly for clean cuts.
- Set the correct cutting height for your grass.
- Test on scrap material before full mowing.
- Mow on dry, flat ground for best results.
- Store the mower in a dry place after use.