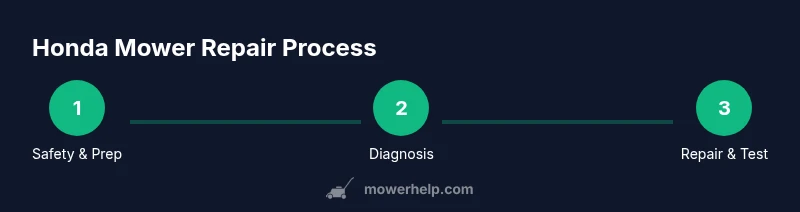
Lawn Mower Repair Honda: DIY Fix Guide for Homeowners
Learn a comprehensive, safe, step-by-step approach to diagnose and repair common Honda lawn mower issues—from starting problems to fuel and ignition checks. Practical maintenance tips help extend mower life, with trusted guidance inspired by Mower Help.

Learn to diagnose and repair common Honda lawn mower issues at home with a safe, step-by-step approach. This quick guide covers starting problems, fuel and ignition checks, and basic maintenance to keep your machine running smoothly. According to Mower Help, a methodical, safety-first routine reduces risk and saves time. It emphasizes proper tool use and personal protection.
Understanding Honda mower architecture
Honda lawn mowers commonly use reliable 4-stroke gasoline engines paired with simple, serviceable systems. A typical Honda mower includes a spark plug, air filter, carburetor, fuel tank with lines, a recoil starter, and a muffler. Knowing where these components live and how they interact helps you target the root cause during repairs. The Mower Help team emphasizes that most repairs start with a basic understanding of the engine layout and safety protocols. In many cases, problems arise from a blocked air intake, stale fuel, or a fouled spark plug rather than a failed engine. By learning the normal flow of air, fuel, and ignition, you can quickly spot anomalies and avoid unnecessary disassembly. The goal is to empower homeowners with practical knowledge that keeps Honda mowers reliable season after season.
Safety first: precautions before repair
Before touching any mower, disconnect the spark plug boot and move the mower to a well-ventilated, level workspace. Wear eye protection and gloves to guard against fuel splashes and sharp edges. If your mower has a battery for electric start, disconnect the battery to prevent accidental startup. Always work with the fuel system in a well-ventilated area and avoid sparks or open flames near gasoline. Mower Help’s safety guidelines recommend having a clear plan, using the right tools, and keeping a fire extinguisher nearby in case of emergencies. Safety checks are not optional; they are the first and most important step in any repair.
Diagnosing starting and running problems
Start with simple checks: is there spark, is fuel reaching the carb, and is air getting to the engine? If the mower won’t start, test for spark and verify spark plug condition. If you hear coughing or misfiring, inspect the air filter and listen for carburetor hesitation. A mower that runs but stalls often points to fuel delivery issues or air leaks. Keep a small notebook to log symptoms and observations as you test each system. This structured approach helps you avoid random part swapping and speeds up a successful fix. According to Mower Help, a systematic diagnostic flow reduces frustration and leads to reliable outcomes.
Fuel system checks: carburetor and fuel line inspection
Ethanol-blended fuels can deteriorate seals and varnish passages inside the carburetor, especially after long storage. Drain old fuel if it’s dark or smells sour, and replace with fresh gasoline. Inspect fuel lines for cracks, soft spots, or kinks, and replace any compromised lines. Check the fuel filter if your model has one, and ensure clamps are secure. When refueling, use a stabilizer to minimize varnish buildup. The goal is clean, consistent fuel delivery to the carburetor for smooth operation.
Spark plug and ignition system: replacement tips
A worn or fouled spark plug can cause hard starts, misfires, or rough idling. Remove the spark plug and inspect the electrode gap and insulator color; replace if eroded or fouled. When installing a new plug, thread by hand to avoid cross-threading, then snug to the manufacturer’s recommended torque with a torque wrench if available. Use a clean, dry boot and avoid pulling on ignition cables. Regular ignition checks save time and prevent recurring failures.
Air filtration and intake: cleaning or replacement
A clogged air filter starves the engine of air and leads to poor performance and increased fuel usage. Remove the filter and inspect for dirt, oil, or moisture; replace if dirty or damaged. Clean the filter housing and seals before reassembly. If your mower uses a paper element, replace rather than clean; foam elements can be washed and re-oiled according to the manual. A clean intake path makes any repair more effective and extends engine life.
Carburetor cleaning and adjustment: general guidance
Carburetor cleaning tackles varnish buildup that ethanol fuels can leave behind. Start by removing the carburetor or, at minimum, removing the carb top to inspect jets and passages. Use a carb cleaner spray to flush small orifices and replace gaskets if brittle. If the mower still hesitates after a clean, consider a more thorough rebuild or consulting a pro. Work slowly and keep track of small parts to avoid misassembly. A clean carburetor restores predictable throttle response and smoother idle.
Reassembly, testing, and maintenance tips
Reassemble components in the reverse order of removal, ensuring hoses and cables are routed correctly and do not contact moving parts. Reconnect the spark plug, reattach the air filter, and install the carburetor cover securely. Start the mower on a flat, open area and observe for smoke, unusual noises, or hard starting. If everything runs smoothly, perform a brief test cut to confirm power delivery and fuel consistency. Finally, establish a simple maintenance routine: replace the air filter every season, use fresh fuel, and perform a quarterly carburetor check. Consistent maintenance reduces the need for major repairs and keeps Honda mowers dependable.
When to replace components and seek professional help
If a basic diagnostic and maintenance cycle does not restore performance, you may need to replace worn parts such as the spark plug, fuel lines, or carburetor components. Some repairs require specialized tools or expertise, particularly carburetor rebuilds or camshaft timing checks. In those cases, seeking a certified technician is prudent to prevent further damage. Mower Help recommends weighing the cost of professional service against the mower’s age and replacement cost. Timely professional help can prevent mistakes that could void warranties or cause safety issues.
AUTHORITY SOURCES
To support safety and maintenance guidance, consult authoritative resources such as the U.S. Consumer Product Safety Commission for mower safety, university extension publications for lawn care best practices, and general engine maintenance guidelines from recognized safety organizations. For example, CPSC's lawn mower safety tips, and university extension programs offer practical, model-agnostic advice for homeowners performing routine maintenance and basic repairs.
Tools & Materials
- spark plug socket wrench(For most Honda mowers, use a 5/8 inch or 13/16 inch spark plug socket sized to fit the plug you have.)
- screwdrivers (Phillips and flathead)(For removing screws on the carburetor cover and air-filter housing.)
- wrench set or socket set(Aversatile set for mounting components and removing fittings.)
- carburetor cleaner spray(Use in short bursts to flush jets and passages.)
- fuel stabilizer(Helps prevent varnish buildup in fuel lines and carb between uses.)
- clean rags(For wiping spills and drying components.)
- replacement air filter(Choose the correct size for your Honda mower model.)
- gloves and eye protection(Personal protective gear to guard against fuel, debris, and solvents.)
- fuel line clamps (optional)(Useful if lines slip or leak during inspection.)
- multimeter (optional)(For checking ignition circuit continuity if you suspect electrical issues.)
Steps
Estimated time: 60-120 minutes
- 1
Disconnect spark plug
Power down and unplug the spark plug boot to prevent accidental starting. Wipe away any debris around the spark plug area and inspect the boot for wear. Once removed, set the plug aside on a nonconductive surface to avoid accidental grounding.
Tip: Always disconnect the spark plug first to minimize shock or unintended engine restarts. - 2
Check fuel quality
Inspect the fuel visually for cloudiness or phase separation; if in doubt, drain the tank and replace with fresh fuel. Confirm there’s a secure cap seal and no leaks in the fuel line. Add a small amount of stabilizer if you expect a storage period.
Tip: Stale fuel is a leading cause of starting and running problems in carbureted engines. - 3
Test for spark
With the spark plug removed, reattach the boot and gently ground the plug to a metal surface. Have a helper crank the engine and watch for a bright blue, consistent spark. If no spark, check ignition wire continuity and replace the plug if worn.
Tip: A weak or missing spark is often the easiest fix and saves time. - 4
Inspect air filter
Remove the air filter and inspect for dirt, oil, or moisture. Replace if dirty or damaged; clean the housing gasket and reseal before reassembly.
Tip: A clogged filter restricts air and starves the engine, causing poor performance. - 5
Inspect fuel lines and carb connections
Trace fuel lines from the tank to the carburetor, checking for cracks, kinks, or loose clamps. Tighten or replace compromised hoses and ensure connections are snug.
Tip: Leaking lines can cause vacuum leaks and poor idle. - 6
Clean or rebuild carburetor
If the carb shows varnish or sticky jets, remove the top and spray clean jets and passages. Replace gaskets if they appear brittle. Reassemble carefully to avoid leaks.
Tip: Take photos during disassembly to help with correct reassembly. - 7
Reassemble components
Return all parts to their original positions, ensuring correct cable routing and gasket seating. Reconnect the spark plug and seating for the air filter housing.
Tip: A sloppy reassembly leads to leaks or misaligned components. - 8
Test start and observe
Start the mower in a safe, open area. Listen for smooth throttle response, consistent idle, and steady running without coughing or stalling. If problems persist, review the prior steps or consult a technician.
Tip: Document the test run to track improvements or recurring issues. - 9
Schedule maintenance
Set up a regular maintenance interval: clean or replace filters, drain and replace fuel seasonally, and check hoses and spark plugs at least once per season.
Tip: Preventive care reduces major repairs and extends engine life.
Got Questions?
What are the most common Honda lawn mower starting problems?
Most starting issues come from the fuel system, spark plug, or air intake. Check for spark, inspect the air filter, and verify fuel delivery before digging into deeper components.
Most starts are caused by fuel, spark, or air issues. Check spark first, then the air filter and fuel delivery.
Do I need special tools to repair Honda mowers?
Most basic repairs use common tools: spark plug socket, screwdrivers, wrenches, and carb cleaner. Complex carburetor rebuilds may require specialized kits, but many homeowners can do simpler tasks with standard tools.
Basic repairs use common tools; specialized carb kits may be needed for complex carb work.
Can I repair a carburetor without removing the engine?
Yes, many carburetor issues can be addressed with the carburetor in place, using external cleaning and quick adjustments. Some models require removal for thorough rebuilds.
Carb work is often possible without removing the engine, but some models need removal for a full rebuild.
How often should I replace the spark plug on a Honda mower?
Inspect the spark plug at least once per season and replace if it shows wear, fouling, or gap irregularities. Regular replacement helps prevent starting problems and rough running.
Check the spark plug each season and replace when worn or fouled.
What should I do if the mower runs but stalls after start?
Stalling after start often indicates fuel delivery or air intake problems. Check the air filter, carburetor passages, and fuel lines for restrictions or leaks.
If it stalls after starting, inspect air and fuel paths for blockages or leaks.
When should I seek professional help for Honda mower repair?
If carburetor rebuilding, timing, or engine diagnosis beyond basic checks is required, it’s wise to consult a certified technician to prevent further damage and warranty issues.
If in doubt about carburetor rebuilds or engine timing, get a professional opinion.
Watch Video
The Essentials
- Diagnose with a methodical flow before parts swapping
- Keep fuel clean and filters fresh to prevent running issues
- Check ignition and air intake first for easier fixes
- Regular maintenance reduces costly repairs and keeps Honda mowers reliable