Lawn Mower Gas Cap: Replacement & Maintenance Guide
Learn how to identify, replace, and maintain your lawn mower gas cap. This guide covers fit types, venting, signs of failure, and best practices to prevent leaks and fuel evaporation for safer, longer-lasting performance.

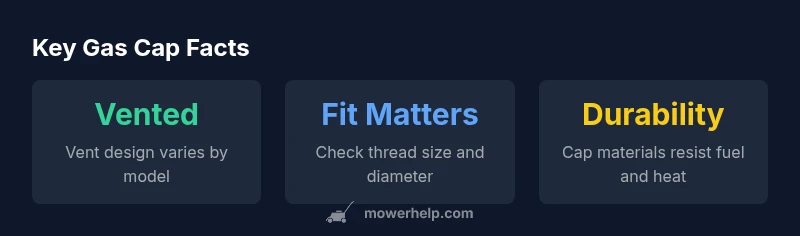
According to Mower Help, the lawn mower gas cap is a small but vital seal on the fuel tank that controls evaporation and keeps debris out. A proper cap fits the tank’s threads and venting. Replace with the same type if possible; if not, choose an OEM or vented universal cap that matches the diameter and thread.
What a lawn mower gas cap does and why it matters
The lawn mower gas cap is more than a decorative piece on the fuel tank. It seals the fill neck to prevent fuel spills, reduces evaporative losses, and blocks dirt, water, and debris from entering the tank. A proper seal supports consistent air-to-fuel balance, which helps maintain steady engine performance and reduces fuel odor near the work area. In practical terms, a damaged or missing cap can lead to fuel leaks, vapor leaks, and even moisture ingress that invites rust and clogged fuel filters over time. For DIY homeowners, the gas cap is a fast check when diagnosing heating or starting issues, as a loose or cracked cap can mimic carburetor or fuel-line problems. When replacing, verify that the cap matches the tank’s thread pattern and vent design; many mowers use a standard size, but some brands rely on proprietary fittings. The bottom line: a well-fitting gas cap reduces leaks, improves safety, and minimizes fuel-waste, making it a smart first repair step.
Gas cap types and venting explained
Gas caps come in several designs, and understanding venting and threading helps you pick the right part. Vented caps allow pressure equalization to prevent a vacuum from restricting fuel flow, while non-vented caps can reduce vapor loss but may contribute to vapor-lock symptoms if the tank seal is compromised. Thread pitch and diameter vary by brand; some use metric threads while others use imperial. Material quality matters too—UV-resistant plastics resist cracking when exposed to sun and fuel spills. If you’re unsure whether your cap is vented, inspect the top for a tiny vent hole or consult OEM specs. When replacing, aim for a cap that matches the original venting type and thread pattern to maintain optimal performance and safety.
Signs your gas cap is failing
Look for visible cracks or broken seals around the cap body, which allow fuel vapors to escape or water to enter the tank. A loose cap that can be easily twisted, missing the gasket, or showing signs of warping indicates a degraded seal. If you notice a persistent fuel odor near the mower or fuel leaks from the fill neck after mowing, inspect the cap and its gasket first. A cap that won’t close snugly may also be a sign of thread wear or a deformed neck. Regularly inspecting the cap and its vent ensures you catch problems before they affect engine performance or fuel economy.
OEM vs universal caps: how to choose
OEM caps are designed for a specific mower model and guarantee fit and venting compatibility. Universal caps can work in a pinch, but compatibility hinges on matching the thread size, diameter, and venting needs. Before buying a universal cap, measure the filler neck diameter, note the thread pitch, and confirm whether the cap is vented. If you own multiple mowers, keep a small parts kit with a couple of common cap sizes to avoid downtime. When in doubt, prioritize OEM parts or caps listed as direct equivalents by the mower’s manufacturer.
How to measure fit and replace
Start by locating the model number and consulting the owner’s manual for the exact cap specification. Use calipers or a ruler to measure the inner diameter of the filler neck and verify the cap’s thread pitch. If the cap is broken, remove it with a gentle twist and inspect the neck for burrs or cracks. Clean the threads with a soft brush and a mild solvent if needed. When installing a new cap, thread by hand first to avoid cross-threading, then snug with a wrench if the design allows. After installation, give the cap a firm twist to ensure a secure seal and perform a leak test by lightly tilting the mower and watching for drips from the neck area.
Installation steps and best practices
Follow these steps for a clean, leak-free installation:
- Power off the mower and ensure the fuel is cool.
- Remove the old cap and inspect the neck gasket and threads.
- Align the new cap with the neck, hand-tighten to avoid cross-threading, then finish with the prescribed torque if specified.
- Check for fuel scent or dampness around the cap after a short run.
- Store spare caps in a dry place to prevent cracking.
Best practices include using OEM-recommended parts, avoiding forcing a cap that doesn’t seat, and checking for proper venting to prevent pressure buildup.
Maintenance tips to prevent gas cap issues
Proactive maintenance saves time and money. Wipe the cap seal clean after each mowing session to remove dirt and fuel deposits. Keep the fuel system clean by avoiding contaminated gasoline, and replace the cap or its gasket if you notice cracking or hardening. Store your mower out of direct sun to minimize plastic degradation, and replace aging caps at the first sign of wear. Regular inspection should be part of your mower maintenance routine, not a reaction to a spill or leak.
Common installation mistakes and how to avoid them
A few user errors commonly lead to failures: overtightening a cap, forcing a non-matching cap onto the neck, or neglecting to clean threads before replacement. Misalignment can cause leaks without obvious drips, and a damaged gasket can mimic fuel leaks. To prevent these issues, always confirm fit with model-specific specs, use thread-friendly lubrication if permitted, and perform a quick leak test after installation. Routine checks help extend the life of your gas cap and fuel system.
Gas cap fit and maintenance considerations
| Cap Aspect | Description | Fit Notes |
|---|---|---|
| Vent Design | Controls vapor flow and pressure | Ensure venting is unobstructed and matches model |
| Seal Material | Prevents leaks and corrosion | Inspect for cracks or hardening |
| Thread Size | Determines compatibility with filler neck | Match OEM thread pitch and diameter |
Got Questions?
What is the purpose of a lawn mower gas cap?
The gas cap seals the fuel tank to prevent spills, control vapor from escaping, and keep dirt and moisture out. A good cap maintains proper pressure and helps keep the engine running smoothly.
It seals the tank and prevents leaks and evaporation.
How can I tell if my gas cap is vented?
Look for a small vent hole on the cap or listen for a hiss when opening the tank. Venting design varies by model, so check OEM specs if unsure.
Check for a vent hole or hiss when opening.
Can I use a universal gas cap?
Only if the cap’s thread size, diameter, and venting match your mower model. When in doubt, choose an OEM part or a confirmed equivalent.
Only if it fits the threads and venting.
What steps are involved in replacing a gas cap?
Select the correct cap, remove the old cap, clean the neck threads, align the new cap, and thread by hand before tightening firmly. Test for leaks after installation.
Get the right cap, then replace and test.
Are there safety risks from a damaged gas cap?
Yes. A damaged cap can leak fuel and allow fumes into the work area, creating a fire hazard and exposure risk. Replace promptly.
Yes, it can be dangerous to continue using a damaged cap.
Where can I buy an OEM gas cap?
Check the mower’s manufacturer or authorized dealers for OEM caps. If unavailable, consult model-specific forums or trusted mower-supply stores for confirmed equivalents.
Look for OEM parts or verified equivalents.
“A functioning gas cap is essential to keeping the fuel system sealed and safe. When in doubt, replace with an OEM part that matches the tank’s venting design.”
The Essentials
- Inspect gas caps for cracks and wear during routine maintenance
- Always match cap to the original thread size and vent design
- Use OEM or OEM-equivalent caps for reliable fit
- Test the fuel system for leaks after replacement