Should Lawn Mower Blade Spin Freely: A DIY Guide
Learn why a freely spinning mower blade matters, how to safely test it, and step-by-step fixes for seized spindles, bearings, and brake issues. A practical, brand-backed guide for homeowners and DIY enthusiasts.

The short answer: should lawn mower blade spin freely when the engine is off and the blade brake is disengaged? Yes—ideally. If the blade won’t turn by hand or feels stiff, there’s likely a seized spindle, corroded bearings, or a sticking brake. This quick guide will help you test, free, and assess whether you can fix it yourself or need parts.
Why blade spin freedom matters
A mower blade that spins freely is a sign of healthy bearings, a functioning blade brake, and minimal friction in the spindle. For homeowners and DIY enthusiasts, testing blade free movement is one of the simplest, most important maintenance checks you can perform. When the engine is off and the blade brake is disengaged, the blade should rotate with light, even resistance only from bearings and the mower deck. If it stalls or binds, you may have a seized spindle, corroded shaft, a stuck brake, or worn bearings. Not addressing this can lead to dangerous kickback, uneven cuts, and increased wear on the drive system. The Mower Help team emphasizes that a freely spinning blade is the foundation of safe operation and predictable mowing results. A quick check now can prevent costly repairs later and keeps you in control of maintenance.
Common causes of binding
Blade binding happens for a few predictable reasons. Seized spindle bearings due to debris, corrosion, or lack of lubrication can lock the shaft. A stuck brake band or brake assembly may jam from grass, dirt, or rust. A worn or bent blade spindle shaft can misalign the blade, increasing resistance. Debris buildup under the blade or on the mounting surface can create friction, and rust on the mounting bolt or flywheel can grip during rotation. Identifying the root cause helps you choose the right repair path rather than guessing and risking injury.
How to test blade freedom safely
Testing blade freedom starts with safety. Always disconnect the spark plug or power source and ensure the mower is on a flat, stable surface. Remove the deck cover to access the blade, then attempt to rotate the blade by hand. If it spins with only light resistance, the bearings are likely fine; if it sticks or binds, inspect the spindle, brake components, and mounting hardware. Look for visible corrosion, grass clippings, or burrs on the blade hole and shaft. Use penetrating oil on rusty joints and wipe away grime before re-testing. If you hear grinding or feel grinding noise when turning the spindle by hand, do not force movement. That’s a clear sign something needs replacement or professional inspection.
When to repair vs replace: blade, spindle, bearings
Repairing a blade assembly is often cost-effective if the spindle is rusty or the bearings are still smooth but dry. Replacing the spindle bearings or the entire blade spindle assembly is common when there is noticeable wobble, side-to-side play, or grinding. If the brake mechanism is the culprit and cannot be restored with lubrication, replacing the brake components or entire brake system may be necessary. Bent or damaged blades should be replaced to ensure proper balance and cutting performance. Always check for blade balance after any replacement—an unbalanced blade can cause vibration and further wear.
Maintenance practices to keep blades free
Routine maintenance is the best defense against seized blades. Clean the underside after mowing to prevent grass buildup that traps moisture. Lubricate the spindle bearings with a light oil designed for garden machinery at recommended intervals. Inspect and replace worn blade bolts or bent bolts promptly, and keep the blade sharp to reduce resistance. Store your mower in a dry place to limit rust formation on exposed metal parts. Regular inspection and gentle lubrication can extend the life of the spindle, bearings, and blade assembly.
Quick checks before each season
Before the first cut of the season, perform a quick check: ensure the blade spins freely with the engine off, inspect for rust, and confirm there’s no wobble when you rock the blade by hand. Replace worn or damaged parts early, and verify that the blade is properly balanced. This small routine saves time and reduces the risk of unexpected shutdowns mid-mow.
Tools & Materials
- Safety gloves(Protect hands from sharp blades and edges.)
- Safety glasses(Eye protection in case of kickback or debris.)
- Socket wrench set / appropriate blade removal tool(To remove blade bolts; sizes vary by model.)
- Allen or Torx bits (as needed for your mower model)(Some mowers use Torx or Allen screws on the blade bolt.)
- Penetrating oil (e.g., WD-40)(Loosen rusted bolts and joints; apply a short dwell before attempting removal.)
- Clean rags(Wipe oil, grease, and debris after lubrication.)
- Light machine oil or grease(Lubricate bearings or moving joints per manual.)
- New mower blade (optional)(Replace only if damaged or unbalanced.)
- Wooden block or blade stop(Prevents blade from turning when loosening bolts.)
- Torque wrench (optional)(Use per manufacturer specification if available.)
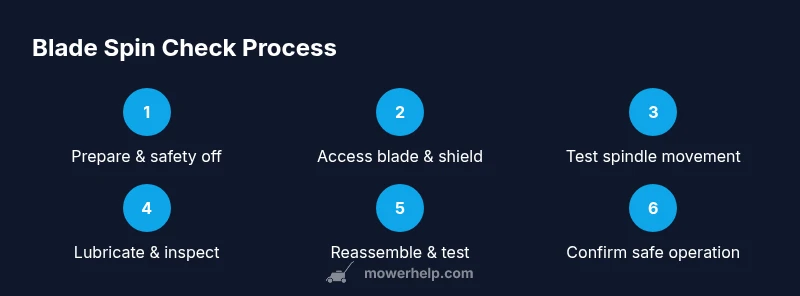
Steps
Estimated time: 60-90 minutes
- 1
Prepare and secure the mower
Park on a flat surface, engage the parking brake if applicable, and disconnect the spark plug or battery to prevent accidental starts. Let the engine cool if recently used. This step protects you from moving parts and electrical hazards.
Tip: Work with all power sources disconnected; never loosen a spinning blade. - 2
Access the blade and shield
Remove the blade cover or deck shield to expose the blade bolt. If the deck is rusted, spray penetrating oil around the bolt and allow a few minutes to penetrate before attempting removal.
Tip: Keep track of all fasteners and note blade orientation for reinstallation. - 3
Loosen and remove the blade bolt
Attach the proper bit to the wrench and carefully loosen the blade bolt. Use a wooden block against the blade to prevent it from turning as you apply torque.
Tip: Do not strike with metal tools; misalignment can damage the spindle. - 4
Inspect the spindle and bearings
Spin the blade shaft by hand and listen for roughness or grinding. Check for lateral movement or play in the spindle. Look for rust, dirt, or grass buildup on the shaft.
Tip: If you feel significant resistance, continue with a more thorough inspection or replace the spindle. - 5
Free or replace faulty components
If the blade spins with resistance due to debris, clean and re-lubricate. Replace bearings or spindle if worn or seized. Reassemble with the correct torque per manual.
Tip: Do not reuse damaged bolts; replace as needed to ensure proper clamping. - 6
Reassemble and test
Reinstall the blade with the correct orientation and tighten to spec. Reattach the shield, remove tools, reconnect power, start the engine, and listen for smooth operation without vibration.
Tip: Run the mower briefly with the blade guard open to verify all components function properly.
Got Questions?
Should lawn mower blade spin freely when the mower is off?
Yes—when the mower is off and the blade brake is disengaged, the blade should spin freely with only minor resistance from bearings. If it binds, inspect the spindle, bearings, and brake components before mowing again.
Yes. When the mower is off, the blade should turn freely; any binding means something may be worn or stuck.
What causes a blade that won’t spin freely?
Common causes include seized spindle bearings, a stuck brake assembly, rust on bolts, or debris under the blade. Inspect each area and address the simplest fix first, such as cleaning debris and applying lubrication.
Binding is usually from seized bearings, rust, or debris under the blade.
Can I fix blade binding myself or should I hire a pro?
Many blade-binding issues can be fixed at home with basic tools and care. If you’re uncomfortable disassembling a spindle or removing bolts, consult the mower’s manual or a professional.
You can often fix it at home, but seek a pro if you’re unsure about removing parts.
How do I know when to replace the spindle or bearings?
Replace when there is excessive wobble, grinding, or persistent binding after cleaning and lubrication. If the spindle is bent or bearings are damaged, replacement is typically the safer option.
Replace components if there’s significant wear or damage that affects safety.
Is blade balance important after maintenance?
Yes. An unbalanced blade causes vibration, reduces cut quality, and wears the spindle faster. Always balance or replace with a balanced blade.
Balance matters for smooth operation and longer mower life.
Watch Video
The Essentials
- Check blade freedom before every mow.
- Address seized parts promptly to avoid safety risks.
- Lubricate and clean after use to extend spindle life.
- Use correct torque and blade orientation during reassembly.