How to Fix a Broken Lawn Mower Handle
Learn how to diagnose, repair, or replace a broken lawn mower handle with safe, practical steps. This guide covers tools, safety considerations, and maintenance to extend handle life for homeowners and DIY enthusiasts.

With the right approach, you can restore a broken lawn mower handle without buying a new mower. Start by inspecting the handle and pivot junctions, determine if cracks, bent brackets, or loose fasteners are the issue, then decide between repair or replacement. This quick guide outlines the essential steps, materials, and safety checks you need to complete the fix.
Why a Broken Lawn Mower Handle Happens
A broken lawn mower handle is usually the result of stress from regular use, improper storage, or a sharp impact such as hitting a curb or a rock. Over time, the fasteners that hold the handle to the mower frame can loosen, and the handle material can crack at high-stress points where the grip attaches to the pivot. For homeowners, the term broken lawn mower handle often refers to a loose pivot, a cracked grip, or a bent bracket that prevents safe operation. Understanding the common failure modes helps you decide whether to repair or replace and sets expectations for the repair’s durability. In many cases, a cracked or bent handle is a warning sign that other parts of the mower could be under extra strain, so thorough inspection is essential. The goal is to restore a solid, secure connection that allows you to control the mower without wobble or fear of sudden detachment, which can be dangerous for you or bystanders.
How to Recognize It
- Wobbly grip when lifting or maneuvering the mower.
- Visible cracks in the handle material or attachment brackets.
- Loose or missing screws, bolts, or lock nuts.
- Misaligned handle that makes starting or steering awkward.
If you notice any of these signs, a broken lawn mower handle is likely the culprit behind unstable steering, uneven cuts, or sudden handle failure during operation. Addressing it promptly improves safety and prolongs the mower’s life. The Mower Help team notes that many homeowners delay repairs, which can lead to further damage and higher repair costs. Early diagnosis is your best defense against a total handle failure.
Safety First: Before You Start
Always unplug or disconnect the spark plug cap (for gas mowers) and let the engine cool before handling any mechanical parts. Wear eye protection and work gloves to protect against sharp edges and metal slivers. A broken lawn mower handle may expose wiring or heat shields; if you see exposed wiring or significant corrosion, stop and consider professional service. Secure the mower on a flat surface with the blade guarded or removed if you plan to inspect the blade area as part of your handle inspection. These precautions keep you safe while assessing damage and prevent accidental startups during repair.
Quick Path to Repair vs Replacement
If the handle itself is cracked or the pivot bracket is bent beyond repair, replacement is usually the safest and most durable option. If the damage is isolated to fasteners, grip wear, or a small crack near a mounting hole, a repair or reinforcement with hardware can restore function at a lower cost and shorter downtime. When deciding, weigh the cost of a new handle or handle kit against the time required for a thorough repair. In many cases, a well-executed repair will extend the mower’s life by several seasons, especially on older models where full replacement parts are still available.
Maintenance to Prevent Future Failures
Preventive care pays off: store the mower in a dry, level area; check fasteners quarterly; apply a small amount of anti-seize or thread-locking compound on metal-to-metal joints when reinstalling; and inspect the handle grip for wear at the start of each season. Regular lubrication of pivot points reduces stiffness and stress on the handle during operation. By building this maintenance routine into your seasonal prep, you can avoid common fixes and keep a broken lawn mower handle from becoming a recurring problem.
Tools & Materials
- Adjustable wrench(To loosen/tighten bolts holding the handle assembly)
- Screwdriver set (Phillips and flat-head)(For removing screws on handles and brackets)
- Hex key/Allen set(If your mower uses hex bolts)
- Replacement handle or repair kit(Choose model-compatible parts)
- Lock washers or locking thread compound(Prevent loosening from vibration)
- Pliers and mallet(Assist with stubborn fasteners or alignment)
- Safety gear (gloves, eye protection)(Personal protective equipment)
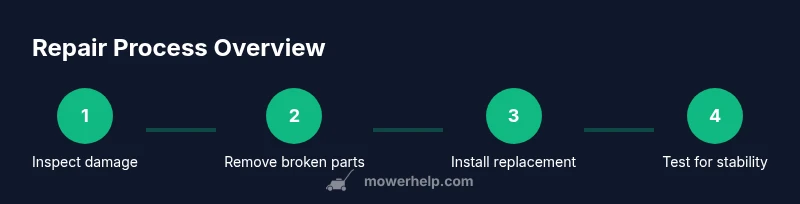
Steps
Estimated time: 60-90 minutes
- 1
Assess damage and gather parts
Inspect the entire handle assembly for cracks, bent brackets, and loose fasteners. Decide whether you can repair the existing handle or need a replacement part. Gather the replacement handle kit or the best-compatible components before you begin.
Tip: Document damage with a photo in case you need to reorder parts later. - 2
Disconnect power and secure the mower
For gas mowers, disconnect the spark plug wire and let the engine cool. Place the mower on a flat surface and use blocks to prevent rolling. Secure the handle area so it won’t shift during removal.
Tip: Never work with a powered mower; safety first prevents accidental starts. - 3
Remove damaged handle or bracket
Use the screwdriver and wrench to detach screws, bolts, and pivots from the handle. If a rivet is used, drill out or cut carefully to avoid damage to the frame. Keep fasteners organized for reassembly.
Tip: Keep screws in labeled containers to match each mounting point. - 4
Prepare and align replacement parts
If installing a replacement handle, ensure the holes align with the mounting brackets and pivot holes. Check for compatibility with your mower model and test-fit before final installation. If reinforcing, apply washers or a brace as recommended by the kit.
Tip: Dry-fit parts first to minimize repeated disassembly. - 5
Attach the new handle and torque fasteners
Install the handle using the original hardware or kit-supplied bolts. Tighten to manufacturer-recommended torque; if unavailable, snug uniformly without overtightening. Reattach any guards or covers that were removed.
Tip: Apply a thread-locking compound only if the parts are designed for it. - 6
Reassemble and test for function
With everything secured, gently move the mower through its typical range of motion. Check for wobble, play, or misalignment at the grip. If any looseness remains, recheck fasteners and alignment before continuing.
Tip: Have a helper hold the mower steady during the initial test. - 7
Final safety checks and maintenance
Lubricate pivot points if specified, re-torque any fasteners after a short break-in period, and inspect for signs of wear after a couple of uses. Store the mower in a dry area to slow corrosion.
Tip: Record the repair date and part lot numbers for future reference.
Got Questions?
What qualifies as a broken lawn mower handle and when should I replace it?
A broken lawn mower handle usually refers to cracks, bent brackets, or loose pivots that compromise control. If cracks exceed a few inches or the bracket is bent beyond alignment, replacement is typically safer and longer-lasting than repair.
A broken handle means cracks, bent brackets, or loose pivots that make control unsafe; replacement is often safer when damage is extensive.
Can I repair a cracked handle, or should I replace the whole unit?
Small surface cracks or minor loosening can be repaired with reinforced brackets and proper fasteners. Major cracks, severe bending, or compromised mounting points usually require a replacement handle kit for reliability.
Small cracks can sometimes be repaired, but major damage usually means replacement is the safer choice.
What safety steps should I follow during the repair?
Always disconnect the spark plug, allow the engine to cool, and wear eye protection and gloves. Work on a flat surface and secure the mower to prevent movement during repair.
Disconnect the spark plug, wear safety gear, and secure the mower before starting.
How long should a repaired handle last?
Durability depends on the quality of parts and how well the repair was carried out. A proper installation with correct torque can last several seasons under normal home use.
If done correctly with good parts and torque, a repaired handle can last several seasons.
Should I hire a professional for handle repair?
If your mower is under warranty or the handle damage is extensive, seeking a pro can ensure safety and proper warranty coverage. For older models, a DIY repair may be cost-effective and faster.
Consider a pro if warranty matters or the damage is extensive; DIY can work for older models.
Watch Video
The Essentials
- Inspect the entire handle assembly for damage before starting.
- Choose replacement parts when cracks or bends exceed repair limits.
- Secure the mower and follow safety steps to prevent injury.
- Test the handle thoroughly after reassembly to ensure safety.
- Adopt regular maintenance to prevent future handle failures.