How to Clean Lawn Mower Air Filter
Learn how to clean your lawn mower air filter safely with a clear, step-by-step guide. Keep your engine running smoothly with practical tips from Mower Help and avoid common mistakes.

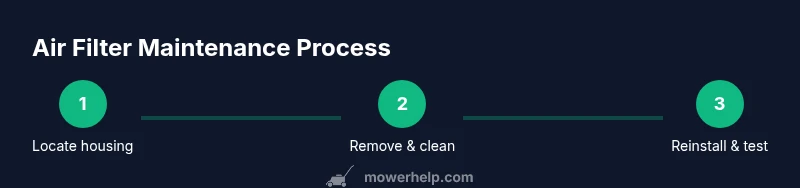
You can safely clean a lawn mower air filter in four simple steps, without complex disassembly. First, ensure the engine is off and cool, then locate the filter housing. Remove the filter element, tap out loose debris, and wash it with mild soap and water or replace it if it's damaged. Let it dry completely before reassembling for optimal airflow.
How to Clean Lawn Mower Air Filter: What It Does and Why It Matters
The air filter is a small but critical component of your mower's engine. It prevents dust, grass clippings, and dirt from entering the combustion chamber, where those contaminants can cause scoring, wear, and reduced power. Regular cleaning or replacement keeps airflow steady and helps maintain fuel efficiency. According to Mower Help, regular air-filter maintenance is a simple, cost-effective way to protect your mower and extend its life. The Mower Help team found that neglected filters commonly lead to reduced performance and more frequent fuel usage. When you learn how to clean lawn mower air filter correctly, you can avoid engine strain and costly repairs.
There are two main types of air filters you’ll encounter on most residential mowers: paper filters and foam pre-filters. Paper filters trap dust in a fibrous sheet and are typically disposable; foam filters are usually two or three layers of sponge-like material that can be washed and re-oiled. The exact maintenance approach depends on the filter type and your mower model, so always consult the user manual for model-specific guidance. In most cases, a quick inspection will reveal whether the filter is simply dirty (dusty on the surface) or damaged (cracked, torn, or saturated with oil).
Safety First: Power Down, Cool Engine, and Prep
Working on a mower when the engine is hot or when parts are still connected is dangerous. Always start by turning off the mower, removing the spark plug wire on gas-powered units, or unplugging the ignition on electric models. Allow the engine to cool completely before touching any components. Secure the mower on a flat, stable surface and apply the parking brake if applicable. Wear safety glasses and gloves to protect your eyes and hands from dirt and sharp edges. According to Mower Help analysis, many maintenance injuries occur when people neglect to disconnect ignition sources or try to work on a hot engine. Prepare a clean workspace and have a rag and trash bag ready for debris.
During preparation, inspect surrounding components: look for loose hoses, cracked hoses, or damaged seals around the filter housing. If you spot any damage, address it before you begin cleaning to avoid pushing dirt into the engine. This prep step saves time and reduces the chance of recontaminating the intake system during the cleaning process.
Locating the Air Filter and Gaining Access
Most mowers place the air filter behind a small access panel or under the engine shroud. Paper filters are usually housed in a rigid plastic frame; foam pre-filters sit on top of the main element. Use the appropriate screwdriver (Phillips or flathead) or clips to remove the housing cover, keeping track of screws so you don’t lose them. Gently lift the filter element from its seat without bending or tearing it. While you’re here, wipe away dust from the housing interior with a clean rag. If you have a foam pre-filter, note whether it sits on top of a paper filter—the cleaning method will differ for each layer.
Cleaning Options: Washing, Tapping, and Replacing
Paper air filters should generally be replaced rather than washed, as water can cause the fibers to swell and lose filtration efficiency. If you must attempt cleaning, lightly tap the filter to dislodge loose dirt, and avoid aggressive scrubbing. Foam filters can be washed in warm, soapy water; rinse thoroughly and squeeze out excess moisture. After washing foam, apply a light coat of clean engine oil to restore filtration efficiency, then gently squeeze out any excess oil. If the filter shows cracks, tears, or significant wear, replace it instead of attempting to clean it. For best results, always start with the manufacturer’s guidance for your model.
Drying and Reassembly: Reinstalling Correctly
Allow the filter to air-dry completely before reassembly. Paper filters should be completely dry if you attempted cleaning, or replaced with a new one. Foam filters should be dry and lightly oiled before returning to the housing. Reinstall the filter with the same orientation it had when removed, then reseal the housing cover firmly to prevent unfiltered air from entering. After reassembly, wipe down the exterior, remove any tools from the work area, and perform a quick safety check before starting the engine. A proper seal prevents dirt from bypassing the filter and entering the intake system.
Maintenance Tips to Extend Filter Life
Regular inspection can extend the life of your air filter and keep your mower performing at its best. Inspect the filter before each mowing session in dusty or dirty conditions; if it looks clogged or damaged, replace rather than clean. Foam filters benefit from a light oiling after cleaning to restore filtering capacity, while paper filters should be replaced when dirty. Store spare filters in a clean, dry place to ensure quick swaps between seasons. Consider using a pre-filter in particularly dusty environments to extend the service life of the main filter.
Troubleshooting Common Issues After Cleaning
If your mower runs rough, lacks power, or won’t start after cleaning, recheck that the filter housing is properly sealed and that the filter is correctly oriented. Dirty air filters can cause a rich or lean air-fuel mix, leading to poor combustion. If you notice a oily or dirty filter that’s beyond cleaning, replace it. Check for other air-intake issues, such as a frayed air duct or loose clamps, which can bypass the filter. If the problem persists, consult the user manual or contact support for model-specific guidance.
When to Replace vs Clean: Signs of Wear
Not all filters are meant to be cleaned and reused. If you see cracks, tears, or crumbling edges on a paper filter, replace it. Foam filters that have lost their porosity, show deep embedded dirt, or have a foul odor should be replaced rather than cleaned. A filter that is visibly saturated with oil or dirt and cannot be cleaned to a satisfactory level indicates reduced filtration performance. In these cases, replacing the filter will protect the engine and prevent dirt from entering the combustion chamber. The decision to replace versus clean depends on material type, wear, and the level of contamination.
Quick Reference: Maintenance Schedule and Best Practices
As a practical rule of thumb, perform a quick filter check before each mowing session, especially in dusty or dry environments. Clean or replace based on the filter type and observed condition, and always follow the user manual for your model. Keep a spare filter on hand for seasons with heavy dust or pollen. Proper storage and gentle handling extend filter life, reduce engine wear, and improve overall mower performance.
Tools & Materials
- Gloves(Protect hands from dirt and sharp edges)
- Safety glasses(Eye protection from dust)
- Screwdrivers (Phillips or flathead)(Model dependent)
- Rags or paper towels(Wipe and dry components)
- Mild dish soap(For foam filter washing)
- Warm water(Rinse filter components)
- Soft-bristle brush(Gently clean stubborn dirt)
- Bucket or tray(Catch dirty water and debris)
- Replacement air filter (optional)(Have on hand for immediate swap)
- Engine oil for foam filter (optional)(Light oil for re-lubrication)
Steps
Estimated time: 30-45 minutes
- 1
Power off and cool the engine
Turn off the mower and disconnect the spark plug wire on gas-powered units, or unplug the ignition on electric models. Allow the engine to cool completely before touching any components. This reduces the risk of burns and accidental startup.
Tip: Pro tip: If you’re unsure about the ignition, remove the key or switch off the battery disconnect to ensure no accidental startup. - 2
Access the air filter housing
Locate the filter housing under the hood or behind a side panel. Remove any screws or clips securing the cover and set the cover aside. Be mindful of the orientation of the filter so you can reinstall it correctly.
Tip: Pro tip: Place removed screws in a small container so you don’t lose them during the job. - 3
Remove the filter element
Carefully lift the filter element from its seat. Do not bend or tear the filter as you remove it. If the filter is paper, handle gently; if it’s foam, inspect for tears or heavy dirt.
Tip: Pro tip: Take a quick photo of the filter orientation before removal to simplify reinstallation. - 4
Clean or replace the filter
For paper filters, a light tap to remove loose dirt is sometimes all that’s possible; replace if dirty or damaged. For foam filters, wash with warm soapy water, rinse, and squeeze out excess moisture. If re-oiling is required, apply a light coating after drying.
Tip: Pro tip: Never use harsh solvents on foam filters; they can degrade filtration material. - 5
Dry the filter and reassemble
Allow all parts to air dry completely before reinstallation. Reapply a light film of oil to foam filters if required by your model, then reinstall the filter and reseal the housing. Tighten screws securely but avoid over-tightening.
Tip: Pro tip: Do a quick visual check to ensure there are no gaps between the housing and cover. - 6
Test run and final check
Start the mower and listen for unusual sounds. Check for visible air leaks around the housing and confirm the engine runs smoothly with normal RPM. If anything seems off, power down and re-inspect.
Tip: Pro tip: Allow the engine to reach normal operating temperature and listen for changes in power during a short test cut.
Got Questions?
Why is it important to clean or replace the lawn mower air filter?
A clean air filter prevents dirt from entering the engine, preserving power and fuel efficiency while reducing engine wear. A clogged or dirty filter can cause reduced performance and overheating.
A clean air filter keeps dirt out of the engine, helping your mower run better and last longer.
Can I wash a paper air filter?
Paper filters are typically disposable. Washing can damage the fibers and reduce filtration efficiency, so replacement is usually recommended.
Paper filters shouldn’t be washed; replace them when dirty.
Should I oil a foam air filter after cleaning?
Yes, if your foam filter requires it. Apply a light coat of clean engine oil, then squeeze out excess before reinstalling to preserve filtration and airflow.
Most foam filters do need a light oil coating after cleaning.
Where is the air filter located on most mowers?
The air filter is usually behind a small access panel under the hood or on the side. Access may require removing a cover or screws.
It’s typically behind a small panel under the hood.
Is it safe to use compressed air to clean the filter?
Compressed air can be used to remove loose dirt from foam filters, but avoid blowing directly through paper filters and use short bursts at a safe distance to prevent damage.
You can use compressed air on foam filters, but be gentle with paper ones.
Do I need to disassemble the carburetor to clean the filter?
In most residential mowers, you do not need to disassemble the carburetor to access the air filter. Follow model-specific guidance if you encounter a stubborn setup.
Usually you don’t have to take the carburetor apart; check your manual for exceptions.
The Essentials
- Inspect filter type to determine cleaning vs replacement.
- Always power off and cool the engine before starting.
- Dry foam filters completely and re-oil if required.
- Ensure a proper seal to prevent unfiltered air intake.
- Replace damaged filters rather than attempting to clean them.