Push Lawn Mower Striper Guide: Create Crisp Stripes
Learn how to choose, attach, and use a push lawn mower striper to achieve crisp stripes. This guide covers compatibility, installation, maintenance, and best mowing practices for pro-looking lawns in 2026.

You will learn how to attach and use a push lawn mower striper to create crisp, professional-looking stripes in your lawn. This guide covers compatibility checks, installation steps, correct blade height, and mowing patterns that maximize shading. By the end, you’ll be able to choose the right striper for your mower and achieve even, showroom-worthy stripes across any lawn size.
What a push lawn mower striper is and why stripes matter
A push lawn mower striper is a rolling or elevated bar that attaches behind your mower to press grass blades in slightly different directions as you mow. The effect is a reflective highlight on the turf, creating visible light and dark stripes across the lawn. Stripes look best on even, well-maintained grass, and they depend on the direction of mowing, sun angle, and grass height. The key is consistent contact between the roller and grass; without it, stripes appear faint or uneven. For homeowners and DIY enthusiasts, a good striper is a simple upgrade that can dramatically improve curb appeal without hiring a landscaper. The Mower Help team notes that choosing a compatible striper and configuring it correctly makes all the difference in results in 2026.
How a striper creates stripes: the science of lawn patterns
Stripes arise because light reflects off the grass blades differently depending on their orientation. The roller on a striping attachment presses the blades slightly in toward the stem as you pass, causing shade lines to alternate with light lines when viewed from above. The technique requires consistent passes and careful alignment so that each stripe lines up with the next. Factors within your control include mowing height (keep grass healthy and not too long), mower speed (steady, moderate pace), and the angle you walk. Weather can also affect results: a dry, firm turf shows clearer lines than wet or patchy grass. For best results, plan your path in advance and practice on a small area before committing to the full lawn.
How to choose the right striper for a push mower
Compatibility is king. Check your mower's deck width and whether rear mounting points are present. Look for adjustable stripe width and a roller that can press the grass without scalping. Material matters: aluminum is lightweight, steel is durable, nylon rollers resist wear. Price ranges typically fall between modest budgets and mid-range kits; many options run roughly $15–$60 depending on features and build quality. Read product reviews and ensure the attachment includes clear installation instructions. A good striper should be easy to mount, stable in operation, and offer predictable stripe results on lawns of various sizes.
Installation and adjustment basics
Before you begin, ensure the mower is on a flat, dry surface and the engine is off (for gas mowers, remove the spark plug cap if needed; electric models require unplugging or removing the battery). Position the striper behind the rear wheels and align it with the rear roller. Secure with the manufacturer’s clamps or bolts, tightening evenly to avoid binding. Adjust stripe width and roller height so the grass is pressed but not crushed; use marks or tape to maintain consistency across passes. Finally, perform a light test pass on a small patch to confirm alignment before mowing an entire lawn.
Best practices for stripe quality
Plan your direction and pattern in advance: start with a straight baseline, then cross passes on subsequent rows to create a checkerboard effect. Maintain a steady pace and consistent pressure for even lines. Keep the grass at a healthy mowing height and ensure the lawn is dry and firm for best stripe visibility. Clean the roller after each use to remove grass residue that can dull stripes, and store the attachment in a dry place to prevent rust. Safety matters: wear gloves when adjusting hardware and keep bystanders clear of the mowing path.
Maintenance and troubleshooting
Regularly inspect mounting hardware for looseness—vibration can loosen bolts and cause misalignment. Clean the roller and underside after mowing to remove grass sap and debris. If stripes appear faint, recheck alignment and adjust roller height or pressure. Uneven stripes often point to ground irregularities; map those areas and avoid mowing over rough patches until fixed. If stripes disappear entirely, re-check mowing direction, ensure the attachment remains attached securely, and test again on a patch before continuing.
Tools & Materials
- Push lawn mower with rear roller mounting points(A mower that supports rear striping attachments; ensure clearance behind wheels.)
- Striping attachment/roller kit(Choose a kit compatible with your mower model and deck width.)
- Mounting hardware (bolts, clamps, brackets)(Should be included with the striper or purchased separately.)
- Adjustable wrench or socket set(For securing hardware without stripping bolts.)
- Tape measure or ruler(Helpful for setting stripe width consistently.)
- Safety gloves and eye protection(Protect hands and eyes during installation.)
- Lubricant or anti-seize spray(Eases mounting and prevents rust.)
Steps
Estimated time: 20-40 minutes
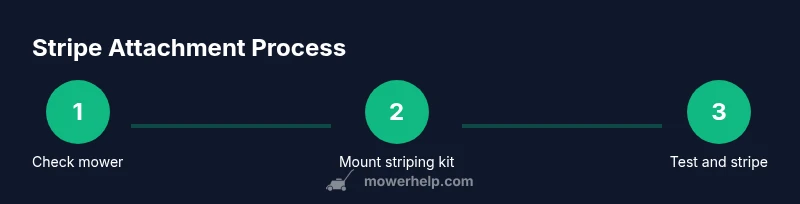
- 1
Check compatibility and prepare workspace
Review your mower’s specifications to ensure rear-mount striping attachments are supported. Clear and dry the area, and place tools within reach. This helps prevent misplaced parts and makes installation smoother.
Tip: Double-check the mower’s official mounting instructions before starting. - 2
Gather tools and parts
Lay out all mounting hardware and read the manufacturer’s instructions. Confirm you have clamps or bolts, brackets, and any spacers the kit requires. This reduces trips to the toolbox mid-assembly.
Tip: Organize parts in the order they will be installed to speed assembly. - 3
Attach the striper alignment
Position the striper behind the rear wheels and align it with the mower’s rear roller. Ensure the device sits level and centered relative to the wheel path. A helper can hold parts steady during this step.
Tip: Mark the initial position with tape to keep alignment consistent. - 4
Secure mounting hardware
Tighten clamps or bolts evenly, avoiding overtightening that could strip threads or warp components. Check that the striper sits firmly with no wobble.
Tip: Use a torque-limited tool if available for consistent torque. - 5
Set stripe width and roller height
Adjust the roller height so grass is pressed but not crushed. Use the tape marks to keep width consistent across passes. Confirm the attachment can still rotate freely without rubbing.
Tip: Make incremental adjustments and test on a small patch. - 6
Test and refine
Run a dry test pass on a patch of the lawn to observe stripe alignment. Check for even contact, adjust as needed, and then proceed to mowing with confidence. Keep an eye on pattern consistency as you expand coverage.
Tip: If stripes drift, re-check mounting and ensure the mower deck isn’t bent.
Got Questions?
Will a push lawn mower striper fit my mower?
Compatibility depends on deck width and the presence of rear mounting points. Check your mower’s manual or the striper’s compatibility list before purchasing.
Compatibility depends on your mower’s mounting points and deck width. Check the manual and the product list first.
How do I attach a striper to a push mower?
Follow the manufacturer’s directions for mounting. Use clamps or bolts provided, center the unit, and tighten evenly. Recheck alignment after the first test pass.
Attach using the provided clamps or bolts, center it, and tighten evenly. Recheck alignment after testing.
Do stripes depend on mowing direction?
Yes. Plan straight passes and then alternate directions on subsequent rows for a checkerboard pattern. Consistent speed and order improve results.
Yes. Plan straight passes and alternate directions to improve stripe consistency.
Are lawn stripers safe for the grass?
When installed correctly, stripers press the grass gently and do not cut it. Avoid excessive pressure and check alignment if you see any scalping.
When set up correctly, they are safe. Don’t press too hard and verify alignment if you notice scalping.
What is the typical price range for stripers?
Prices vary by material and features. Most options for entry to mid-range kits fall in a budget-friendly range.
Prices vary by material and features; expect a modest budget range.
Watch Video
The Essentials
- Choose a compatible striper and mount securely.
- Align width to mower balance for even stripes.
- Mow with steady pace and consistent pressure.
- Inspect hardware and clean the roller regularly.