Replacement Parts Lawn Mower: A DIY Guide
Learn how to identify, source, and install replacement parts lawn mower with confidence. This comprehensive guide covers OEM vs aftermarket options, compatibility checks, sourcing tips, and safe installation for DIY homeowners and hobbyists.

By the end of this guide, you will know when to replace parts on a lawn mower, how to identify exact part numbers, and where to source reliable replacement parts lawn mower. We’ll compare OEM versus aftermarket options, explain compatibility checks, and outline a safe, cost effective replacement process. This quick start helps minimize downtime and extend your mower’s life.
Why replacement parts lawn mower matter
A well maintained mower relies on components that wear out over time. When a blade dulls, a filter clogs, or a belt stretches, replacing the part can restore performance and prevent further damage. The goal is to keep the engine and drive system running smoothly without overhauling the entire unit. For homeowners and DIY enthusiasts, understanding replacement parts lawn mower basics helps you decide when to repair versus replace and which parts to prioritize. According to Mower Help, staying proactive with timely part replacements reduces downtime, lowers repair costs, and keeps your outdoor space looking sharp. By focusing on essential components and compatible parts, you can keep your mower operating at peak efficiency season after season.
In practice, this means recognizing symptoms early, identifying the exact part number, and choosing a source you trust. Replacement parts lawn mower are available in OEM forms that fit the original specifications and in aftermarket options that may save money. The right choice depends on how you use the mower, the part reliability, and your willingness to perform the repair yourself. The rest of this guide will walk you through these decisions with practical, step by step guidance.
Common replacement parts lawn mower you’ll encounter
Across most lawn mowers, a handful of replacement parts lawn mower show up most often. Blades wear or nick, belts slip or crack, air filters clog, spark plugs foul, and gaskets or seals degrade with age. A damaged blade can reduce cutting efficiency and increase vibration, while a clogged air filter can starve the engine of air and reduce power. When a belt slips, the mower loses drive motion and can stall. Replacement parts lawn mower in these categories usually come with either OEM part numbers or aftermarket equivalents that claim compatibility. For DIY projects, starting with a clean parts diagram from your manual helps you locate the exact item you need and avoid buying the wrong replacement parts lawn mower.
Before ordering, gather the mower model and serial numbers, inspect the part position, and verify that the part number matches the diagram. This reduces the chance of incorrect replacement parts lawn mower and speeds up the repair process. Common areas to inspect include the blade adapter, blade spindle, air intake, spark plug boot, belt pulleys, carburetion components, and lubrication points. Keeping a small parts tray and magnetic mat nearby makes it easier to manage screws and small components during replacement parts lawn mower tasks.
How to identify the right replacement parts lawn mower part numbers
Accurately identifying the right replacement parts lawn mower begins with locating the model number on the mower or engine. This number is your key to the official parts diagram and the exact replacement parts lawn mower recommended by the manufacturer. Use your user manual or online service diagram to cross reference the part number. If the manual is unavailable, many manufacturers post digital diagrams by model on their support sites. When in doubt, confirm by providing the exact model, year, and serial number to the seller so you receive the correct replacement parts lawn mower. For complex assemblies, write down the part’s position and take a photo before disassembly to ensure you reassemble correctly and don’t confuse similar parts. This careful approach ensures your replacement parts lawn mower fit first try and operate safely.
OEM vs aftermarket replacement parts lawn mower: pros and cons
OEM replacement parts lawn mower come directly from the original equipment manufacturer and are designed to match the exact specifications of your unit. They tend to offer precise fit, reliable performance, and longer guaranteed compatibility, but they can be pricier. Aftermarket replacement parts lawn mower are produced by third party brands and can provide cost savings, broader availability, and sometimes enhanced durability. The trade off is potential variation in fit or finish and differing warranty terms. For routine maintenance, many DIYers start with aftermarket options for common items like belts and filters, while reserving OEM parts for critical assemblies such as the blade hub or engine components. Always review part diagrams, warranty terms, and return policies when choosing replacement parts lawn mower.
In both cases, verify the part number on arrival, and compare to the factory diagram to ensure you have a true replacement parts lawn mower that will integrate with your deck, engine, and safety features.
Sourcing replacement parts lawn mower: where to buy
Finding reliable sources for replacement parts lawn mower is essential for success. Authorized dealers and the manufacturer’s online store are the safest routes for OEM options. For aftermarket parts lawn mower, a mix of reputable retailers, local mower shops, and large online marketplaces can offer competitive prices and broader availability. When selecting a supplier, check the return policy, shipment speed, and compatibility guarantees. Helpful tips include requesting the manufacturer’s diagram or cross reference sheet, reading user reviews, and confirming that the seller provides replacement parts lawn mower for your exact model and year. If you retire an older mower, consider whether the cost of replacement parts lawn mower outweighs the value of repair versus replacement and plan accordingly.
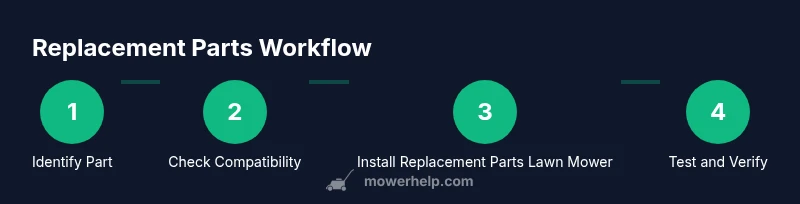
Step-by-step: Replacing a common part ex blade or filter (overview)
This section provides a practical sequence to replace a common component such as a blade or air filter. Each replacement parts lawn mower task is different, so always consult your diagram for specific steps. Begin by safely disconnecting power, securing the mower, and gathering the necessary tools. Remove the old component, compare it with the replacement parts lawn mower to confirm fit, install the new part, and reassemble. Finally, run a careful test and perform basic safety checks. The steps outlined here emphasize accuracy, tool control, and safety to minimize the risk of damage or injury.
Safety considerations and warnings when replacing parts
Safety should be your top priority when performing any replacement parts lawn mower work. Disconnect the spark plug wire and remove the battery or power source before touching moving parts. Wear eye protection, gloves, and sturdy footwear. Work in a well-ventilated area and keep a clear workspace to avoid slips or dropped components. If you feel uncertain about torque specs or alignment, pause and consult the manual or a professional. Properly securing fasteners and testing after replacement is essential to prevent blade kickback or belt failure. Always follow the manufacturer guidance for any replacement parts lawn mower that involve the engine, blade, or drive system.
In short, treat every replacement parts lawn mower task as a potential safety risk and plan accordingly.
Budgeting and planning for replacement parts lawn mower
Replacement parts lawn mower costs vary with part type and source. Belts, filters, and spark plugs are typically affordable, while certain engine or deck components can be more substantial investments. To manage costs, create a parts list based on your maintenance schedule, estimate replacement rates for the parts you use most, and compare OEM versus aftermarket pricing. Keeping a small reserve for unexpected replacements helps prevent delays. When planning, consider whether you should join a mower club or community forum for tips and cost-effective sources for replacement parts lawn mower. A clear budget helps you decide when repair yields a better return than replacement.
3 quick tips for avoiding common replacement parts lawn mower mistakes
- Always verify part numbers against the model diagram to ensure a perfect fit for replacement parts lawn mower.
- Do not force a part into position; if it does not fit naturally, recheck alignment and fastener size.
- Test the mower after replacement in a controlled environment to confirm safe operation and proper function.
Tools & Materials
- Replacement part compatible with mower model(Ensure exact part number and position on the diagram)
- Model/Serial number reference(Locate on the mower deck stamping or engine block)
- Socket wrench set(Metric sizes typical for mower hardware)
- Screwdriver set(Include Phillips and flathead for various fasteners)
- Lubricant or anti seize compound(Use on moving metal parts as recommended by manufacturer)
- Safety gear(Gloves, eye protection, and closed toe shoes)
- Owner manual or parts diagram(Helpful for accurate part numbers and torque specs)
Steps
Estimated time: 45-75 minutes
- 1
Identify the replacement part
Locate the model and serial numbers on your mower and consult the parts diagram to find the exact replacement parts lawn mower. Record the part number and confirm compatibility before purchasing. This prevents ordering the wrong item and saves time.
Tip: Take a photo of the diagram and the part you remove for reference. - 2
Power down and prepare workspace
Disconnect power source or remove the spark plug to prevent accidental startup. Clear the area of debris and secure the mower on a stable surface. Gather tools and the replacement parts lawn mower in one place.
Tip: Work in bright light and use a magnetic tray for small screws. - 3
Remove the old part
Loosen fasteners in a logical sequence and carefully remove the worn component. Keep fasteners organized and note their original location to avoid misplacement. Inspect surrounding parts for wear that might indicate a broader issue.
Tip: Count turns or markings on old fasteners to replicate torque later. - 4
Compare and verify the new part
Lay the replacement parts lawn mower next to the old one and verify dimensions, mounting holes, and adapters. Double check that the replacement part matches the diagram for your exact model. Any misalignment is a sign to recheck the part number.
Tip: If in doubt, pause and contact the seller with model details. - 5
Install the replacement part
Attach the new component using the original fasteners in the same pattern. Replace gaskets or seals as needed and apply a light coating of lubricant where specified. Tighten to manufacturer torque specs if available.
Tip: Do not overtighten; strip threads can create leaks and failures. - 6
Reassemble and test safely
Reassemble any covers or guards and reconnect the power source. Start the mower at low idle, listen for unusual noises, and check for proper operation of the replacement part. Observe for smoke, fuel leaks, or misfires during first run.
Tip: Have a fire extinguisher handy and test in a clear, open area. - 7
Perform routine checks after replacement
After the initial test, inspect fasteners again, confirm belt tension if applicable, and run through a short cut to confirm performance. If something feels off, stop and recheck the installation before continuing use.
Tip: Document the replacement in your maintenance log for future reference.
Got Questions?
What should I do first when I need replacement parts lawn mower?
Start by locating the mower model and serial numbers, then consult the official parts diagram to identify the exact replacement parts lawn mower you need. Verify part numbers with the retailer before purchasing.
First locate the model and serial numbers, check the parts diagram, and confirm the exact replacement parts lawn mower with the seller before buying.
Are OEM parts always better than aftermarket parts for lawn mowers?
OEM parts match the original specifications and may ensure smoother operation in critical assemblies, but aftermarket options can offer cost savings. Compare warranty terms, return policies, and expected lifespan when choosing replacement parts lawn mower.
OEM parts match the factory specs, but aftermarket parts can save money. Compare warranties and returns when choosing replacement parts lawn mower.
How do I know if a replacement part is compatible with my mower?
Check the exact model number, part number, and the diagram provided by the manufacturer. Confirm that mounting points and dimensions align with the replacement parts lawn mower you plan to use.
Verify model and part numbers and compare to the diagram to ensure compatibility.
Can I install replacement parts lawn mower without professional help?
Many parts are DIY friendly if you follow safety steps and use the right tools. Start with simple items like filters or blades and progress to more complex components as you gain experience.
Yes, many parts are DIY friendly as long as you follow safety steps and use the right tools.
What are common mistakes when replacing parts?
Using the wrong part number, skipping safety steps, and failing to test after installation are common errors. These can lead to poor performance or damage.
Common mistakes include using wrong parts and not testing after installation.
How long do replacement parts lawn mower typically last?
Durability depends on part type, usage, and maintenance. Regular cleaning, lubrication, and timely replacements extend the life of your mower components.
Durability varies by part and usage; maintenance extends life.
Watch Video
The Essentials
- Identify the exact part number before buying replacement parts lawn mower
- Choose OEM or aftermarket based on fit, cost, and warranty
- Verify compatibility using the model and diagram
- Follow safe disassembly and reassembly steps
- Test the mower carefully after installation