Scratch and Dent Lawn Mowers: Repair and Reuse Guide
Learn how to assess cosmetic dents on lawn mowers, decide between DIY repairs or professional help, and safely restore the deck for resale or continued use. This 2026 guide from Mower Help covers safety, tools, step-by-step fixes, and buying considerations.

By the end of this guide you will know how to assess cosmetic dents on lawn mowers, decide between repair or replacement, and safely restore the deck for better resale or performance. The steps cover safety, common DIY fixes, and preventive care. According to Mower Help, understanding dent severity helps you avoid costly mistakes.
What scratch and dent lawn mowers are and why the issue matters
Scratch and dent lawn mowers are common sights in the used market and can be a smart purchase when you know what to look for. A dented deck or scuffed housing may have come from rough handling in the garage, a crowded pickup bed, or aggressive mowing near obstacles. In most cases, the damage is cosmetic and does not affect engine power, blade speed, or drive gear. However, you should not assume that a dent is harmless. The Mower Help team emphasizes that cosmetic damage can hide structural issues such as a bent frame, cracked mounting points, or corrosion at critical joints. These problems can compromise safety and performance if left unchecked. By the time you finish this section, you should be able to separate obvious cosmetic defects from deeper concerns, estimate the likely repair effort, and decide whether to repair, refinish, or move on to a different unit. Remember that in 2026, buyers expect full transparency and demonstrable maintenance history, so documenting your inspection is part of the value you offer.
How to assess the severity of dents and their impact on function
Dents vary in size, location, and the material involved, and their effect on mowing performance depends on where they occur. Start with a visual survey: is the dent on a noncritical panel or near the blade mounting, drive belt, or engine shrouding? Look for cracks, bent brackets, or misaligned gaps; these signs suggest structural damage rather than just a crushed cosmetic layer. Check for rust, oil or fuel leaks, loose fasteners, and any movement when you press on the deck. The Mower Help analysis shows that most cosmetic dents do not reduce cutting efficiency, but dents around the blade hub or engine mount can indicate deeper issues. Take photos and measure dent depth if possible, then compare with a similar unit in good condition to gauge the severity. If the mower has a brand-new engine or warranty, these factors may influence your decision to fix or replace.
DIY repair options for cosmetic dents and when to DIY vs hire a pro
Cosmetic dents on metal decks can sometimes be smoothed, filled, and repainted, but plastic components require gentler techniques or replacement. For steel decks, a soft hammer, dolly set, and careful tapping can flatten a shallow dent, followed by light sanding and primer. Epoxy or polyester filler can fill deeper impressions, then sanded smooth and sealed with a rust-inhibiting primer. Plastic covers can often be reshaped with careful heat and pressure, or reinforced with specialized plastic repair adhesives. If the dent is large, jagged, or affects the deck’s flatness or rigidity, or if you notice cracks around mounting points, it’s usually more cost-effective to replace the affected part or consult a professional. The decision to DIY versus hire a pro depends on your skill level, the mower’s value, and how much you rely on it for high-season lawn care. Remember to document every repair for future resale and warranty considerations, and keep expectations modest for price vs. performance.
Safety, prep, and working environment to minimize hazards
Safety first: always disconnect power sources before touching moving parts. For gas mowers, remove the spark plug wire and allow the engine to cool; for electric mowers, disconnect the battery or unplug the cord. Work in a well-ventilated area with stable lighting, and use a sturdy work surface or ramps to support the mower. Wear eye protection, gloves, and a dust mask if sanding or grinding. Keep a fire extinguisher or a small bucket of sand nearby when working near fuel. Clean the dented area with degreaser before applying any filler, and mask off surrounding paint to prevent overspray. If you’re unsure about a repair, stop and reassess rather than forcing a fix. In 2026, safety standards require proper PPE and a clear exit path in your workshop.
Maintenance and prevention to extend life after a dent
After you’ve completed a cosmetic repair, implement a light maintenance routine to extend the life of scratches and dents. Regularly inspect fasteners for tightness, lubricate moving parts, and keep belts aligned. Clean the cooling fins and underside of the deck, since debris can trap moisture and accelerate rust. Store your mower in a dry place with protective covers to minimize future dents. When painting, use durable enamel or spray paint designed for metal or plastic, and apply a clear coat to seal the finish. Remember that proper curing times are essential, so avoid heavy use for the first 24–48 hours after painting. Finally, maintain a simple repair log to track what you fixed and when, which helps you evaluate whether a repair is worth it in future seasons.
How to choose a scratch and dent mower when shopping and what to check
If you’re shopping for a dented mower, start with a hands-on inspection: test the starter, turn the blades, check the drive, and listen for unusual noises. Look beyond cosmetic flaws: verify the engine compression, belt tension, and oil or fuel condition. Ask the seller about the dent size, how it occurred, and whether the unit has been repaired before. Compare the asking price to models in good condition, keeping in mind that a dented deck can be an advantage if the price is low and a credible repair history exists. Review the warranty, return policy, and service history, and factor in replacement parts availability and future maintenance costs. A transparent seller who can provide photos, measurements, and repair receipts will help you make a confident decision in 2026.
Tools & Materials
- Safety gloves(Protect hands from sharp edges and debris)
- Safety goggles(Eye protection during sanding and grinding)
- Spark plug wrench / battery tool(Disable ignition on gas or electric units)
- Degreaser or isopropyl alcohol(Clean surfaces before repair)
- Soft hammer and dolly set(Flatten shallow metal dents)
- Body filler (epoxy/polyester) and hardener(Fill deeper dents (metal decks))
- Putty knife(Mix and apply filler)
- Sandpaper assortment (80-400 grit)(Smooth and feather edges)
- Primer and spray paint (matching color)(Protect metal and blend repair)
- Clear coat spray(Seal finish for durability)
- Masking tape and drop cloths(Prevent overspray and protect nearby parts)
- Rags and solvent for cleanup(Keep workspace tidy)
- Replacement panels or decals (optional)(Use if structure is compromised)
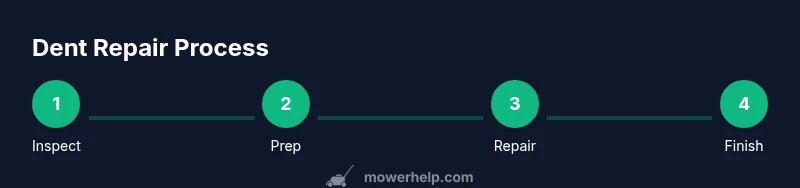
Steps
Estimated time: 1-2 hours
- 1
Prepare and secure the mower
Power off the mower, disconnect the spark plug wire or battery, and place the unit on a stable surface. Remove loose parts and set them aside so nothing gets lost during the repair.
Tip: Always unplug or disconnect power before touching any moving parts. - 2
Expose the dent area and clear the workspace
If needed, remove panels or shielding to access the dent. Clean the surface with degreaser to ensure good adhesion for filler or reshaping.
Tip: Mask surrounding paint to prevent overspray when repainting. - 3
Choose a repair method
Decide between reshaping for plastic/deck parts or filling for metal dents. For large or structural damage, consider replacing the affected panel rather than attempting a cosmetic fix.
Tip: Start with the simplest method to avoid unnecessary work. - 4
Apply filler or perform reshaping
For metal dents, use a dolly to smooth the surface, then apply a thin layer of filler. For plastics, follow heat-and-form techniques or specialized adhesive repair kits. Let it cure per product directions.
Tip: Apply thin coats and cure fully between applications. - 5
Sand, prime, and seal
Sand the repaired area level with the surrounding surface, then apply rust-inhibiting primer. Paint to match the original color and finish with a clear coat if desired. Allow adequate drying time.
Tip: Feather edges to blend repairs with the existing finish. - 6
Reassemble and test
Reinstall any panels, reattach guards and hardware, then reattach the power source. Start the mower and perform a controlled test on a small patch of grass to verify safety and operation.
Tip: Document the repair with photos for future reference.
Got Questions?
Are scratch and dent lawn mowers safe to operate after cosmetic fixes?
Yes, provided there is no structural damage and repairs are solid. Verify belts, blades, and guards are secure before mowing.
Yes, if the structure is sound and all parts are secure.
Will cosmetic dents affect mowing performance?
Most cosmetic dents won't affect cutting performance, but damage near critical components can create issues. Check deck clearance and blade alignment.
Usually not, but check critical parts for alignment and clearance.
Can I use filler on metal decks?
Epoxy-based fillers can work on metal decks when properly cured and sealed with primer. Sand smooth and repaint to prevent rust.
Yes, with proper curing and sealing.
Is repainting necessary for resale?
Not strictly necessary, but repainting improves appearance and can boost perceived value. Use matching paint and clear coat for durability.
Optional but helpful for value.
How long do cosmetic repairs take?
DIY cosmetic fixes typically take 1–3 hours depending on dent size and drying time between coats.
About a few hours, depending on dent size.
Do repairs affect the mower warranty?
Repairs by third parties can affect warranty status. Check your manufacturer's policy and keep receipts for any parts you replace.
Check policy; warranties may be affected.
Watch Video
The Essentials
- Assess dent severity before deciding on repair
- Prioritize safety and proper PPE
- DIY fixes save money but avoid structural damage
- Consider warranty and resale implications
- Document repairs with photos and notes