How to Put a Lawn Mower Motor on a Go Kart
Learn how to safely mount a lawn mower motor on a go kart with a complete step-by-step process, tool list, and safety checks. This guide covers frame compatibility, drive alignment, fuel and cooling considerations, and testing for a successful DIY conversion.

You’ll learn how to safely mount a lawn mower motor on a go kart, align the drive train, install essential controls, and perform a controlled test run. This quick guide outlines planning, mounting fundamentals, safety measures, and testing steps to help you complete the conversion with confidence.
Safety and Planning for a Go Kart Engine Swap
According to Mower Help, safety should be the top priority whenever you modify powertrains. Start by surveying your workspace, wearing PPE (gloves, eye protection, and sturdy footwear), and ensuring you have a clear, well-ventilated area. Define the project scope, set a realistic timeline, and prepare for potential extra materials. This section also covers emergency shutdown practices, fire safety, and the importance of verifying that the frame can handle the added torque and weight of a lawn mower motor. Keeping a detailed plan and a simple risk assessment helps you avoid rushed decisions that could lead to injury or damage to the kart.
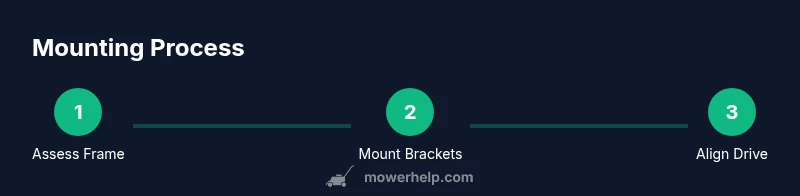
Assessing Frame and Engine Compatibility
The go kart frame must tolerate the lawn mower engine’s weight and thrust. Check the engine mounting pattern, shaft alignment, and overall weight distribution. Look for frame tubes that can be reinforced if needed and identify a clear mounting surface that won’t interfere with wheels, steering, or the seat. Consider a smaller displacement engine if your frame isn’t designed for heavy-duty use. A compatible engine and frame combination reduces vibration and wear, leading to a longer-lasting build.
Mounting Strategy and Alignment
A precise mounting strategy prevents drivetrain misalignment, which can cause belt or chain derailment and excessive wear. Plan the engine location so the output shaft aligns with the drive sprocket or belt pulley on the rear axle. Use sturdy brackets or adapters and confirm that mounting holes line up before drilling. Align the engine’s output with the kart’s drive system and ensure there is adequate clearance for air intake, exhaust, and cooling. Proper alignment minimizes vibration and improves steering stability during a go kart test.
Drive System: Transmission, Clutch, and Sprockets
Select a drive method (belt or chain) that mirrors the engine’s torque characteristics and your kart’s rear axle. Install the correct pulley or sprocket sizes to achieve a safe final drive ratio, and ensure proper belt tension or chain slack. Include a tensioner or idler pulley to maintain consistent engagement as the engine RPM changes. This section also covers braking compatibility and how to prevent power transfer from binding during acceleration.
Fuel, Cooling, and Electrical Considerations
Mounting a lawn mower engine requires careful routing of fuel lines, air intake, and cooling paths. Use a fuel tank placement that minimizes spill risk and keeps lines away from heat sources. Install a simple cooling shroud if the engine is air-cooled and avoid restricted airflow. For electrical, wire a kill switch, ignition switch, and throttle linkage with appropriate safeguards. Always follow fuel safety guidelines to avoid leaks, spills, or fumes near hot exhaust.
Safety Enclosures, Braking, and Steering Interactions
Modifications should not compromise the kart’s braking or steering. Add protective plates or guards where moving parts could catch clothing or appendages. Ensure the throttle control and kill switch are easily accessible, and install a simple safety tether if the kart will be used remotely or by others. Verify that the fuel line and ignition wiring are secured away from the exhaust and moving components to prevent heat damage and short circuits.
Testing, Tuning, and Break-in Procedures
Begin with slow, controlled static tests in a safe, open area. Check for unusual vibrations, noises, or movement of mounting hardware. Gradually increase RPM while monitoring engine temperature and belt tension. Record observations and adjust alignment, tension, or mounting as needed. A careful break-in period helps the engine adapt to the new drive conditions and reduces the risk of early wear.
Common Mistakes and Troubleshooting
Avoid common mistakes like overtightening bolts, misaligning pulleys, or skipping a formal safety check. When problems arise, re-check mounting brackets, alignment tolerances, and fuel delivery. Cooling issues and electrical shorts are frequent culprits; inspect hoses and wires for wear and ensure connections are secure.
Maintenance and Long-Term Upkeep
After the initial integration, plan regular maintenance checks for the engine, drive belt or chain, and mounting hardware. Schedule periodic inspections for frame fatigue, fastener torque, and lubrication points. Document service intervals and test results to maintain performance and safety across the kart’s lifespan.
Tools & Materials
- Engine mounting brackets/adapters(Choose brackets compatible with your engine pattern and frame mounting points)
- Engine mounting bolts, nuts, and washers(Use hardware appropriate for frame material and engine pattern)
- Vibration isolation spacers/shims(Optional to reduce engine vibration on rough terrain)
- Drive belt or chain kit (pulleys/sprockets)(Match drive method to engine speed and frame layout)
- Tensioner pulley or idler(Maintain proper belt/chain tension during RPM changes)
- Throttle cable and governor linkage(Ensure responsive throttle control)
- Kill switch and ignition switch(Critical safety features for immediate shutdown)
- Fuel lines, clamps, and fuel filter(Route away from heat and moving parts)
- Fuel tank or tank mounting hardware(Stable, upright placement with venting)
- Air intake routing and exhaust shield(Prevent debris ingress and overheating)
- Wrenches, sockets, and torque wrench(Use correct sizes and torque specs for fasteners)
- Drill and metal bits(Required if you reinforce or create new mounting holes)
- Pliers, zip ties, and electrical tape(Secure wiring and fuel lines)
- Safety gear(Gloves, goggles, and sturdy clothing)
Steps
Estimated time: 4-6 hours
- 1
Prepare frame and gather components
Inspect the kart frame for cracks and measure mounting points. Gather the engine, mounting brackets, and drive components. Confirm you have the right tools and safety gear before you begin.
Tip: Double-check frame welds and support before drilling any new mounting holes. - 2
Position engine and establish mounting pattern
Place the engine close to the frame surface where it will be mounted. Mark drill points through the engine’s mounting holes and test fit brackets without fasteners to confirm alignment.
Tip: Use mock-up screws to verify fit before final drilling. - 3
Mount engine brackets to frame
Bolt brackets to the frame at the marked locations, ensuring square alignment. Use washers for load distribution and snug fasteners to avoid movement during operation.
Tip: Never over-tighten—torque gradually to avoid bending brackets. - 4
Install drive train components and align output
Attach pulleys or sprockets to the engine output and rear axle. Align with a straight line, and verify belt/chain tension without binding.
Tip: Use a straightedge or string line to confirm alignment across all rotating parts. - 5
Connect throttle and safety controls
Install the throttle linkage and kill switch. Test the throttle range at idle and full throttle while ensuring the kill switch immediately stops the engine.
Tip: Mount controls within easy reach of the driver for quick shutdown. - 6
Route fuel, wiring, and cooling paths
Secure fuel lines away from heat sources and moving parts. Tie wiring neatly with protection. Ensure adequate clearance for air intake and exhaust.
Tip: Use fuel hose clamps and heat shields to prevent leaks and chafing. - 7
Perform static checks and initial test
With no rider, perform a controlled test stand to monitor engine behavior, vibrations, and drive engagement. Confirm all fasteners remain secure during the test run.
Tip: Have a fire extinguisher accessible and a clear test area. - 8
Progress to controlled on-ground test and tune
Gradually test acceleration, braking, and handling with a slow speed run before any full-speed testing. Make minor adjustments to alignment and tension as needed.
Tip: Document RPM ranges and final drive ratios for future maintenance.
Got Questions?
Is it safe to mount a lawn mower engine on a go kart?
Yes, with proper mounting, protective guards, and safe operating procedures. Always evaluate frame strength and maintain safe clearances around moving parts.
Yes, but only after you reinforce the frame, add guards, and test thoroughly in a controlled area.
What engine types are best for go kart conversions?
Lightweight, air-cooled petrol engines with compatible mounting patterns work best. Avoid engines that exceed frame strength or require complex electrical systems.
Lightweight, air-cooled petrol engines with simple mounting patterns are ideal.
Do I need to reinforce the frame?
In many cases, yes. A reinforced frame reduces vibration and prevents fatigue at mounting points during aggressive use.
Most builds benefit from frame reinforcement at mounting points.
Can I reuse the original fuel tank?
You can if it’s securely mounted, properly vented, and the fuel line routing is safe and unobstructed by exhaust or moving parts.
You can reuse it if it’s securely mounted and safe to use.
What is the first safety test after installation?
Do a static test with no rider to check for abnormal noise, vibration, or movement. Then perform a slow-velocity test in a controlled area.
Start with a no-driver test and then a slow, controlled run.
Watch Video
The Essentials
- Plan thoroughly before any modification to the frame or engine.
- Ensure frame, brackets, and drive components are compatible and secure.
- Test progressively in a controlled environment and document findings.
- Prioritize safety features and proper shutdown capabilities.