Toro Lawn Mower Belt Guide: Inspect, Replace, Maintain
Learn how to inspect, replace, and maintain the Toro lawn mower belt with step-by-step guidance, safety tips, and troubleshooting to keep your mower running smoothly.

By following these steps, you’ll inspect, replace, and maintain the lawn mower belt toro with confidence. This quick guide covers belt types, safety checks, and a practical replacement process tailored for Toro decks. Keep your mower running smoothly and avoid common belt failures with proper maintenance. This post from Mower Help also includes troubleshooting tips.
Belt basics: what a belt does in a Toro mower
Understanding the belt system in a Toro lawn mower is the first step to diagnosing why the blade won’t engage or why the mower won’t move. The belt connects the engine to the blade pulley (deck belt) and, on many Toro models, to the drive system (drive belt). If either belt slips, wears unevenly, or breaks, you’ll notice a loss of torque, sluggish blade speed, or a squeal from under the hood. According to Mower Help, a healthy belt should have a uniform width, smooth surface, and no cracks or fraying at the edges. A failing belt will often show cracks near the ribbed sections, glazing that reduces friction, or a noticeable looseness when you try to twist it with your fingers. The Toro belt setup can vary by model, but the underlying principle is the same: belts transfer rotational power and keep components synchronized. Keeping this awareness helps you decide whether the issue is a simple misrouting, a worn belt, or a problem with the pulleys.
Common belt failure symptoms
Belt wear manifests in several telltale signs. If you hear squealing when starting or during operation, the belt may be slipping or misaligned. A cracked or frayed edge is a clear red flag that the belt is past its useful life. Reduced blade height or uneven cuts can indicate a worn deck belt, while slow or inconsistent mower movement often points to a stretched or damaged drive belt. If the belt looks glazed or has shiny surfaces, it’s not gripping pulleys properly and needs inspection or replacement. Finally, if the mower stops suddenly or the blade stops rotating while the engine runs, inspect both belts and pulleys for obstruction, wear, or damage. Regularly checking for these symptoms helps prevent sudden breakdowns.
Types of Toro belts and how to identify yours
Toro uses different belts depending on the model and the system. Most decks rely on a deck belt to drive the blade, while drive belts handle propulsion under the deck. The belt style can vary by model family (e.g., single-blade vs. mulching decks) and by year. To identify your belt, locate the belt routing diagram usually stamped on the underside of the mower or in the owner’s manual. Compare the belt width, rib pattern, and end shapes with the diagram. If you’re unsure, remove the belt and take it to a parts retailer with your model number for a precise match. The goal is to have a belt that sits snugly in pulleys without twisting and that maintains proper tension during operation. For the keyword strategy, you’ll often see references to the term lawn mower belt toro when discussing replacements for Toro models.
Safety first: prep and safety checks
Safety is non-negotiable when servicing a Toro mower. Start by turning off the ignition, removing the spark plug wire, and allowing the engine to cool. Disconnect any power sources on electric mowers. Remove the battery if applicable and wear cut-resistant gloves and safety glasses. Work in a well-lit, stable area, and keep the mower on a flat surface. Before removing any covers, note how components are routed, and consider taking photos to guide reassembly. If you’re unsure about fuel safety, avoid working near open flames or sparks. This section emphasizes the importance of controlled steps and protective gear to prevent injuries and accidental starts.
Belt routing and the two main belt systems on Toro decks
Most Toro decks use two main belt systems: the drive belt and the deck belt. The deck belt powers the blade by linking the engine pulley to the blade pulley, while the drive belt connects the engine to the transmission for forward movement. Correct routing means keeping the belt tight against pulleys and避免s cross-routing. A misrouted belt can slip, wear unevenly, or whip against the underside of the deck cover. Always refer to the routing diagram for your specific model. A photo or diagram in the service manual clarifies the path and helps you verify that the belt sits correctly in every groove.
Inspection workflow: how to assess wear without replacing
Start by visual inspection: look for cracks, fraying, glazing, or missing ribs. Run your finger along the belt thickness and check for uniform width; any variance can indicate wear. Spin the pulleys by hand (with instrument off) to see if the belt tracks true or if it binds. Listen for unusual noises during a gentle rotation that might signal pulley damage or misalignment. If you find glazing or slick surfaces, the belt’s grip is compromised and replacement is warranted. Document your findings and compare against the manufacturer routing diagram. This approach helps you decide whether you can postpone replacement or proceed with a belt install.
Replacing a worn belt: general approach
When you replace a worn belt, it’s essential to obtain a Toro-compatible belt that matches the model’s routing diagram. Remove the old belt from all pulleys before installing the new one, and ensure it sits square in every groove. Don’t force the belt into tight spots; if it doesn’t seat easily, recheck routing and pulley alignment. After installation, rotate the pulleys by hand to confirm smooth operation and that the belt doesn’t rub against any overhangs. Finally, reassemble covers and test the mower on a flat surface before returning to regular use.
Maintenance strategies to extend belt life
Preventive maintenance is your best defense against premature belt failures. Regularly clean the belt path to remove grass clippings, dirt, and debris that can cause uneven wear. Inspect pulleys for chips, flat spots, or wobble, and replace worn pulleys as needed. Keep blades sharp; dull blades force the belt to work harder to achieve the same cut, increasing wear. Use a belt dressing only if specifically recommended by Toro, and never apply lubricants or solvents that can degrade plastic belt materials. Establish a routine where you check belts every 8–12 hours of use, or at least monthly during peak mowing season.
Authority sources
For safety and maintenance standards, refer to trusted sources:
- https://www.osha.gov
- https://extension.illinois.edu
- https://extension.umn.edu/lawn-care
Tools & Materials
- Toro-compatible replacement belt(Ensure model compatibility; carry both deck and drive belt options if unsure)
- Spark plug wrench(Used to safely disconnect spark plug wire)
- Socket wrench set (metric and SAE)(For pulleys and blade adapter bolts)
- Flathead and Phillips screwdrivers(Covers and guards; prying where allowed)
- Gloves and safety glasses(Protect hands and eyes during disassembly)
- Pliers or needle-nose pliers(For belt removal and tension clamps)
- Marker or tape(Label routing before removal; helps during reassembly)
- Clean rag and mild solvent(Clean pulleys and grooves before installing new belt)
Steps
Estimated time: 30-60 minutes
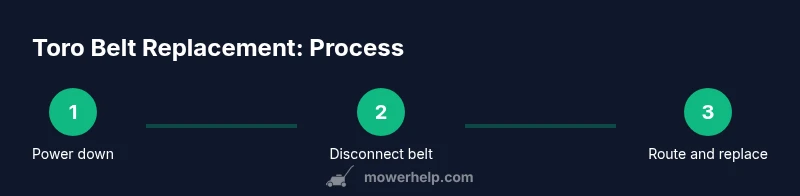
- 1
Power down and remove the spark plug wire
Shut off the mower, remove the key or unplug if electric, and gently detach the spark plug wire with a spark plug boot puller. This prevents accidental starts during disassembly and protects you from sparks.
Tip: Verify the engine won’t start by attempting a quick crank after wire removal; never rely on the switch alone. - 2
Access the belt area and note routing
Remove protective covers and shields to expose the belt path. Take clear photos or draw a quick sketch of how the belt sits on each pulley to guide reassembly.
Tip: A photo guide prevents misrouting, especially on Toro models with complex routing. - 3
Relieve tension and remove the old belt
Loosen the tensioner or belt clamps, then carefully lift the belt away from all pulleys. Do not twist the belt while removing it, as it can stretch or crack.
Tip: Keep pulleys aligned; a misaligned belt during removal can cause permanent damage. - 4
Compare and select the correct replacement belt
Inspect the old belt for width, rib pattern, and length. Compare these details to the Toro manual or parts diagram to ensure you choose the exact replacement.
Tip: If unsure, bring the old belt or model number to a Toro parts dealer for a precise match. - 5
Install the new belt following routing
Place the belt onto the pulleys in the correct order. Avoid forcing it into place; if it binds, recheck routing and pulley alignment.
Tip: Install the belt dry; some models tolerate a light spray of belt-surface conditioner, but avoid lubricants that degrade rubber. - 6
Re-tension and alignment check
Reapply tension as specified by the Toro diagrams and verify that the belt sits square in all grooves. Spin the blade pulley by hand to ensure free rotation without rubbing.
Tip: A correctly tensioned belt should not slip when you apply slight torque to the pulley. - 7
Reassemble covers and guard
Replace all covers and guards securely. Ensure no tools or rags are left in the belt area that might cause interference.
Tip: Double-check all fasteners before startup to avoid loose components during operation. - 8
Test run and belt function check
Reconnect the spark plug wire, start the mower, and run briefly to confirm blade engagement and forward movement. Listen for unusual noises and recheck belt tension if needed.
Tip: Test on a flat, clear area to observe belt behavior safely.
Got Questions?
Can I replace a Toro belt myself, or should I hire a professional?
Replacing a belt on a Toro mower is often a doable DIY task for homeowners with basic tools. Follow the model-specific routing diagram and safety steps, and replace worn pulleys if needed. If you encounter unusual resistance or suspect a damaged transmission, consult a professional.
Yes, you can replace it yourself if you follow the routing diagram and safety steps. If you feel unsure, seek professional help.
What belt do I need for my Toro model?
The belt you need depends on your exact Toro model and deck. Check the owner’s manual or the routing diagram on the mower, then match the width, length, and ribbing. If in doubt, bring the old belt to a parts retailer for correct identification.
Check the manual or routing diagram to identify the exact belt, and verify with a parts retailer if needed.
How can I tell if the belt is the problem or the pulleys?
If the belt shows visible wear but the pulleys spin freely without binding, it’s likely a belt issue. If pulleys wobble, crack, or the belt binds when installing, the pulleys or bearings may be the real problem. Always inspect both when diagnosing.
Look for wear on the belt and wobble or binding in the pulleys to determine whether it’s belt or pulley related.
Is it safe to operate the mower with a damaged belt?
Operating with a damaged belt can cause further damage to the mower and pose safety risks. Stop mowing, replace the belt, and inspect for additional wear on pulleys and guards before resuming use.
No. If the belt is damaged, stop and replace it before mowing again.
Should pulleys always be replaced when the belt is worn?
Pulleys should be inspected for glazing, cracks, and bearing wear. If any pulley shows signs of damage or misalignment, replace it to prevent rapid belt wear or failure after a replacement.
Inspect pulleys and replace if you notice damage or misalignment.
Can I reuse my old belt after re-routing if it still looks fine?
If the belt has no cracks, glazing, or wear and sits evenly in grooves, it may be reusable. However, most technicians recommend replacing any belt that shows wear to prevent unexpected failure.
Only reuse if there’s no wear and it seats properly; otherwise, replace.
Watch Video
The Essentials
- Identify deck vs. drive belts and route correctly
- Inspect belts for cracks, glazing, and wear before replacing
- Use Toro-compatible belts matched to your model
- Test belt operation carefully after reassembly