Repair Electric Lawn Mower: Step-by-Step Guide
Learn how to repair an electric lawn mower with a clear, safe DIY approach. Diagnose common issues, perform safe tests, replace worn parts, and extend mower life with practical maintenance tips from Mower Help.

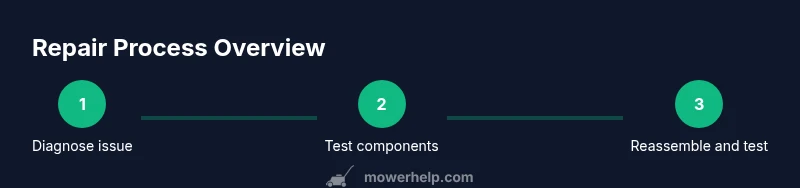
You will diagnose and repair common issues on electric lawn mowers, from dead batteries to faulty switches, safely test operation, and restore reliable cutting performance. Before you start, unplug the battery or disconnect the power, wear protective gear, and have essential tools ready. This guide covers step-by-step repairs, safety, and when to seek professional help.
Why electric lawn mowers require maintenance
Electric lawn mowers offer convenient, quiet operation, but they depend on a network of electrical and mechanical components that can wear out or fail. Regular maintenance helps prevent unexpected downtime, extends the life of the mower, and keeps cutting performance consistent. According to Mower Help, a proactive maintenance routine reduces downtime and can significantly lower the risk of sudden breakdowns. Start with a simple seasonal check: inspect the power cord or battery pack, examine the blade, and ensure fasteners are snug. Even small issues—like a loose battery connection or a dirty switch—can cause sudden shutdowns or poor mowing results. By treating maintenance as a routine habit, you’ll minimize surprises, keep warranty eligibility intact where applicable, and preserve the investment you’ve made in your yard care tools.
Common problems and quick checks
Even well-made electric mowers can fail for predictable reasons. A weak or dead battery is the most common culprit for cordless models, while cords, switches, and safety interlocks frequently cause interruptions for corded models. Start with the basics: check the battery (or charger) to confirm it’s charging and holding a charge; verify that the safety interlock and trigger switch engage properly when you press the handle; inspect the blade for dullness or damage; and look for corrosion on terminals or loose connections. If you notice an unusual smell, heat buildup, or buzzing without motor rotation, stop using the mower and perform targeted checks with a multimeter to isolate the fault. Document any steps you take to help future maintenance and troubleshooting.
Safety and electrical considerations
Electrical systems in lawn mowers pose unique risks, including shock hazards, short circuits, and mechanical injuries from the blade. Always unplug the power source before opening any housing or removing covers. Wear PPE such as gloves and safety glasses, and work in a dry, well-ventilated area. Use a non-conductive work surface and keep water away from all electrical components. Dispose of damaged batteries or cords following local guidelines to prevent environmental harm. If you’re unsure about electrical measurements, consult the manual or a professional. The goal is to prevent harm while you diagnose and repair the mower, not to rush through a fix.
Diagnosing battery and motor issues
Battery health determines how long and how effectively an electric mower runs. Start by testing voltage output with a multimeter and checking for a full charge on cordless models. If the battery fails to hold a charge after a complete cycle, it’s often time to replace it with a correctly rated pack. For motor-related problems, listen for grinding noises, unusual heat, or stuttering during operation. A motor that struggles to start may indicate worn brushes, bad windings, or internal connector corrosion. Always isolate the power source before diagnosing motor components, and trace wiring for damaged insulation or loose connectors. When in doubt, proceed in small, testable steps rather than replacing multiple parts at once.
Cleaning, disassembly, and inspection
A clean mower runs cooler and with fewer misreads from sensors or switches. Start by removing debris from the blade area, cooling vents, and housing. Use dry brushes or compressed air to lift dirt away; avoid spraying liquids into the motor or battery housing. When disassembling, photograph each step for reassembly and label wires if necessary. Check blade balance and condition; a nicked or bent blade should be replaced rather than sharpened, as imbalance can cause vibration and cut quality issues. Inspect the safety interlock mechanism and its wiring for continuity. Reassemble only after all components are dry and secure.
Plan before you repair: where to start and what to test
Before touching any parts, define the problem based on symptoms, then map out a logical sequence of tests. Start with power, then safety interlocks, then simple continuity checks across accessible wires. If the mower runs briefly but stops, focus on battery health or switch actuation. If there’s no power at all, verify the power source, cord integrity (for corded models), and fuse or circuit breaker status (if applicable). Developing a small, repeatable test routine helps you identify the faulty component without unnecessary part swaps. Remember: if you encounter high voltage, burnt components, or melted insulation, stop and seek professional help. Your safety comes first.
When to replace parts and how to source replacements
Some electric mower parts wear out with use, especially batteries and switches. Replacement parts should be matched to your model’s specifications and rated for the same voltage and amperage. Start with the most likely culprit based on symptoms (e.g., battery or switch) and replace that part first to confirm the fix. Source replacements from reputable suppliers, the manufacturer’s official parts catalog, or authorized service centers. Keep receipts and note serial numbers for warranty considerations. If a part is hard to source or if electrical safety is a concern, contact a professional technician for a precise diagnosis and safe replacement guidance.
Maintenance routines to extend life and performance
A sustainable maintenance routine covers regular inspection, cleaning, lubrication, and safe storage. Clean blades and housings after mowing to prevent rust and corrosion. Check blade balance, replace dull or damaged blades, and inspect the drive mechanism if your model includes one. Periodically inspect wiring and interlocks for wear, and test safety features before every use. Store the mower in a dry, ventilated area away from extreme temperatures. By adopting these routines, you’ll preserve cutting quality, extend service life, and reduce the likelihood of unexpected breakdowns. Mower Help recommends setting a seasonal maintenance schedule and sticking to it for best results.
Authority sources and safety resources
For safety guidance and best practices, consult authoritative resources from recognized institutions. These sources provide frameworks for electrical safety and maintenance that complement hands-on repair work:
- https://www.osha.gov/electrical-safety
- https://extension.illinois.edu
- https://www.nfpa.org/
Using these references, align your repair approach with established safety standards and recommended maintenance practices. Always follow model-specific instructions in your user manual and consider professional service for complex repairs. The goal is to maintain safe operation and protect your investment in lawn care equipment.
Tools & Materials
- Multimeter or voltmeter(Digital preferred; measure DC voltage and continuity across wires)
- Screwdriver set (Phillips and flat-head)(Include small and medium sizes; magnetic tips helpful)
- Nut drivers and pliers (needle-nose)(Useful for clamp terminals and small fasteners)
- Wire cutters/strippers(For trimming damaged wires and preparing connections)
- Electrical contact cleaner(Clean corrosion on terminals and connectors)
- Replacement battery pack (if cordless)(Only if the current pack fails to hold charge; ensure correct voltage)
- Replacement blade (if damaged)(Select a blade of the same size and mount pattern)
- Safety gear(Gloves, safety glasses, and closed-toe shoes)
- Owner’s manual(Model-specific instructions and safety interlocks)
- Battery charger (for cordless models)(Only if you are testing with a charge cycle)
Steps
Estimated time: 60-90 minutes
- 1
Disconnect power and safety check
Unplug the charger or remove the battery. Ensure the unit cannot be powered by any source. Put on PPE and lay out tools in a safe, dry workspace.
Tip: Double-check connectors before touching exposed conductors; verify there is no residual charge. - 2
Inspect battery and terminals
Visually inspect the battery pack and all terminals for corrosion, looseness, or damaged insulation. Clean with contact cleaner and reseat connections firmly.
Tip: Take photos of how wires are connected before disconnecting anything to ease reassembly. - 3
Test with a multimeter for continuity
Set the meter to the appropriate DC range and check across the battery leads and key wires. Look for consistent readings and signs of open circuits in suspect cables.
Tip: If readings are inconsistent, isolate the suspect section and test again to narrow down the fault. - 4
Check safety interlock and trigger switch
Operate the handle and engage the interlock; verify it interrupts power when released. Measure resistance across switch terminals if accessible.
Tip: Worn interlocks or stuck switches are common culprits; replacements are usually straightforward. - 5
Inspect motor and drive assembly
Look for burnt smells, discoloration, or unusual warmth. Manually rotate the blade (carefully) to detect binding and inspect drive belts or gears for wear.
Tip: Do not run the motor while your hand is near the blade; ensure the area is clear of tools and debris. - 6
Reassemble and run a test
Reconnect the power source, reassemble housing, and perform a gentle test run on a clear patch of lawn. Observe for abnormal noises, smoke, or vibrations and stop if anything unusual occurs.
Tip: Start with a short test and gradually increase running time as you confirm proper operation.
Got Questions?
Can I repair an electric lawn mower myself?
Yes, many common issues can be addressed at home with proper safety practices and the right tools. Avoid complex electrical faults if you’re unsure.
Yes, many common issues can be repaired at home if you follow safety steps and use the right tools.
What should I do if the mower won't start after repairs?
Recheck the battery charge, verify all connections are secure, and confirm the safety interlock is functioning. If unresolved, test components sequentially or seek professional help.
Check the basics—battery, connections, and safety interlock—then retest. If it still won't start, consider a professional diagnosis.
Is it safe to use water to clean an electric mower?
Avoid spraying water on electrical components. Use dry cleaning methods and minimal moisture, focusing on the blade and exterior housing.
Don’t splash water on electrical parts; clean with a dry brush and compressed air.
How do I know when to replace the battery?
If the battery no longer holds a charge, or shows swelling or rapid voltage drop, replace with the correct-rated pack.
If it won’t hold a charge, consider replacing the battery with a compatible pack.
Are there safety concerns specific to electric lawn mowers?
Yes—watch for electrical shocks, blade-related cuts, and battery hazards. Always wear PPE, keep away from water, and disconnect power before working.
Be mindful of shocks and blade hazards; always disconnect power before working.
Watch Video
The Essentials
- Power off before touching internal parts.
- Check battery health and connections first.
- Test safety interlocks thoroughly.
- Replace damaged blades or failed components as needed.
- Document steps to aid future maintenance.