Can You Put Lawn Mower Blades Upside Down? A Safety Guide
Find out if you can install lawn mower blades upside down, how orientation affects cutting quality and safety, and follow this step-by-step blade guide to install and maintain blades properly.

Definition: Generally, you should not install lawn mower blades upside down. The sharpened edge must face the ground to cut grass effectively, while the flat side rides against the top of the blade. Installing upside down can leave dull edges scraping the turf rather than cutting, resulting in ragged lawns and higher engine strain. If in doubt, replace the blade and consult your mower's manual.
Why blade orientation matters
According to Mower Help, blade orientation is not optional—it directly affects cutting performance, safety, and mower balance. The bevel or grind on a lawn mower blade is designed to face downward toward the grass, so the sharpened edge slices cleanly with every pass. Installing a blade upside down can leave dull edges scraping the turf rather than cutting, resulting in ragged lawns and higher engine strain. In some mowers, improper orientation also reduces lift, increases grass clumping, and can cause excessive vibration that wears bearings over time. Before you even start the engine, confirm you are using the correct blade for your model and that it is not warped or cracked. A quick visual check will save you time and headaches later.
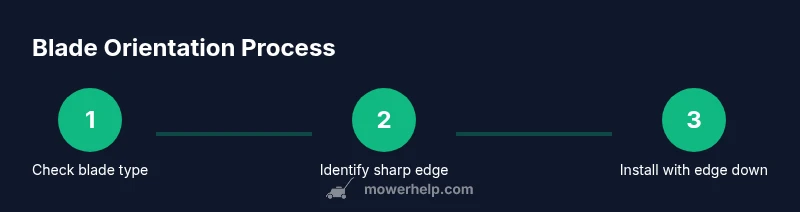
How to identify the correct edge on your blade
Most mower blades have a single sharp edge and a flat, non-sharpened back. The correct orientation places the sharpened edge toward the ground so that each pass slices grass cleanly. If the blade has dual bevels or two cutting surfaces, reference the mower’s manual to identify which side is intended to contact the grass. When in doubt, remove the blade and inspect the grind pattern—consistent bevel on one side indicates the intended orientation. Always compare with the existing blade’s original orientation if you’re replacing rather than rotating. Store removed blades with the sharpened edge protected to avoid accidental cuts.
What happens if you install upside down
Installing upside down can dramatically reduce cutting quality; you may see uneven heights, torn grass, and more visible streaks. An upside-down blade tends to leave the dull side exposed, requiring more passes to achieve the same result and increasing fuel consumption. Some mowers rely on blade balance to prevent vibration; upside-down mounting can shift the center of gravity and stress the spindle and deck. In short, flipping a blade is a band-aid that often creates new problems rather than solving the original issue. If your blade looks worn or damaged, replace it rather than attempting a flip.
Quick safety check before removing or installing blades
Before touching any moving parts, disconnect the spark plug (or remove the battery on electric models) and wait for the blade to stop. Put on cut-resistant gloves and safety glasses. Use a proper wrench or socket to hold the blade and prevent slipping, then loosen the blade nut in a counterclockwise direction. Inspect the blade for cracks, chips, or excessive dullness. Replace if in doubt. To keep track of orientation, take a photo of the blade’s current position before removing it, and reattach with the sharpened edge facing the ground.
Step-by-step verification and precautions (intro to STEP-BY-STEP) and alignment tips
After installation, perform a careful visual check: the blade should sit flat on the spindle, with the sharpened edge facing down and centered in the blade mounting cup. If your mower uses a mulching blade or a dual-edge model, ensure you’re following the specific orientation for that blade type. Recheck all fasteners for snug fitment, then perform a safe, low-speed test run on a clear patch of lawn with the mower deck guard in place. If anything sounds off—grinding, thumping, or excessive vibration—stop the engine and re-evaluate the mounting.
Tools & Materials
- Gloves (cut-resistant)(Protect hands from sharp edges)
- Safety glasses(Eye protection required during blade work)
- Socket wrench or blade wrench(Fit to your blade nut size)
- Torque wrench or manufacturer-specified torque(Avoid over-tightening)
- New mower blade (if replacing)(Ensure compatibility with model)
- Screwdriver or blade removal tool(Assist with stubborn blades)
- Rags or a tray(Catch oil or debris)
Steps
Estimated time: 15-25 minutes
- 1
Power down and access blade
Shut off the mower and disconnect the spark plug wire (or remove the battery on electric models). Remove any blade covers so you can clearly see the blade nut and securing hardware. This step prevents accidental starts and gives you daylight access to the blade.
Tip: Always begin with power isolation to avoid injury. - 2
Loosen and remove the blade nut
Secure the blade with one hand using a gloved grip and loosen the nut with a wrench in the opposite direction (usually counterclockwise). Do not strike the blade with a hammer or forceful blows—this can crack the blade or spindle.
Tip: Hold the blade steady to prevent it from rotating as you loosen the nut. - 3
Remove and inspect the blade
Carefully lift the blade from the spindle and inspect for cracks, chips, or excessive dullness. If the blade is damaged, replace it rather than attempting a repair. A balancing check with a fingertip along the edge helps detect light warping.
Tip: If uncertain about wear, replace the blade; dull or cracked edges can be dangerous. - 4
Identify correct orientation
Look for the bevel or grind on the blade—this side is designed to face downward toward the ground. If replacing, align the new blade so the sharpened edge points down and the flat side faces upward. Verify the blade’s holes or center hole aligns with the spindle.
Tip: When in doubt, compare with the blade’s original orientation or the manual. - 5
Install the blade and tighten
Place the blade back onto the spindle with the correct orientation, insert the nut, and securely tighten to the manufacturer’s torque specification. Spin the blade by hand to ensure it turns freely without rubbing. Reattach any guards or covers you removed.
Tip: Use a torque wrench if torque specs are provided to avoid over-tightening. - 6
Test run and final checks
Reconnect the spark plug wire or battery, start the mower at idle in a clear outdoor area, and listen for vibration or unusual noises. If the blade wobbles or touches the deck, shut down and recheck mounting. Confirm the blade’s sharpened edge remains facing downward.
Tip: Only test run on a flat, open area with bystanders clear.
Got Questions?
Can all lawn mower blades be oriented both ways?
No. Most blades have a fixed bevel direction designed to face the ground for proper cutting. Installing upside down typically reduces performance and can cause imbalance.
Most mower blades are designed for one orientation and should face downward toward the ground for cutting. Upside-down installation usually lowers performance and can cause vibration.
What signs indicate a blade is installed incorrectly?
Unusual vibrations, uneven cut, increased grass tearing, or the blade rubbing against the mower deck are common signs. If you notice any of these, stop and recheck orientation.
Look for vibrations or uneven cutting; if you notice rubbing or noise, recheck blade orientation and mounting.
Is it ever acceptable to flip a blade temporarily?
Only in rare cases and with an identical blade type; generally not recommended. Most blades rely on a bevel direction that should face downward.
Flipping is usually not recommended; rely on the correct orientation and replace if unsure.
Do mulching blades have different orientation rules?
Mulching blades follow the same principle: sharp edge toward the ground. Always consult the manufacturer for blade-specific guidance.
Mulching blades still need proper edge orientation; check the manual for any exceptions.
Where can I find torque specs for reinstalling blades?
Torque specs are found in the mower’s manual or the blade manufacturer’s guide. Use a torque wrench when precise tightness is required.
Check the manual or manufacturer’s guide for torque numbers and use a torque wrench if available.
What should I do with a damaged blade?
Replace a damaged blade rather than attempting a repair. Damaged blades can crack during use and cause injury.
If the blade is cracked or bent, replace it rather than trying to fix it.
Watch Video
The Essentials
- Always orient the sharpened edge toward the ground
- Verify blade type mirrors model instructions
- Inspect for damage before reinstalling
- Replace worn blades rather than flipping
- Test at low speed to confirm proper setup