How to Remove a Lawn Mower Blade Safely
Learn how to safely remove a lawn mower blade with a clear, step-by-step guide. This expert walkthrough covers safety gear, tools, torque basics, installation tips, and maintenance to extend blade life.

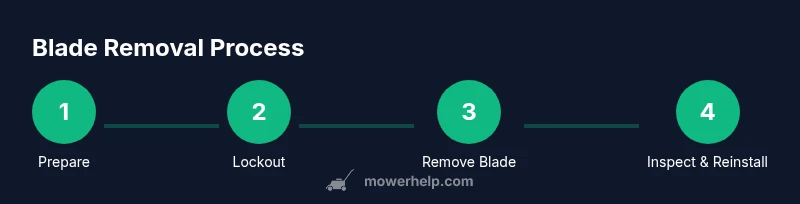
You can safely remove a lawn mower blade by disconnecting power, tipping the mower to access the underside, and loosening the blade bolt with the correct socket. This quick guide outlines essential safety gear, the exact removal steps, common mistakes to avoid, and guidance on reinstalling or replacing the blade.
Safety First: Gear and Site Setup
Removing a lawn mower blade is a common maintenance task, but it carries sharp edges and a moving blade assembly. Before you touch anything, ensure the engine is off, the spark plug wire is disconnected, and the mower sits on a flat, stable surface. According to Mower Help, safety is foundational when removing blades; never bypass PPE or the lock-out steps. For gas mowers, allow the engine to cool and drain any excess fuel if necessary. For electric mowers, disconnect the battery pack or unplug from the outlet. If possible, use a stable stand or blocks to prevent tipping. Remember: even when the mower appears still, the blade is a sharp hazard that can cause severe cuts if mis-handled.
Blade Anatomy and Thread Directions
Most mower blades are secured by a central bolt that threads into the spindle. In many models, the bolt uses a standard right-hand thread (tightens clockwise, loosens counterclockwise). Some models or older units may use a left-hand thread, which tightens counterclockwise and loosens clockwise. Always inspect the blade and spindle to confirm the thread direction before attempting removal. If in doubt, consult your mower’s manual or the blade labeling. This understanding helps you avoid stripping bolts or overtightening when reinstalling.
Workspace, PPE, and Safety Practices
Set up a well-lit, clean workspace with ample room to maneuver. Wear heavy-duty gloves, safety glasses or a face shield, and sturdy footwear. Clear nearby tools and keep kids/pets away from the area. Have a small bucket or tray ready to hold dropped hardware. If you’re using a jack or ramps, ensure the devices are rated for the mower’s weight and are placed on a solid surface. Maintain a calm, deliberate pace to avoid slips on slick grass or damp surfaces.
Tools and Materials You’ll Need (Overview)
Before you start, familiarize yourself with the typical toolkit for blade removal: a socket wrench set with the correct socket size for your blade bolt, a breaker bar if the bolt is stubborn, a blade removal tool or a sturdy piece of wood to stabilize the blade, and a clean rag for wiping grease or grass buildup. For replacement or sharpening, have a spare blade or sharpening kit on hand. Keep a torque reference from your manual handy to guide final tightening after installation.
Preparing the Mower and Securing the Blade Area
Position the mower on a solid surface and engage any wheel blocks to prevent movement. If needed, tilt the mower slightly on its side with the air filter facing up to prevent fuel leakage. Use a clamp or strap to hold the blade in place once you’ve exposed it. Ensure the blade can spin freely when you attempt to loosen the bolt; this reduces the risk of the blade catching on the spindle as you apply torque. A clean work surface helps you keep track of the hardware and fasteners.
Understanding When to Replace vs. Sharpen
A dull blade reduces cutting efficiency and can stress the engine. If the blade has deep nicks, cracks, excessive wear, or is warped, consider replacing it rather than sharpening. If you choose to sharpen, do so evenly on both sides to preserve balance. Balanced blades reduce vibration and prolong spindle life. After removal, inspect the blade’s mounting surface for burrs, rust, or wear, and clean as needed before reinstalling a fresh or sharpened blade.
Reinstallation Considerations: Orientation and Torque
When reinstalling, align the blade with the mounting holes so the blade edges face the correct direction for mowing cut. Tighten the bolt by hand first to avoid cross-threading, then use the socket and breaker bar to reach snug contact. Avoid overtightening, which can damage the spindle or blade. If your manual specifies a torque, apply it gradually with a torque wrench. Reconnect the spark plug or battery, and wipe away any grease or grass clippings from the exterior.
Aftercare: Cleaning, Storage, and Routine Checks
Wipe down the blade surface and spindle area to remove grass residue and oil. Store the spare blade in a dry place to prevent rust, and label the replacement blade if you own multiple mowers. Periodically check blade balance by resting it on a shaft or using a balancing tool; an unbalanced blade will cause vibration and wear. Finally, perform a test run on a small patch of grass in a safe area to confirm proper operation and ensure there are no unusual noises or vibrations.
Maintenance Mindset: Regular Checks for Longevity
Treat blade maintenance as part of a broader routine: inspect the blade every season or after heavy use, and sharpen or replace as needed. Keep the spindle and mounting hardware clean and dry, and replace any worn bushings or seals to maintain proper blade alignment. A proactive approach reduces emergency blade removals and extends the life of your mower overall.
Tools & Materials
- Safety goggles or face shield(ANSI Z87.1-rated for impact protection)
- Work gloves(Cut-resistant if possible; gripping surface helps)
- Sturdy work clothes and closed-toe shoes(Protect skin and feet)
- Socket wrench with appropriate socket size(Check your blade bolt size)
- Breaker bar or ratchet(Use if bolt is stubborn)
- Blade removal tool or solid metal bar(Stabilizes blade during removal)
- Spare blade or sharpening kit(Have replacement ready)
- Torque wrench (optional)(If your manual lists a torque value)
- Rags or degreaser(Clean grease from the area)
- Block of wood or wedge(To stabilize the blade during removal)
Steps
Estimated time: 30-45 minutes
- 1
Power down and secure the mower
Turn off the engine and remove the key or switch. For gas mowers, allow the engine to cool and disconnect the spark plug wire; for electric mowers, unplug or remove the battery. Move to a stable, level surface and engage wheel blocks if available.
Tip: Never touch the blade while the engine is running or if the blade is hot. - 2
Rotate mower and prepare access
Tilt the mower safely onto its side or a stable ramp so you can access the blade from beneath. Ensure the air intake is not blocked and that fuels are secured away from ignition sources. Have a helper if the unit is heavy.
Tip: Keep the blade edge pointed away from you as you tilt to prevent accidental contact. - 3
Stabilize the blade
Use a blade removal tool, piece of wood, or a thick magnet to hold the blade in place while you apply torque to the bolt. This prevents the blade from spinning and slipping as you loosen the bolt.
Tip: Do not rely on fingers alone to prevent rotation; use a stable stabilizer. - 4
Loosen the blade bolt
Attach the correct socket to the bolt and apply steady pressure to loosen. If the bolt is stubborn, switch to a breaker bar or apply a small amount of penetrating oil to the bolt threads and wait a few minutes.
Tip: Remember: most blades loosen counterclockwise; check the manual for any reverse-thread bolts. - 5
Remove the blade
Once the bolt is clear, lift the blade away from the spindle. Be mindful of sharp edges and ensure you don’t drop the blade onto your feet. Place the blade on a stable surface with the edges protected.
Tip: Note the blade orientation—edge direction matters for proper reinstallation. - 6
Inspect and decide on replacement
Inspect the blade for cracks, chips, or excessive wear. If damaged or unbalanced, replace it. If still usable, you may resharpen evenly on both sides to maintain balance.
Tip: Balance is crucial; an unbalanced blade can damage the spindle and create vibration. - 7
Prepare for reinstall or replacement
Clean the mounting surface and the blade; remove any grass or debris. If replacing, align the new blade with the mounting holes and ensure the edge will cut in the correct direction.
Tip: Use a clean, dry surface to avoid introducing debris into the spindle. - 8
Tighten the bolt and restore orientation
Hand-tighten the bolt first, then use a socket wrench to snug it. If your mower manual specifies a torque, use a torque wrench to reach that specification. Recheck the blade alignment and ensure it sits flat.
Tip: Avoid overtightening; excessive torque can strip the spindle or warp the blade. - 9
Reattach and test
Reconnect the spark plug wire or battery. Spin the blade by hand to check for clear rotation. Start the mower and perform a brief test cut on a safe area to listen for abnormal noises or vibration.
Tip: If you hear grinding or wobbling, stop and recheck blade mounting before use.
Got Questions?
Do I need to disconnect the spark plug before removing the blade?
Yes. Disconnecting the spark plug (or power source for electric mowers) is a critical safety step to prevent accidental starts while you work under the mower.
Yes—always disconnect the spark source before touching the blade.
Can I remove the blade without tipping the mower?
Accessing the blade typically requires tipping the mower to expose the underside. If you cannot access it safely, consult your manual or a professional.
Usually you need to tilt the mower to reach the blade safely.
What tools are required for blade removal?
A socket wrench with the correct socket is essential. A breaker bar helps with stubborn bolts, and a stabilizer tool or wood block keeps the blade from moving.
You’ll need a socket wrench, maybe a breaker bar, and something to stabilize the blade.
Which direction do I unscrew the blade bolt?
Most blades loosen counterclockwise, but some models use reverse threads. Check your manual or blade labeling to confirm the correct direction.
Usually counterclockwise, but some blades use reverse threads—check the manual.
When should I replace vs sharpen a blade?
If the blade shows cracks, deep nicks, or warping, replace it. If it’s dull but undamaged, you can sharpen it evenly on both edges and re-balance.
If it’s cracked or warped, replace; otherwise you can sharpen if balanced.
Is it safe to test-run the mower after blade work?
Yes, but only after you’ve reassembled everything and reconnected the power source. Run in a safe area and listen for any unusual noises or vibrations.
Yes—test it in a safe area and listen for issues.
The Essentials
- Stop the engine and disconnect power before touching the blade.
- Identify bolt direction and use the correct tool to loosen.
- Inspect blade for wear; replace if cracked or unbalanced.
- Always reinstall with correct orientation and torque guidelines.