What to Charge Lawn Mower Battery On: A Complete Guide
Learn how to properly charge a lawn mower battery, including charger types, safety steps, and best practices to extend battery life. Mower Help explains with practical tips.

You should charge a lawn mower battery using a dedicated charger that matches your battery type (lead-acid or lithium-ion). Plug into a proper outlet with the charger rated for the battery’s voltage, and never charge on a standard outlet without a regulator. According to Mower Help, using the correct charger and following safety steps protects battery life.
Understanding why charging method matters
Charging a lawn mower battery correctly matters because improper charging can shorten battery life, reduce runtime, or cause safety hazards. The charger’s chemistry, current, and voltage control determine how the chemical reactions inside the battery proceed, influencing capacity and cycle life. Using the wrong charger or charging in a poorly ventilated area can lead to overheating, gas buildup, and, in extreme cases, damage to the battery or mower electronics. According to Mower Help, following manufacturer guidance and using a charger designed for your battery type is essential to maximize longevity and performance. This section explains the core principles you should know before you begin charging, and it sets up a sensible, safe workflow for common mower batteries.
Battery types: identifying lead-acid vs lithium-ion
Most residential lawn mowers use either sealed lead-acid (SLA) batteries or lithium-ion packs. Lead-acid batteries are typically heavier and may require occasional maintenance, including checking electrolyte levels on non-sealed types. Lithium-ion packs are lighter and often have built-in protection against overcharge. To determine which you have, check the label on the battery or consult the mower manual. Correctly identifying the chemistry is critical because charging parameters—voltage, current limit, and termination behavior—depend on the battery type. When in doubt, photograph the label and look up the model in the manual.
Matching chargers to battery type
Choose a charger that matches the battery’s chemistry and nominal voltage. For lead-acid batteries, use a charger with a maintenance/float mode for long-term storage and avoid fast charging that generates excess heat. For lithium-ion packs, select a charger designed for Li-ion chemistry, with automatic shutoff and temperature sensing. Always verify that the charger’s output connectors and polarity align with the battery terminals; misalignment can create dangerous sparks or damage. If you replace the charger, ensure it has an automatic termination feature to stop charging when the battery is full.
Safety first: PPE and environment
Work in a well-ventilated area and away from open flames or smoking materials. Wear gloves and safety glasses to protect hands and eyes from possible acid leaks or sparks. Keep metal tools away from battery terminals to avoid short circuits, and avoid charging in extreme temperatures. Clean the battery posts with a dry brush if you see corrosion, and use a non-metallic tool to check connections. If you notice a strong smell of sulfur or excessive heat, stop charging immediately and move the setup to a safer place.
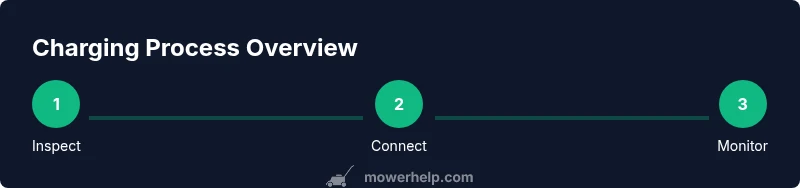
Step-by-step charging setup checklist
- Prepare the charger and battery: read both manuals, confirm voltage, and inspect for damage.
- Connect the charger leads to the battery terminals, ensuring correct polarity.
- Place the battery on a non-conductive mat in a ventilated area.
- Start the charger and set the appropriate mode; enable auto-termination if available.
- Monitor the process for heat, swelling, or abnormal smells; do not leave unattended for long periods.
- When charging completes, disconnect the charger first, then the battery, and test resting voltage after a short rest. This checklist helps ensure you do not miss critical safety and setup steps during charging.
Common charging mistakes and how to avoid them
Common mistakes include using a charger that isn’t compatible with the battery chemistry, charging in a poorly ventilated or cramped area, ignoring heat buildup, and leaving the charger connected after charging ends. Another frequent issue is neglecting terminal cleaning, which can lead to poor connections and slower charging. By sticking to a compatible charger, maintaining airflow, and following a clear stop rule, you reduce risk and extend battery life.
Maintaining battery health after charging
After charging, store the battery in a cool, dry place and keep terminals clean. For SLA batteries, avoid storing at full charge in very hot environments; for Li-ion, aim to keep around a 40-60% state of charge during storage. Periodically check for signs of wear, such as reduced runtime or swelling. Regular cycling and proper storage practices help extend the life of mower batteries and keep the mower ready for use.
When to replace a lawn mower battery
Even with proper charging, batteries degrade over time. Common replacement signs include slower cranking, inability to hold a charge, visible swelling, or signs of leakage. If your voltage recovers after charging but quickly drops under load, the cells are worn. Replacing with a compatible battery pack restores performance.
Troubleshooting charging issues
If the charger doesn’t power up, check the outlet and cords for damage and confirm the charger is the right type for your battery. If the battery refuses to accept a charge, inspect terminals for corrosion and verify polarity. A hot battery or charger is a red flag: discontinue use and inspect ventilation and wiring. If in doubt, consult the mower’s manual or contact support.
Tools & Materials
- Battery charger compatible with your mower’s battery type (lead-acid or lithium-ion)(Rated for the battery voltage and chemistry; use a charger with automatic termination if possible)
- Multimeter or voltmeter(For verifying resting voltage after charging)
- Insulated gloves and safety glasses(Protect hands and eyes while handling batteries)
- Fire-safe mat or non-conductive work surface(Keep the charging area clean and dry)
- Ventilated workspace(Charge in a well-ventilated area to dissipate any gases)
- Owner’s manual or battery label(Verify correct charging settings)
- Distilled water (for certain lead-acid batteries)(Only if your battery requires topping up)
Steps
Estimated time: 1-4 hours
- 1
Inspect and prepare the battery
Check for cracks, corrosion, and swelling. Clean terminals with a dry brush and ensure the battery is disconnected from any load before starting. If you see damage, pause and consult the manual before continuing.
Tip: Always disconnect the battery before handling to avoid sparks or shorts. - 2
Connect the charger to the battery
Attach charger leads to the correct terminals, ensuring correct polarity. Confirm the connector is snug and there are no exposed wires. If you notice heat or smell, stop and reassess the setup.
Tip: Double-check polarity before powering on to prevent dangerous sparks. - 3
Set charger mode and start
Select the charger mode that matches the battery chemistry (lead-acid or Li‑ion) and enable auto-termination if available. Start charging and ensure the charger indicates charging without fault indicators.
Tip: Use auto-termination to prevent overcharging and overheating. - 4
Monitor charging
Keep an eye on temperature and any abnormal smells. If the battery or charger becomes hot to the touch, stop charging and recheck connections and ventilation.
Tip: Never leave charging unattended for long periods. - 5
Disconnect and test
When the charger finishes, disconnect the charger first, then the battery. Let the battery rest for 15-30 minutes and measure resting voltage with a multimeter.
Tip: A healthy resting voltage indicates good terminal connections and state of charge. - 6
Store or reinstall
Store the battery in a cool, dry place or reinstall as needed. For storage, maintain an appropriate charge level according to chemistry and seasonal use.
Tip: Label the date of charging to track cycles and anticipate maintenance.
Got Questions?
What charger do I need for a lawn mower battery?
Use a charger designed for your battery type (lead-acid or lithium-ion) and mower voltage. Check the label and manual to confirm compatibility; avoid generic car chargers. Always prefer automatic termination to prevent overcharging.
Use a charger designed for your battery type and mower voltage, with automatic shutoff if possible.
Can I charge lawn mower battery indoors?
Yes, in a well-ventilated area away from heat sources and ignition sources. Ensure the space has good airflow and a nonflammable surface. Do not charge in a confined space with poor ventilation.
Yes, but only in a well-ventilated area away from heat sources.
How long does charging take?
Charging times vary with battery size and charger, typically ranging from 1 to 4 hours. Avoid forcing a fast charge beyond what the manufacturer recommends. Check the charger’s indicators for completion.
Most charges take about 1 to 4 hours depending on the battery and charger.
Is it safe to leave charging overnight?
Only if you have a charger with automatic shutoff and the area is safe. Do not leave charging unattended in spaces without ventilation or with potential ignition sources.
Only if the charger auto-terminates and the area is safe.
Should I disconnect the battery after charging?
Yes. Disconnect the charger first, then the battery. If possible, allow a short rest before use to stabilize the cells and verify the voltage.
Yes, unplug the charger and remove the battery when done.
What are signs of a bad battery after charging?
If the battery cannot hold a charge, shows swelling, or overheats during charging, replace it. Terminal corrosion or voltage dropping quickly under load are also warning signs.
Swelling, heat, or sudden loss of charge indicate replacement is needed.
Watch Video
The Essentials
- Match charger to battery chemistry.
- Charge in a ventilated, safe area.
- Monitor charging and disconnect on completion.
- Inspect battery health during and after charging.