How to Check a Lawn Mower Starter
Learn how to check your lawn mower starter, diagnose common issues, and decide between repair or replacement with our thorough, DIY-friendly guide for homeowners and DIY enthusiasts.

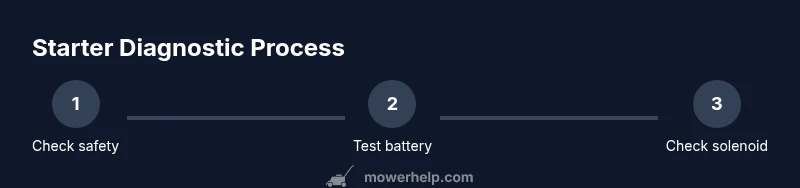
This guide shows you how to check a lawn mower starter and diagnose common failures. You’ll test the battery and electrical connections, inspect the solenoid, and verify that the starter motor engages properly. By following these steps, you’ll know whether to repair or replace individual components.
How a lawn mower starter works and common failure modes
Understanding the starter system is the first step in diagnosing crank issues. A typical gas lawn mower uses either a recoil starter (pull-start) or an electric start with a solenoid to engage the flywheel. When you pull the cord or press the start button, a pawl or gear engages the flywheel and turns the engine over. If the engine fails to crank, the fault can lie with the battery on electric-start models, corroded connections, a sticking solenoid, a worn starter motor, or a damaged ring gear on the flywheel. According to Mower Help, knowing how the starter should operate helps you narrow down failures quickly and minimizes unnecessary disassembly. In many models the starter’s job is simple: provide a surge of torque to overcome initial resistance and bring the engine to life. Common failure modes include a weak or dead battery, loose or corroded cables, a faulty solenoid, or a jammed starter. By recognizing these patterns early, you can triage safely and efficiently, often saving time and money.
Diagnostic overview: signs and initial checks
Crank-noise that is faint or absent, a rapid clicking sound at the outset, or no response when turning the key or pulling the cord are classic signs. If you hear a single click that doesn’t engage, the solenoid or starter gear may be sticking, or the battery voltage is too low to engage. A buzzing sound or consistent clicking can indicate a failed relay or poor contacts. For electric-start mowers, check that the battery is charged and the safety interlocks are functioning. For recoil-start models, inspect the starter rope, pulley, and housing for wear. The symptoms point toward electrical issues first and mechanical issues second.
Safety first: precautions before you begin
Before you touch the starter, disconnect the spark plug wire on gas models and remove power on electric-start machines. Wear ANSI-rated eye protection and insulated gloves. Work on a cool engine in a well-ventilated area and keep tools and rags away from moving parts. Secure the mower so it cannot roll, and have a helper nearby if you’re lifting components. These precautions minimize the risk of electric shock, arcing, or unintended engine turns.
Step-by-step diagnostic flow (non-destructive tests)
- Identify model and locate the starter components. This helps you locate the solenoid, wiring harness, and starter motor quickly. 2) Inspect exterior wiring and battery connections for corrosion, frayed insulation, or loose terminals. 3) Perform a voltage test at the starter while attempting to start the engine using a known-good battery if available. 4) Check safety interlocks and starter switch function—erratic behavior here often mimics a starter problem. 5) If non-destructive tests show clear electrical issues, address them before dismantling the starter. 6) Consider a bench test of the starter motor if you have the tools to apply controlled power safely. 7) When removing the starter, document whether you loosened the wrong parts or misrouted cables to avoid reassembly errors. 8) Reassemble and perform a controlled start to verify repair success. If the symptoms persist, proceed to targeted component replacement.
Battery health and electrical checks
Battery health is the most common source of crank failures on electric-start mowers. Use a multimeter to verify voltage; a healthy 12V battery should show around 12.6V when fully charged, dropping under load. Inspect all cables and terminal clamps for corrosion—clean with a wire brush and reconnect securely. Apply dielectric grease to terminals to prevent future corrosion. If voltage drops significantly under load, the battery may be weak and should be replaced. Do not assume a good-looking battery is always functional; voltage under load matters more than static voltage.
Inspecting the starter motor and flywheel engagement
Check the starter motor for signs of wear or binding. A seized or sticking starter will fail to engage the flywheel or will momentarily engage and slip. Inspect the ring gear on the flywheel where the starter pawl engages; chips or missing teeth signal replacement is needed. Manually spin the flywheel with the spark plug removed to feel for binding or roughness. If the starter motor spins freely but the engine won’t crank, the problem likely lies with the solenoid, wiring, or flywheel engagement rather than the motor itself.
When to repair, replace, or seek professional help
Many starter problems can be resolved with cleaning, tightening connections, or replacing a failed solenoid. If diagnostics show a worn gear, a seized bearing, or persistent electrical faults after all non-destructive tests, replacement of the starter or solenoid is usually the best option. Mower Help analysis shows that investing in a reliable starter is cost-effective over time, given repeated failures from poor connections or corroded contacts. For flywheel damage or deep mechanical wear, professional service is advised to avoid further damage.
Preventive maintenance to extend starter life
Regularly clean battery terminals and protect connections from moisture and dirt. Periodically check interlocks and safety switches for smooth operation. Lubricate moving parts sparingly with manufacturer-approved lubricants and avoid over-lubrication near electrical components. Store the mower in a dry environment and disconnect the battery if it will be unused for long periods. Adopting these habits reduces corrosion, preserves electrical integrity, and keeps the starter ready when you need to mow. The Mower Help team recommends pairing these practices with annual quick checks to reduce the chances of unexpected crank failures.
Tools & Materials
- Safety gear (gloves and eye protection)(ANSI-rated eye protection; leather gloves or mechanic gloves)
- Multimeter or voltmeter(to test battery voltage and continuity)
- Wrenches and screwdrivers set(to access starter and solenoid; include metric and SAE)
- Battery (known-good, 12V)(for testing the solenoid and starter without the mower battery)
- Battery terminal cleaner or wire brush(to remove corrosion from clamps)
- Dielectric grease(to protect cleaned terminals from future corrosion)
- Contact cleaner(electrical contact cleaner for solenoid and switch contacts)
- Shop rag or microfiber cloth(for cleaning and drying surfaces)
- Zip ties or electrical tape(to secure loose wires after testing)
Steps
Estimated time: 60-90 minutes
- 1
Prepare the mower and safety gear
Put on eye protection and gloves. Disconnect power from electric-start models and remove the spark plug boot on gas models. Move the mower to a clean, dry work area and secure it to prevent movement.
Tip: Double-check that the battery is disconnected before touching any wires to avoid sparks. - 2
Check battery health
Measure the battery voltage with a multimeter and compare to the expected nominal value. Inspect terminals for corrosion and clean as needed. If the battery won’t hold a charge, consider replacement.
Tip: Test battery under load if possible; voltage alone can be misleading. - 3
Inspect electrical connections
Visually inspect all connectors, cables, and the solenoid. Look for loose clamps, frayed insulation, or green corrosion. Clean contacts and reseat connectors firmly.
Tip: Use contact cleaner for stubborn oxidation and apply dielectric grease after cleaning. - 4
Test the solenoid operation
With the battery connected, observe or listen for the solenoid engaging when starting. A proper click without engine engagement indicates a solenoid or wiring fault rather than the engine.
Tip: If you can bridge the solenoid’s terminals with a jumper wire safely, you can isolate the solenoid issue (do not misuse jumpers). - 5
Bench-test the starter motor
Remove the starter if necessary and connect to a known-good power source to verify spin and gear engagement. Listen for smooth rotation and absence of grinding.
Tip: Support the starter securely to avoid dropping it during a bench test. - 6
Inspect the flywheel engagement
Check the flywheel teeth where the starter pawl engages. Look for chipped teeth or a bent ring gear that could prevent proper engagement.
Tip: Rotate the flywheel by hand to feel for smooth operation and to confirm engagement points. - 7
Reassemble and test starting
Reinstall any removed components and reconnect power. Attempt a controlled start and observe the startup sequence closely for any abnormal noises or delays.
Tip: Take photos during disassembly to simplify reassembly. - 8
Assess after-action maintenance
Document results, record parts tested, and set a quick maintenance reminder. If symptoms persist, plan for replacement or professional service.
Tip: Regular checks reduce the chance of sudden crank failures during peak mowing season.
Got Questions?
What are the most common causes of lawn mower starter failure?
Weak batteries, corroded connections, and sticking solenoids are frequent culprits. Mechanical wear in the starter or flywheel can also cause failure.
Most crank failures come from battery health, corroded wiring, or a sticking solenoid, with some cases due to worn components.
Can I diagnose starter problems without opening the mower?
Yes. Start with battery tests, inspect connectors, and test the solenoid. If these pass but the engine still won’t crank, plan for non-destructive testing of the starter.
Yes. Start by checking the battery and wiring before taking things apart.
Is it safer to replace the battery before testing the starter?
Testing with a known-good battery helps isolate issues. If the starter engages with a healthy battery but fails with the mower’s battery, the problem is battery-related.
Use a good battery for isolation; otherwise you might misdiagnose.
What tools are essential for checking a lawn mower starter?
A multimeter, wrenches, screwdrivers, contact cleaner, dielectric grease, and a safe workspace are essential for diagnosing and testing starter systems.
You’ll need basic tools like a multimeter and screwdrivers to diagnose starter issues.
How do I know if the starter solenoid is the issue?
If you hear a click but the engine doesn’t engage, or a no-click condition with power applied, the solenoid or its wiring is a likely candidate. Further tests can confirm the exact fault.
A clicking solenoid usually points to the solenoid or wiring as the fault.
How often should I service the starter to prevent failures?
Regular visual inspections and terminal cleaning during routine mower maintenance help prevent unexpected crank failures. Use preventive steps and test components at the start of each mowing season.
Do a quick check at the start of the season to catch corrosion early.
Watch Video
The Essentials
- Verify battery health before other checks
- Tighten and clean all electrical connections
- Test the solenoid prior to the starter motor
- Know when replacement is the better choice