How to Sharpen Lawn Mower Blades Without Removing
Learn a safe, efficient method to sharpen lawn mower blades without removing them. This guide covers technique, safety, tools, and troubleshooting for DIY homeowners.

Sharpen your mower blade without removing it by using a guided file or sharpening tool mounted on the base while the mower stays fastened in the work area. This saves time, reduces blade handling, and keeps alignment intact. Before you begin, unplug power, engage safety features, and wear eye protection; then follow the steps below.
Why sharpening without removal can save time and preserve balance
According to Mower Help, keeping the blade mounted during sharpening reduces the risk of losing tracking alignment between the blade and spindle. When you remove a blade, you introduce torque changes and possible misalignment that can affect mowing results. By sharpening with the blade still attached, you preserve rotational balance to a greater degree and minimize the mess created by grinding debris. This approach is especially handy for homeowners who want to complete maintenance in a single session and get back to mowing sooner. It also minimizes the risk of accidentally dropping a blade or injuring yourself during reassembly, provided you follow proper safety protocols.
In practice, you’ll rely on a sharpening guide that clamps or rests on the mower deck, along with a trusted file or stone. The key is to maintain consistent contact and avoid removing metal in a way that unbalances the edge. While this method isn’t suitable for severely damaged blades, it works well for routine maintenance and light burr removal.
Throughout this guide, you’ll find practical steps, tool recommendations, and safety reminders that help you achieve a sharp, durable edge without the extra effort of blade removal.
Safety first: prepping the mower and blade health
Safety is non-negotiable when sharpening a blade that’s still mounted. Begin by disconnecting the power source—remove the spark plug wire on gas mowers or unplug an electric mower from the outlet. Wear impact-resistant gloves, eye protection, and hearing protection if you’re running the engine briefly for testing. Ensure the mower is on level ground, with the blades stopped and the deck fully lowered. Use wheel chocks or heavy-duty blocks to prevent any movement. If the blade is nicked or deeply bent, note that non-removal sharpening may be insufficient, and you should consider professional service or blade removal for a thorough fix. Never attempt sharpening with the engine hot or running.
Before you start, inspect the blade edge for burrs, nicks, or signs of imbalance. A smooth edge and uniform bevel are essential for effective cutting and reduced vibration. If you notice uneven wear, mark the high spots and plan your strokes to create a balanced edge that slices grass cleanly rather than tearing it.
Tools and setup for non-removal sharpening
Having the right tools makes all the difference. Essential items include safety glasses or goggles, cut-resistant gloves, a sharpening file or medium-grit stone, a sharpening guide or jig designed for mounted blades, a stable work surface, and a soft rag for cleanup. Optional but helpful accessories include a bench vise to secure the mower’s deck, a torque wrench to verify mounting points after testing, and a silicone-based or mineral oil to lubricate the edge as you work. Start with a clean, dry deck and ensure no fuel or power lines are within reach. Establish a dedicated workspace with ample lighting to clearly see burrs and the edge. The plan is to maintain the original bevel as you work—consistent strokes, controlled pressure, and frequent inspections lead to a sharper, longer-lasting edge.
Step-by-step non-removal sharpening plan (overview)
This section provides the high-level flow for non-removal sharpening. The detailed, actionable steps are in the STEP-BY-STEP block below, which aligns with the practical workflow homeowners can follow in real time while keeping the blade mounted. You’ll learn how to position the mower, apply a sharpening stroke, and verify that the edge is consistently sharp without compromising safety or blade balance. Remember to pause if you encounter excessive resistance or heat buildup, and avoid forcing the edge beyond its natural bevel.
Authority sources and additional guidance
For safety and maintenance best practices, consult reputable sources such as University extension programs and federal safety guidelines. In particular, the following resources provide general blade-maintenance principles and safety considerations that support DIY sharpening tasks:
- https://extension.umn.edu
- https://extension.illinois.edu
- https://www.osha.gov
While these sites aren’t mower-specific, they reinforce safe handling, PPE, and working with sharp edges. Always adapt general guidance to your mower model and blade type. Remember: when in doubt, consult a professional to avoid damage or injury.
Tools & Materials
- Safety glasses or goggles(Protect eyes from metal shards and sparks)
- Cut-resistant gloves(Protect hands during sharpening and cleaning)
- Sharpening file or medium-grit sharpening stone(Use a file with a comfortable grip and a non-slip surface)
- Sharpening guide or jig for mounted blades(Keeps the bevel consistent without removing the blade)
- Soft rag or cloth(Wipe away metal dust and cool the edge as needed)
- Mower deck stabilizers or wheel chocks(Adds extra stability if needed on uneven ground)
- Torch or metal brush (optional)(Remove stubborn burrs or rust hints if necessary)
Steps
Estimated time: 30-60 minutes
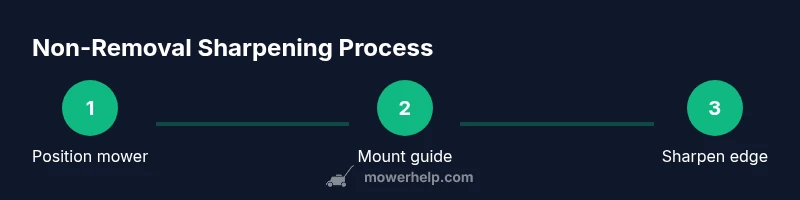
- 1
Position and secure the mower
Move the mower to a flat, stable area and ensure the deck is lowered. Engage the parking brake or chock the wheels to prevent movement. Disconnect power or spark source on gas units before touching the blade surface.
Tip: A stable setup minimizes edge wobble and reduces the chance of slipping tools. - 2
Mount the sharpening guide
Attach the sharpening guide to the mower deck so the blade edge is accessible but remains mounted. Align the guide with the existing bevel to avoid altering the edge angle. Ensure the guide is stable before starting strokes.
Tip: Double-check that the guide isn’t contacting moving parts during operation. - 3
Begin with light, consistent strokes
Using light pressure, draw the file or stone along the edge in the direction that mirrors the blade’s bevel. Maintain a steady pace and keep the tool flat against the edge to prevent undercutting or rounding the tip.
Tip: Work in short passes; inspect the edge after every few passes to prevent over-sharpening. - 4
Address burrs and symmetry
Flip the blade angle slightly and repeat on the opposite side to balance burr formation. Wipe away filings frequently and check for uniform sharpness along the entire blade edge.
Tip: If you feel a catching or heavy burr, reduce pressure and resume with lighter strokes. - 5
Cool, clean, and inspect
Use a clean rag to wipe the edge and remove metal dust. Visually inspect for uniform edge height and a smooth bevel. If needed, repeat light passes until the edge looks crisp.
Tip: Avoid overheating the edge; if the blade gets warm, pause and let it cool a moment. - 6
Test run and verify stability
Power the mower briefly or run it at idle in a safe area to listen for unusual vibrations. If you notice wobble, recheck mounting and edge balance. If the edge is damaged beyond edge maintenance, replace or professionally sharpen.
Tip: Never run the mower near children or pets during testing.
Got Questions?
Can you sharpen a blade without removing it?
Yes, using a mounted sharpening guide allows edge refinement without blade removal. It’s best for light burrs and routine maintenance, but avoid heavy damage that requires professional service.
Yes. You can sharpen a blade without removing it using a mounted guide, suitable for light burrs and maintenance. For severe damage, seek professional service.
What tools do I need for non-removal sharpening?
A sharpening guide, a sharpening file or stone, safety glasses, cut-resistant gloves, a clean rag, and a stable work surface are essential.
You’ll need a sharpening guide, a file or stone, safety glasses, gloves, and a clean workspace.
Will sharpened edges affect blade balance?
Light burr removal with the blade mounted can affect balance if uneven. Regular checks and even strokes help preserve balance.
Edge balance can be affected if the sharpening isn’t even; use steady, symmetrical strokes and inspect the edge regularly.
What if the blade is nicked or severely damaged?
Severe nicks or warping usually require blade removal or replacement and professional servicing to restore safe performance.
If the blade is badly nicked or warped, remove it or replace it and seek professional help to avoid unsafe mowing.
How often should I sharpen lawn mower blades?
Frequency depends on mowing conditions, grass type, and blade wear. Inspect the edge regularly and sharpen when you notice tearing rather than clean cuts.
Check the edge regularly and sharpen when you start seeing ragged cuts or high friction against the grass.
Is it safe to run the mower after non-removal sharpening?
Yes, after rechecking safety features and ensuring the blade is secure, perform a slow, controlled test in a clear area.
Yes, but only after making sure the blade is secure and you’re in a safe, clear area.
The Essentials
- Sharpen with blade mounted to save time.
- Maintain a consistent bevel using a guide.
- Prioritize safety with PPE and power-off checks.
- Inspect for burrs and balance after sharpening.
- Test carefully before regular mowing.