How to Check If Lawn Mower Battery Is Charging
A complete, step-by-step guide to verify your lawn mower battery charging status. Learn resting voltage, running voltage, and how to interpret readings to diagnose charging system health and avoid downtime.

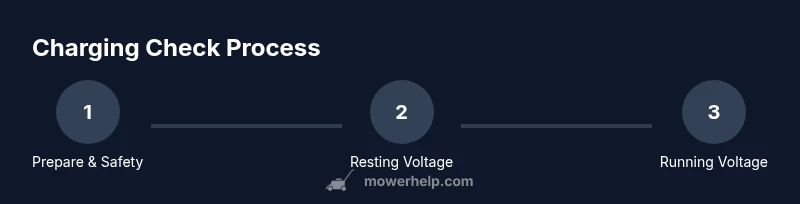
This guide covers how to check if lawn mower battery is charging by testing resting voltage with the engine off, then measuring charging voltage while the engine runs. You’ll use a multimeter or tester to compare readings with the mower’s manual and identify common faults in the charging system. Follow the steps to confirm charging health.
How the lawn mower charging system works
Most lawn mowers with a battery use a small alternator or integrated charging circuit that replenishes the battery while the engine runs. When the engine is off, the battery should sit at a stable resting voltage (often around 12.6 volts for a healthy 12V battery). When the engine is running, the charging system should push the voltage higher, offsetting the battery’s discharge from starting and running accessories. This block explains the roles of the key components—battery, alternator/charger, voltage regulator, and wiring—and why voltage readings matter for diagnosing charging problems. Understanding these basics helps you interpret readings accurately and avoid unnecessary part replacements.
Before you start: safety and prep
Safety is the foundation of any electrical check on a lawn mower. Wear eye protection, gloves rated for battery work, and ensure the mower is on a flat, stable surface in a well-ventilated area. If you have a gas mower, disconnect the spark plug wire or remove the key to prevent accidental starting. For electric mowers, unplug or switch off the power supply. Gather your testing tools and review your mower’s manual for any model-specific precautions. This preparation reduces the risk of shocks, sparks, or battery damage during testing.
Tools and setup you’ll need
You don’t need fancy equipment for a basic charging test, but a few reliable tools make the job easier and safer. A digital multimeter set to DC volts is essential for measuring battery and charging voltages. You’ll also want alligator clip leads to connect the meter without disturbing connections, and a battery tester if available for quick load testing. Keep a pen and notebook handy to record readings and timestamps. If you don’t have a manual, you can still perform the test by noting the resting voltage and the engine-run voltage, then comparing to typical ranges described in this article.
Testing resting voltage: what to expect
Begin with the engine off and the battery rested for a few hours if possible. Connect the multimeter probes to the battery terminals (positive to positive, negative to negative) and record the resting voltage. A healthy 12V battery while at rest typically shows around 12.6 volts, though readings in a narrow range (roughly 12.4–12.8V) are common for a charged, idle battery. If resting voltage is significantly lower—below about 12.2V—the battery may be weak or discharged and may require charging or replacement. Note any corrosion on terminals, which can affect readings and performance.
Testing charging voltage with the engine running
With the engine running, re-check the voltage at the battery terminals. The charging system should push the voltage above the resting level; many lawn mowers show charging voltages in the low to mid 13V range when the alternator is active. If the voltage stays near resting levels or drops under load, the charging circuit or battery may be faulty. Remember, exact values vary by model, so use your mower’s service manual as a reference point. If you don’t have it, a typical healthy running voltage should be noticeably higher than resting voltage.
Interpreting readings: healthy vs faulty
Healthy readings feature a resting voltage around 12.4–12.6V and a rising voltage when the engine runs, ideally above 13V. A resting voltage well below 12.0V typically indicates a weak battery, while a charging voltage that does not rise with the engine running suggests an issue with the alternator, voltage regulator, or wiring. If you see a voltage reading that drifts or fluctuates significantly under steady conditions, suspect a loose connection or a failing battery. Compare readings across a few test cycles to confirm consistency.
Common faults and practical fixes
Frequent culprits include corroded battery terminals, loose or damaged wiring, a worn belt driving the alternator (if applicable), a faulty voltage regulator, or a failing battery. Start with the simplest fix: clean and tighten terminals, then inspect connectors for corrosion. If readings are off, reseat or replace wiring as needed. For a weak battery, a full charge or replacement may solve the problem; for a faulty alternator or regulator, you’ll likely need component-level repair or replacement. In many cases, addressing poor connections yields immediate improvements.
Maintenance tips to prevent future charging problems
Perform regular battery maintenance, including terminal cleaning, corrosion prevention, and proper storage during off-season. Periodically test the resting and running voltages to catch slow degradation early. Keep spare fuses and a basic set of tools on hand so small issues don’t escalate. Finally, follow your mower’s maintenance schedule to keep the charging system in good shape and extend battery life.
When to seek professional help
If readings are inconsistent, you don’t have the manual, or you’re uncomfortable handling electrical tests, it’s wise to contact a qualified mower technician. A professional can diagnose partial faults (like a failing regulator or internal battery defect) that aren’t obvious from basic voltage checks. Early professional assessment can prevent battery damage or electrical fires and helps you avoid costly part replacements.
Tools & Materials
- Digital multimeter (DC voltmeter)(Set to DC volts, 20V range or auto-range; measure across battery terminals.)
- Alligator clip leads(Keep leads short and insulated to prevent shorts.)
- Safety gloves(Wear cut- and acid-resistant gloves for battery work.)
- Wrench or screwdriver set(Use to disconnect/secure any electrical connections as needed.)
- Owner’s manual / service manual(Always refer to model-specific voltage specs and procedure.)
- Battery cleaner or brush(Optional for cleaning corroded terminals before testing.)
- Notebook and pen(Record readings, times, and observations for trends.)
Steps
Estimated time: 60-90 minutes
- 1
Power down and secure the mower
Shut off the engine, remove the key if applicable, and disconnect the spark plug wire on gas models. Ensure the mower is on a flat, stable surface with the blade stationary. This prevents accidental starts and protects you during testing.
Tip: Double-check the blade area is still and unpowered before touching any electrical components. - 2
Access the battery terminals
Locate the battery in the mower’s body; identify the positive and negative terminals. If needed, clean corrosion from terminals with a brush and a mild solution before testing to avoid poor contact affecting readings.
Tip: Never short the terminals with metal tools; keep metal parts away from the battery posts. - 3
Set up the multimeter for resting voltage
Configure the multimeter to a DC voltage range appropriate for a 12V system. Connect the red probe to the positive terminal and the black probe to the negative terminal. Record the resting voltage with engine off and load removed.
Tip: Hold the probes steady and avoid touching metal parts with your fingers or other metal objects. - 4
Record resting voltage
Read and note the resting voltage. A typical healthy resting value is around 12.6V for a fully charged 12V battery. If the reading is significantly lower, consider charging or testing the battery under load.
Tip: If voltage is very low, do not attempt to start or run the engine; you risk damaging the battery further. - 5
Run the engine and measure charging voltage
Start the mower and allow it to run at a steady speed. Re-measure the voltage across the same terminals. A charging system should raise the voltage above resting level, commonly into the low to mid 13V range. If readings do not rise, the charging path may be faulty.
Tip: Record the time you took the measurement to compare against startup and warm-up behavior. - 6
Inspect connections and components
Check all wiring, connectors, the belt (if applicable), and the alternator/voltage regulator assembly for wear, looseness, or corrosion. Tighten any loose connections and replace damaged cables as needed.
Tip: A loose ground connection is a frequent cause of poor charging performance. - 7
Interpret readings and decide on next steps
Compare resting and running voltages to your mower’s manual or service data. If readings indicate a fault, determine whether to re-charge the battery, replace it, or replace the faulty charging component. Schedule professional service if unsure.
Tip: Document readings and actions so you can track future trends and anticipate maintenance needs.
Got Questions?
Do all lawn mowers have a charging system?
Most lawn mowers with a battery include a charging system, but some walk-behind models rely on battery recharging when the engine runs or on external charging methods. Check your model’s manual for specifics.
Most mowers with a battery have a charging system, but some smaller models may rely on manual charging. Your manual will confirm details.
What does it mean if resting voltage is low?
A resting voltage significantly below 12.2 volts typically indicates a weak or discharged battery. Charge the battery first and re-test, or replace if it won’t hold a charge.
If resting voltage is low, the battery may be weak. Charge and test again, and replace if it won’t hold a charge.
What if the voltage doesn’t rise when the engine runs?
If the charging voltage stays the same or drops when the engine runs, there may be a fault in the alternator, regulator, or wiring. Inspect connections and consider professional diagnosis.
If voltage doesn’t rise with the engine running, the charging path likely has a fault. Check wiring and components, and seek a pro if needed.
Can I jump-start a lawn mower battery?
Jumpering a lawn mower battery is generally not recommended due to the risk of sparks and damage to electrical components. Use a proper charger or replace the battery as needed.
Jump-starting is usually not advised. Use a charger or replace the battery to avoid damage.
How often should I test the charging system?
Test the charging system at least once per mowing season and after any electrical problems are observed. More frequent checks help catch issues early.
Test it at the start of each season and after any electrical issues to stay ahead.
What maintenance helps keep charging reliable?
Regularly clean terminals, inspect wiring, and keep the battery secured. Follow the mower’s maintenance schedule to prevent corrosion and loose connections.
Keep terminals clean, check wiring, and secure the battery to prevent future charging problems.
Watch Video
The Essentials
- Test resting voltage before loading the system.
- Expect a higher voltage when the engine runs if charging works.
- Identify faults by comparing readings to model specs and manual.
- Address loose connections and corrosion to restore charging.
- Use the findings to decide between charging, replacing the battery, or repairing components.