How to Keep Lawn Mower Tires from Going Flat
Learn practical steps to prevent lawn mower tires from going flat, including inflation checks, puncture prevention, and storage tips for DIY homeowners.

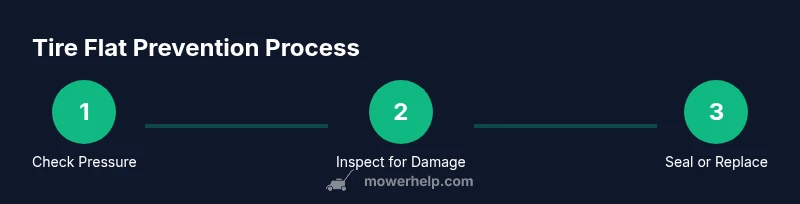
By the end of this guide you’ll know how to prevent lawn mower tires from going flat through proper inflation, routine inspection, and smart maintenance. You’ll learn where to check tire pressure, how to scan for punctures, when to seal or replace tires, and storage tips to minimize flats. Follow these steps to extend tire life and improve mowing performance.
Why Proper Tire Maintenance Saves Money and Time
Tires are the only contact point between your mower and the ground, yet they’re the most neglected component in many home setups. Regular maintenance reduces the chance of unexpected flats, extends tire life, and improves fuel efficiency and mowing quality. According to Mower Help, developing a simple routine—check pressure, inspect tread and sidewalls, and store correctly—pays off in fewer downtime days and lower repair costs. Flats often stem from slow leaks that go unnoticed until you hear a hiss or see the mower pull to one side. Small punctures from nails, screws, or sharp stones can become bigger holes after a few mowing sessions, especially on rough terrain or when the mower is loaded with heavy clippings. By treating tires as part of your maintenance schedule rather than an afterthought, you keep cutting performance steady and avoid expensive tire replacements.
How Tire Pressure Affects Mowing Performance
Tire pressure directly influences traction, cutting efficiency, and even grass height. When tires are underinflated, the contact patch expands and increases ground pressure, causing tearing and scalping. Overinflation reduces the footprint, which can create hollowed paths and uneven clippings. Maintaining the recommended cold pressure helps the blade stay level, prevents mower strain, and ensures uniform distribution of weight across the deck. Regular checks also help you notice slow leaks before they become flats. Remember: your manual specifies the correct PSI for each tire—stick to those values to keep mowing consistent and safe.
Common Flat-Causes on Residential Mowers
Flats aren’t always a fast puncture. They can start as slow leaks from a worn valve stem, bead leak, or a tiny crack in the sidewall. Sharp debris like nails, screws, or jagged rocks hidden in tall grass are frequent culprits. Storage conditions matter: prolonged heat, direct sun, or pressure from stored objects can weaken tires over time. Edges on sidewalks, driveways, and raised curbs may pinch tires during sharp turns or when tipping the mower. Even routine mowing on uneven terrain without proper weight distribution can create stress points that lead to flats. Being proactive with checks and proper storage dramatically lowers these risks.
A Well-Stocked Tools and Materials Kit
Before you begin, assemble the right tools so you aren’t scrambling mid-job. A well-stocked kit reduces downtime and helps you complete repairs cleanly. You’ll want a reliable tire pressure gauge, an air pump or compressor with a gauge, a soap-and-water spray bottle for leak testing, and a clean rag for wipe-downs. If your manual allows, a puncture sealant can help with small leaks. Have wheel chocks, a basic socket set or wrench for removing wheels if needed, and spare tires or inner tubes on hand for permanent replacements. Keeping a small container of tire-safe cleaner makes bead and rim surfaces easier to reseat. Safety glasses and gloves round out the kit to protect hands and eyes during repairs.
Step 1: Gather Tools and Prepare Your Workspace
Start by parking on a flat, level surface away from children or pedestrians. Disconnect the spark plug cap or remove the battery on electric models to prevent accidental starting. Clear the work area of loose objects and ensure you have good lighting. Place wheel chocks under the mower if you’re lifting it or removing wheels. This step reduces the risk of the mower rolling during maintenance and keeps you safer as you work. Having everything organized before you touch the tires saves time and prevents the accidental misplacement of small parts.
Step 2: Check Current Tire Pressure When Cold and Reference Your Manual
Tire pressure should be checked when the tires are cold to get an accurate reading. Use a quality gauge and compare readings to the manufacturer’s recommended PSI listed in your owner’s manual. If you don’t have the manual handy, note any inconsistent mowing results like uneven cutting height or pulling to one side, which can indicate under- or over-inflated tires. Do not inflate beyond the recommended range, and avoid pressurizing a warm tire, which can give a false high reading. Regular checks help catch leaks early and maintain optimal performance.
Step 3: Inspect Tires for Damage, Wear, and Leaks
Carefully examine each tire for cuts, cracks, bulges, or signs of sidewall damage. Look at the tread for uneven wear, which can suggest misalignment or overloading. Inspect the valve stems for cracks or leaks around the base. A simple leak test can be performed with soapy water—spray or brush soapy solution on the tire and valve; if bubbles form at any point, you’ve found a leak. Small punctures in the tread can sometimes be repaired with sealant or patches if the sidewall is intact. If sidewall damage is present, replacement is typically the safer option.
Step 4: Clean and Prepare the Rim Bead and Tire for Re-Seating
Dirt and debris can cause poor bead seating, leading to slow leaks after inflation. Wipe the rim seat with a degreaser or cleaner, rinse with water, and dry completely. If you see corrosion or rust on the bead seats, address it before seating the bead to ensure a proper seal. For bead seating, you may need a helper to apply even pressure while you inflate. A small amount of soapy water around the bead helps the tire slide into place as you inflate.
Step 5: Seal, Patch, or Replace Punctured Tires—Weighing Your Options
For slow leaks or small punctures in the tread, sealants designed for tubeless tires can seal the puncture from the inside. Check your mower’s manual before applying any sealant to ensure compatibility. If you pierce through the tread or the sidewall is damaged, patching is often insufficient, and tire replacement is the safer choice. Patches are typically used for inner tubes, while sealants are best for tubeless designs. When in doubt, consult a professional or the mower manufacturer for guidance.
Step 6: Reinflate to Manufacturer Specs and Test Run
After sealing or replacing, recheck the air pressure and bring it to the recommended cold PSI. Re-seat the tire firmly on the rim to ensure an airtight seal and spin the wheel to listen for air leaks while lightly applying pressure. Once inflated, perform a short test drive on a smooth surface to verify balance and traction. If you hear hissing or notice continued loss of pressure, re-check the bead seating and consider a more thorough inspection or professional service.
Step 7: Proper Storage to Prevent Long-Term Flats
Store the mower in a cool, shaded area when not in use. If you store it outside, use a breathable cover and avoid stacked weight that deforms tires over time. For winterized storage, slightly reduce pressure to accommodate temperature changes and prevent strain on the beads. Elevate the mower so tires don’t deflate from constant ground contact, especially for heavy seasonal mowers. Regular checks at the start and end of the season help catch issues before they become major problems.
Step 8: When to Upgrade: Flat-Resistant Tires and Alternatives
If flats become a recurring problem, consider upgrading to flat-resistant tires or tires with reinforced beads. Some homeowners opt for thicker sidewalls or tires with built-in puncture protection layers. In some cases, it may be more economical to replace with a different tire model recommended by the mower manufacturer. Always verify wheel compatibility and weight ratings before purchasing upgrades.
Tip: If your mower uses inner tubes, ensure you select tubes with the correct size and valve type, and replace valves if they’re sluggish or corroded.
Quick Troubleshooting Checklist for On-the-Go Flats
- Check inflation when cold and verify readings against manual specs.
- Inspect for visible punctures, cuts, or sidewall damage.
- Test for leaks with soapy water at valve stems and bead seats.
- If a leak is found, decide between sealant, patch, or replacement based on damage type.
- Reinflate and test drive on a smooth surface to confirm stability.
- Reassess after mowing rough terrain to catch issues early.
Long-Term Maintenance Plan for Flat Prevention
Create a simple quarterly routine: inspect tires for wear and damage, clean beads and rims, test pressure, and inspect storage conditions. Keep a small maintenance log to track readings and repairs. Rotate mowers or tires if you have more than one unit to distribute wear evenly. Regular, proactive care reduces downtime and extends tire life, saving money and hassle over multiple mowing seasons.
Tools & Materials
- Tire pressure gauge(Digital preferred; ensure accuracy and read when tires are cold)
- Air pump or compressor(With an integrated gauge; high enough flow to seat beads)
- Soap and water spray(Detect leaks around valve stems and beads)
- Rag or degreaser(Clean rims and beads before reseating)
- Tire sealant (puncture-prevention liquid)(Only if recommended by the mower manual)
- Bead seater or helper(Assist with bead seating during inflation)
- Pliers or socket set(For removing wheels if necessary)
- Replacement tires or inner tubes(On-hand for irreparable damage)
Steps
Estimated time: 60-90 minutes
- 1
Gather tools and secure the mower
Park on a flat surface, engage the parking brake, and disconnect the spark plug cap or battery. Clear the area of debris and ensure good lighting. Place wheel chocks if lifting the mower; this prevents accidental movement during tire work.
Tip: Organize tools in a tray to avoid misplacing small parts. - 2
Check pressure when cold
Use a reliable gauge to measure cold tire pressure and compare it to the manufacturer’s spec in the manual. Do not rely on readings from a warm tire, which can be misleading. If you don’t have the manual, look up the model online and verify the correct PSI.
Tip: Record the current readings so you can track changes over time. - 3
Inspect tires for damage
Look for cuts, bulges, or worn tread. Check sidewalls for cracks and the valve stems for leaks. Ping the tires lightly with a finger to feel for soft spots that may indicate internal damage. If you see any sidewall damage, plan for replacement rather than patching.
Tip: Use a flashlight to spot hairline cracks you might miss with normal lighting. - 4
Clean bead seats and rims
Wipe the bead seats and rim with a clean cloth and degreaser. Remove rust or debris that could prevent a proper seal. Dry thoroughly before reseating the tire.
Tip: A clean bead is essential for an airtight seal; skip this step at your own risk. - 5
Seal or patch as needed
If the leak is in the tread and your manual allows, apply a compatible puncture sealant. If the puncture is in the sidewall or is large, plan for replacement rather than patching.
Tip: Follow product directions precisely; too much sealant can cause balance issues. - 6
Reinflate and reseat the bead
Inflate slowly to the recommended PSI and ensure the bead fully seats around the rim. Listen for a consistent seal as you inflate. If beads won’t seal, consider a bead-seating technique with a helper.
Tip: Maintain steady pressure and avoid rapid bursts that can damage the valve stem. - 7
Test drive and recheck
After inflation, rotate the wheel by hand to feel for even resistance and then test the mower on a smooth surface. Recheck the tires after a short test run for any loss of pressure or new leaks.
Tip: If you hear air escaping during the test, stop and re-evaluate the bead seal. - 8
Store and plan next maintenance
Store the mower in a cool, shaded area and consider slightly reducing pressure if it will sit for an extended period. Maintain a regular schedule to inspect tires every mowing season and after rough terrain.
Tip: Keep a simple maintenance log to monitor tire health over time.
Got Questions?
What usually causes lawn mower tires to go flat?
Common causes include punctures from nails or sharp debris, slow leaks from valve stems, and damage from rough terrain or improper storage. Regular inspection helps catch these issues early.
Flat tires are usually caused by punctures, valve leaks, or damage from rough terrain, so regular checks prevent surprises.
Should I patch or replace a punctured tire?
Patch repairs are generally suitable for minor tread punctures or inner tubes when permitted by the manufacturer. Sidewall damage typically requires tire replacement for safety and reliability.
Patch repairs work for small punctures if allowed by your mower’s manual; sidewall damage means you should replace the tire.
Can tire sealants prevent flats?
Tire sealants can help with small leaks if your mower manual approves their use. They are not a cure-all, and significant damage still requires patching or replacement.
Sealants can help with small leaks when approved by the manual, but they aren’t a substitute for replacement when damage is severe.
How often should I check tire pressure?
Check tire pressure at least monthly during the mowing season and before storage changes. A quarterly sanity check helps catch slow leaks early and keeps performance consistent.
Check monthly during mowing season and before putting the mower away for storage.
Is it safe to store a mower with inflated tires?
Long-term storage with full inflation can put stress on the tires and beads. Store on a flat surface with stability or slightly reduce pressure per the manual, and use a protective cover.
Avoid storing with full pressure for long periods; follow the manual to reduce strain on tires.
Watch Video
The Essentials
- Regularly check tire pressure to prevent avoidable flats.
- Inspect tires for punctures and sidewall damage before mowing.
- Choose sealing, patching, or replacement based on damage type.
- Proper storage and seasonal checks extend tire life.