How to Make Lawn Mower Tires Flat Free: Step-by-Step Guide
Learn practical, homeowner-friendly steps to prevent flats on lawn mower tires, including inspection, sealants, valve stems, and ongoing maintenance. A comprehensive guide for DIY enthusiasts from Mower Help.

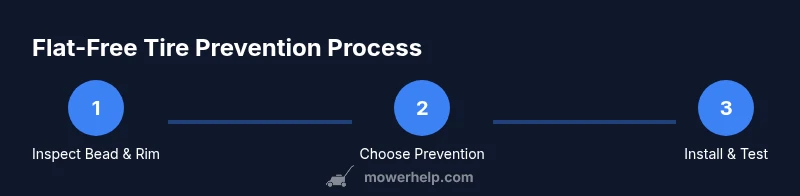
By inspecting for wear, seating the bead correctly, and using puncture-preventive methods like sealants or flat-free inserts, you can significantly reduce flats. Start with a visual tire health check, verify valve stems and bead seating, choose a preventive option, and test pressure after installation to ensure long-lasting flat-free performance.
Why this matters and how to start
If you’re looking for a reliable way to cut maintenance time, you want to know how to make lawn mower tires flat free. Flats happen for several reasons: punctures from hidden debris, damaged valve stems, improper bead seating during mounting, or aging tire materials. The Mower Help team emphasizes proactive inspection and timely maintenance to minimize downtime. This guide shows practical, homeowner-friendly steps to keep mower tires performing well through mower seasons and beyond.
Quick checks before you start
Before you dive into repairs or preventive measures, perform a pre-check routine. Inspect both tires for cracks, sidewall bulges, or embedded objects. Remove any visible debris and clean the tire surface to inspect the bead area where the tire seals against the rim. Check the rim for dents or corrosion that could prevent a proper seal. Confirm the wheel is square to the mower frame and that the axle isn’t bent. Finally, verify the tire’s recommended pressure range from the manufacturer label and keep a reliable pressure gauge handy. These initial checks are essential to reduce recurring flats and ensure accurate seating when you install preventive measures.
Understanding flat-free tire options for mowers
There are several approaches to reducing flats, from traditional flat-repair methods to modern preventive solutions. Tubeless tires with puncture sealants can self-seal small leaks, while flat-free inserts provide a solid alternative that minimizes bead leaks and pinch- flats. Bead-seating products help ensure a proper seal during mounting, especially on older rims. When choosing among options, consider mower usage, terrain, and the weight carried by the mower. For homeowners, a blend of bead-seating checks and a lightweight sealant can deliver a reliable, long-lasting flat-free result without frequent maintenance.
Inspecting mower tires for wear and damage
Carefully inspect the tire tread for excessive wear, cuts, or weathering. Uneven wear can indicate misalignment, suspension issues, or overloading, all of which raise the risk of flats. Check the sidewalls for cracking and the bead area where the tire seals against the rim. Remove the wheel (following your mower’s manual) to inspect the rim’s bead seat area and rim flange for damage or corrosion. If you notice cracking, deep cuts, or bead deformities, replace the tire or rim as needed. This step is vital to ensure any preventive measures will work effectively and safely.
Choosing prevention methods: sealants, inserts, or replacement
Sealants (liquid or paste) can seal small punctures as you ride, while flat-free inserts provide a more permanent barrier against flats but may add some weight. Bead-sealants help ensure a reliable seal at the bead, especially on stubborn rims. For older mowers or heavy-use applications, consider a combined approach: install a puncture sealant and use a bead sealer for added reliability. Remember, the right choice depends on tire type (tubeless vs. tubed), mower weight, terrain, and maintenance habits. Always consult your mower’s manual for compatibility.
Applying sealants and maintaining tire pressure
If you choose a puncture sealant, inject the recommended amount through the valve stem or rim valve, then rotate the wheel to distribute the product evenly. Recheck the tire pressure with a gauge after sealing, and top off to the manufacturer’s recommended range. For flat-free inserts, install according to the product’s instructions and ensure the bead is fully seated before replacing the wheel and applying air. Regularly check tire pressure once a month during mowing season, and adjust as needed when you store the mower for winter.
Long-term maintenance and safety considerations
Flat-free maintenance isn’t a one-and-done task. Schedule seasonal inspections, especially after hitting rocks or stumps. Store the mower in a dry area to prevent rim corrosion and sealant degradation. Always wear eye protection when removing tires and avoid overinflation, which can cause bead damage. If you notice persistent leaks, punctures larger than a few millimeters, or bead seating difficulty, consult a professional or replace the tire. Safety and reliability are the goals of proactive maintenance.
Troubleshooting common issues
If you still experience flats after preventive steps, start with verifying the sealant’s compatibility and the tire’s compatibility with a flat-free insert. Check for small punctures that sealants didn’t stop and inspect the bead area for improper seating. Re-seat the tire bead if needed and verify that the rim is clean and rust-free. If the tire can’t be sealed or seated properly, replacement is the safest option to avoid unpredictable flats during cutting and mowing.
Tools & Materials
- Tire pressure gauge(Dial gauge preferred; read at curbside parking)
- Air compressor or tire inflator(Ensure adjustable psi output)
- Flat-free tire insert or puncture sealant(Choose based on tire type and rider needs)
- Bead sealer or edge sealant(Helps seal bead on suspect rims)
- Tire patch kit (for tubed tires)(Use only if tires are tubed)
- Valve stems and small valve core tool(Replace aging stems)
- Wheel removal tool or socket set(To remove mower wheel safely)
- Rags and solvent(Clean rims and bead area before seating)
- Replacement tire or rim (if needed)(Only if wear or damage is detected)
Steps
Estimated time: 60-90 minutes
- 1
Prepare and inspect
Park the mower on a level surface and disconnect the spark plug or battery for safety. Remove the wheel and inspect the tire, bead, and rim for damage. Clean the bead seat area thoroughly so the tire can seal properly.
Tip: A clean bead seat helps avoid leaks and ensures a good seal. - 2
Check bead seating and rim integrity
Examine the rim flange for dents or corrosion. If the bead doesn’t seat squarely, use a rubber mallet gently to coax it into place or replace the rim if damaged.
Tip: A damaged bead can cause persistent leaks; do not force a seal. - 3
Choose a preventive method
Decide between sealant, flat-free inserts, or bead sealant based on tire type and mower use. Read manufacturer guidance for compatibility.
Tip: For heavy-use mowers, combining sealant with a bead sealer often yields better results. - 4
Install the prevention product
If using sealant, inject the recommended amount through the valve and rotate the tire to distribute evenly. If using inserts, install according to the product instructions.
Tip: Do not overfill sealants; follow the label directions for your tire size. - 5
Seat the bead and refill to spec
Mount the tire back on the rim, ensure the bead seats evenly, and inflate to the manufacturer’s recommended pressure.
Tip: Check pressure after seating; a bead that seats inconsistently often indicates rim damage. - 6
Test and monitor
Spin the wheel and check for slow air loss. Recheck pressure after 30 minutes of operation, then at regular intervals during mowing season.
Tip: Keep a log of pressures each month to catch slow leaks early.
Got Questions?
Can I reuse a punctured tire if I seal it well?
Punctured tires can sometimes be repaired if the puncture is small and in a repairable location, but for mower tires exposed to rough terrain, replacement is often safer. Assess the damage and follow the tire and rim manufacturer guidelines.
You can sometimes repair small punctures, but for mower tires, replacement is often the safer choice after a damage assessment.
What causes lawn mower tires to go flat?
Flats are usually caused by punctures from debris, bead damage, aging rubber, or improper seating. Regular inspection helps catch issues before they lead to a flat.
Flats usually come from punctures, bead damage, or aging rubber, and can often be prevented with regular checks.
Should I replace or repair tubeless tires when flats occur?
Tubeless tires with minor leaks can often be repaired with sealants and bead sealer. For larger punctures, or if the bead is damaged, replacement is safer.
Repair is possible for small leaks, but larger issues usually require replacement.
Is sealant safe for all lawn mower tires?
Most sealants are designed for specific tire types; always check compatibility with your tire and rim. Avoid mixing sealants from different brands in the same tire.
Check compatibility with your tires and rims, and don’t mix sealants.
How often should I check tire pressure during mowing season?
Check the tire pressure at least once a month during mowing season and after heavy use or storage changes to maintain optimal performance.
Check monthly during the season and after heavy use.
What safety steps are mandatory when working on mower tires?
Disconnect power, remove the battery or spark plug, and wear safety glasses. Use proper tools and work on a stable surface to avoid injury.
Power off, disconnect, wear eye protection, and use proper tools on a stable surface.
Watch Video
The Essentials
- Inspect tires and rims before applying any prevention method.
- Choose the prevention method based on tire type and mower usage.
- Regular pressure checks extend flat-free performance.
- Bead seating and rim condition are critical for a reliable seal.
- Safety first: disconnect power and wear eye protection when working on wheels.