Lawn Mower Tire Repair Kit: Step-by-Step Guide
Learn how to diagnose and fix punctures on lawn mower tires using a repair kit. This comprehensive guide covers tools, safety, step-by-step instructions, common mistakes, and expert tips for durable, DIY tire repairs.

With a lawn mower tire repair kit, you can quickly fix a puncture or slow leak and get back to mowing. You'll need basic safety gear, a jack or stable stand, and the repair kit’s patches or plugs. This guide covers removing the wheel, inspecting the tire, applying a patch or plug, reseating the bead, and reinflating to the correct pressure.
Why a Lawn Mower Tire Repair Kit Makes Lawn Care Easier
For homeowners and DIY enthusiasts, a lawn mower tire repair kit can save time, money, and frustration when a tire goes flat or develops a slow leak. According to Mower Help, most punctures in lawn mower tires are repairable with patches or plugs, provided the tire tread is still healthy and the bead seat is intact. Having a repair kit on hand reduces downtime and lets you tackle minor repairs in a weekend workshop or on the roadside. The kit typically includes patches, plugs, adhesive cement, a rasp or reamer, tire levers, and clean rags. With the right preparation, you can extend tire life, maintain traction, and keep your mower operating safely between professional service visits.
This section sets the stage for practical, hands-on repair work. Expect clear, tool-focused guidance that helps you avoid common missteps and stay safe while working on mower tires. Throughout, the emphasis is on using a dedicated lawn mower tire repair kit designed for the job—not generic automotive patches that may not seal properly at mowing speeds.
What’s in a Typical Lawn Mower Tire Repair Kit
A standard kit for lawn mower tires is designed specifically for tubeless or tubed mower tires and usually contains three essential components: patches for straight punctures and holes, and plugs for larger or irregular openings. In addition, you’ll find a small bottle of adhesive cement, a prep rasp or reamer, and a patch roller to seat patches smoothly. Most kits also include tire levers to pry the bead away from the wheel and a cleaner cloth. Some kits include sealant or bead sealer to help the bead reseat. When selecting a kit, check that it is rated for the tire size of your mower and includes clear instructions tailored to lawn equipment.
Understanding what’s in your kit helps you choose the right approach for patching versus plugging. The kit you pick should clearly specify suitability for the tire type on your mower (tubed vs tubeless) and come with simple, lawn-specific instructions to minimize guesswork.
Safety First: Prep, PPE, and Setup
Before you touch any tire, power down and secure the mower. For gas mowers, disconnect the spark plug; for electric mowers, unplug or remove the battery. Wear heavy gloves and eye protection. Work on a flat, level surface and use wheel chocks or blocks to prevent rolling. Remove the wheel from the mower if necessary, following the manufacturer’s guidance, and place it on a stable work surface. Clear away dirt and debris, so punctures are easy to locate, and keep a small plastic tray for screws and small parts. Finally, read the repair kit’s instructions and verify you have compatible patches or plugs for the hole type.
Safety isn’t optional here—reliable patching depends on stable support, clean surfaces, and avoiding pinching or debris that could compromise the repair.
Diagnosing Tire Issues on a Lawn Mower
Start by inspecting the tread and sidewalls for cuts or cracks; note if the leak is slow or rapid. Submerge the tire with soapy water to identify the exact puncture location; a bubble indicates a leak. Determine whether the tire is tubed or tubeless, as this changes the patch or plug method. For bead leaks, verify the rim is clean and undamaged, as a compromised bead cannot hold air reliably. If you find bead or sidewall damage, or if the tread is worn near the minimum tread depth, replacement may be the safer option. Many punctures in the tread area are repairable using a patch kit, while punctures near the sidewall usually warrant a tire replacement.
Accurate diagnosis saves time and prevents trying an unsuitable repair on a damaged tire.
Patch vs Patch+Plug: Choosing the Right Repair Method
Patches can seal a puncture from inside the tire if you can access the inner liner, while patches applied on the outside can cover smaller holes. Plugs are useful for larger holes that patches alone cannot seal, but they require precise alignment to avoid damaging the tube or tire. If your kit includes both, you can often repair minor punctures with a plug first and then reinforce with a patch, ensuring a longer-lasting fix. Always follow the kit’s directions for curing time and cure surface preparation. Avoid patching over a wear area; that can fail under pressure and result in immediate air loss.
Choosing the right method depends on hole size, location, and tire type. When in doubt, start with a plug if a patch isn’t accessible from inside the tire.
Maintenance and Longevity: When to Repair vs Replace
Repairing a lawn mower tire is usually cost-effective if the puncture is small, the bead is intact, and the tread is still within safe limits. However, large holes, sidewall cracks, or missing tread depth beyond the recommended minimum typically require tire replacement. Regular inspection of tires during annual mower maintenance helps catch slow leaks early. Even with repairs, monitor for new leaks after your first test run. If you keep infrequent equipment downtime minimal, you’ll maintain better traction and safer operation across mowing seasons.
Regular maintenance reduces emergency repairs and keeps your mower performing at its best.
AUTHORITY SOURCES
- NHTSA tires safety: https://www.nhtsa.gov/equipment/tires
- Extension resource: https://extension.illinois.edu/
- Consumer Reports tire maintenance overview: https://www.consumerreports.org/
Tools & Materials
- Lawn mower tire repair kit (patches/plugs, adhesive, patch roller)(Ensure compatibility with your tire type (tubed vs tubeless) and mower tire size)
- Jack or stable wheel support(Use a solid, non-slip support to lift and stabilize the wheel)
- Wheel chocks or blocks(Prevent rolling during repair)
- Tire levers or pry bars(For bead removal and tire separation)
- Soap solution or water for leak testing(Bubble test helps locate punctures precisely)
- Rags or towels(Clean surfaces and wipe adhesive evenly)
- Gloves and eye protection(Protect hands and eyes from sharp edges and chemicals)
- Marker or chalk(Mark puncture location for reference)
- Air pump or compressor with gauge(Reinflate to correct tire pressure)
- Bead seating lubricant/bead sealer (optional)(Helps bead seating and seal)
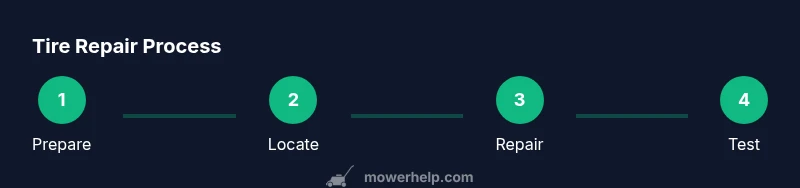
Steps
Estimated time: 45-60 minutes
- 1
Prepare and secure the mower
Power down the mower, disconnect the spark plug (gas mowers) or unplug the battery (electric mowers), and place wheel chocks. Remove the wheel if needed and position it on a stable surface. This setup prevents movement and protects you during bead work. Why: A stable setup reduces the risk of injury and improves repair accuracy.
Tip: Wearing gloves and eye protection minimizes cuts and debris exposure. - 2
Depressurize and locate the puncture
Deflate the tire completely and inspect for visible damage. Use soapy water to confirm the exact puncture location and check for bead leaks around the rim. Why: Accurate localization prevents unnecessary patching and ensures you repair the right area.
Tip: If you cannot see a hole, scan for bead leaks or internal tube issues. - 3
Choose patch or plug method
If the hole is small and the kit provides patches for inside use, prepare the inner liner and apply the patch per instructions. If the hole is larger or near the bead, a plug might be more appropriate. Why: The right method increases the chance of a durable seal.
Tip: Follow kit directions for curing time and surface prep. - 4
Apply the patch or plug and cure
Roughen and clean the puncture area, apply adhesive as directed, place the patch or plug, and ensure it sits flush with the tire surface. Allow any recommended curing time before reinflating. Why: Proper adhesion and seating prevent early air loss.
Tip: Avoid pressing on the patch edge to prevent lifting. - 5
Re-seat the bead and mount the tire
Position the tire back on the rim, carefully seating the bead all around. Use tire levers if necessary to ensure a confident seal around the entire circumference. Why: A poor bead seal can cause immediate air loss after reinflation.
Tip: Work slowly around the wheel to avoid pinching the tube (if present). - 6
Reinflate and test for leaks
Inflate to the manufacturer-recommended pressure. Recheck for leaks with soapy water and inspect the bead seating. If no bubbles appear and the pressure holds, reattach the wheel and test the mower normally. Why: This confirms a successful repair before you use the mower again.
Tip: Take a short test run on a flat surface to verify stability.
Got Questions?
Can I repair a punctured lawn mower tire instead of replacing it?
If the puncture is small, away from the bead and sidewalls, and the tread is still safe, a patch or plug can be a durable fix. If the puncture is large, near the bead, or the tire shows sidewall cracking or heavy wear, replacement is safer.
For small punctures away from the edges, patching or plugging is usually fine. If you see cracks or bead damage, replace the tire.
Is it safe to repair a tire with bead damage?
No. Bead damage compromises air retention and can be dangerous. If you notice a bead leak or damaged bead, replace the tire rather than repair it.
Bead damage means replacement is the safer option.
Do I need special tools beyond the repair kit?
Most lawn mower tire repairs can be completed with the kit and common shop tools (jack, levers, pump). If your mower uses a different rim size, you may need size-specific tools.
Usually, the kit and standard shop tools are enough.
How long does a repaired tire last?
Durability depends on hole size, patch quality, and tire wear. A well-done repair can last weeks to mowing season if the tire isn’t excessively worn and you monitor for new leaks.
If the tire is in good condition, repairs can last long enough for you to finish the season.
Should I patch inside or outside the tire?
Inside patches provide a more durable seal, but not all repairs allow inner access. Outside patches are easier and common for visible punctures. Follow the kit instructions for best results.
Follow the kit instructions; inside patches are often stronger but may not be possible on all tires.
Watch Video
The Essentials
- Inspect tire condition before repair
- Choose patch or plug based on hole size and location
- Follow kit instructions for curing and seating
- Test thoroughly with soap water after repair
- Replace tires with bead or sidewall damage or excessive wear