Replacement Cable for Lawn Mower: A DIY Guide
Learn how to replace the throttle or safety cable on a lawn mower with this practical, step-by-step guide. Safe maintenance for most gas and electric models.

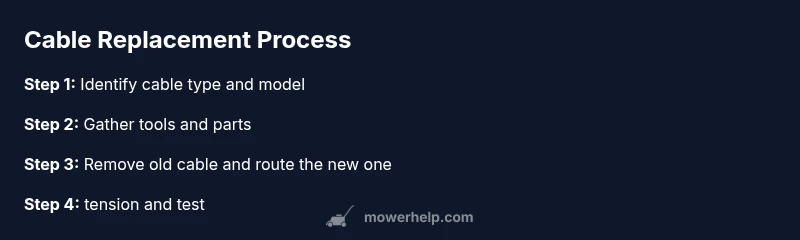
You’ll learn how to replace a faulty throttle or safety cable on a lawn mower. Start by identifying the cable type, then gather the right replacement part, tools, and safety gear. The guide covers removal, routing, installation, tension adjustment, and a test run to ensure smooth operation for most gas and electric mowers.
Understanding the replacement cables for lawn mowers
A replacement cable in a lawn mower refers to the flexible wire that connects control levers to the engine or blade mechanisms. The most common cables are throttle cables, which control engine speed, choke cables that manage starting behavior, and safety or kill cables that disengage the blade or shut off the engine. When these cables wear, stretch, or break, you notice delayed response, stiff movement, or no response at all from the control levers. For homeowners, replacing a faulty replacement cable for lawn mower is a practical repair that restores control, improves safety, and extends the life of the mower. According to Mower Help, understanding the function of each cable helps you pick the right replacement cable for lawn mower. Start by identifying whether you need throttle, choke, pull start, or safety switch cable. Different models use different end fittings, lengths, and routing paths, so confirm compatibility before ordering. If you feel unsure, consult the mower’s manual or a service representative before buying a part. A correctly matched cable will align with the pulleys, guides, and levers that control the cutting performance. With the right part, this repair can be performed quickly and safely in a home workshop. Mower Help’s guidance emphasizes accuracy in part selection to avoid misrouting or binding that could worsen the problem.
Identifying the correct replacement cable for your model
Choosing the right replacement cable for lawn mower starts with your model number and a close look at the current cable. Locate the model plate on the mower, then locate a diagram in the manual or on the manufacturer’s website showing the throttle or choke cable routing. Measure the old cable length with a flexible tape, and note the type of end fittings at each end. Some cables have rounded crimp ends, while others use square or post-style connectors. Verify the cable’s routing path through any guides or pulleys to ensure it will fit modules, springs, and levers without rubbing. Also check whether the mower uses one cable or multiple cables for different controls. Based on Mower Help analysis, correct cable selection reduces friction, prevents premature wear, and improves control reliability. Always compare the replacement cable part number with the diagram and your model’s specifications before purchasing. If you’re unsure, contact customer support or a local mismatch check service that can confirm compatibility.
Tools, parts, and safety gear you’ll need
Before you start, assemble the necessary tools and safety gear. Essential items include the replacement cable for lawn mower that fits your model, a set of screwdrivers (Phillips and flat-head), pliers (needle-nose), a small wrench or socket set, and cable ties for routing. You’ll also want a clean rag, some degreaser or lubricant spray, and safety gloves to protect your hands. Have your mower manual handy to verify routing points and clamp locations. Optional items include a cable puller if the path is tight and a spray lubricant to ease movement of the new cable. Keeping your work area organized and well-lit will help you avoid misrouting or losing small fasteners. A clean workspace reduces the risk of mixed parts and makes it easier to observe routing rules from the manual. Remember to use a magnetic tray or labeled containers for small screws to speed up the process and minimize misplacement.
The installation journey: routing, tension, and testing
The installation of a replacement cable for lawn mower involves careful routing from the control lever through guides and pulleys to the engine linkage. Start by removing the old cable ends from levers and supports, then thread the new cable in the same path to avoid tangling or binding. Attach each end to its respective lever or actuator and secure with the appropriate fittings, bolts, or clamps. Adjust tension so that the lever returns smoothly to its resting position without slack, then verify that the cable moves freely without catching on any edges. Ensure the routing path avoids sharp bends that could pinch the cable or create friction. After mounting, operate the lever a few times to confirm good response and alignment. Finally, test the mower in a safe outdoor area to confirm the replacement cable for lawn mower engages and disengages the blade or engine correctly. If you notice sticking, binding, or delayed response, recheck the routing and tension and adjust as needed. Visual checks and gentle cycling of the controls during the test are essential to catch misrouting early.
Maintenance tips to extend cable life and avoid future failures
After replacing a cable for lawn mower, practice periodic inspection and gentle maintenance to extend its life. Keep the routing path clean and free from dirt that can cause wear, inspect end fittings for cracks or deformation, and replace any frayed cord immediately. Apply a light coating of spray lubricant to exposed portions to minimize friction, but avoid over-lubricating moving parts that may attract dirt. Replace worn clamps and zip ties with the same type recommended by the manual to preserve alignment. When storing the mower long-term, avoid cramped spaces that could bend the cable or allow it to rub against sharp edges. Keeping spare cables on hand for common models can reduce downtime when a failure occurs. The Mower Help team emphasizes testing after installation and keeping a close eye on any changes in control feel during the first mowing sessions.
Tools & Materials
- Replacement cable (throttle or safety) compatible with your mower model(Ensure correct length and end fittings)
- Screwdrivers (Phillips and flat-head)(For housing screws and clamps)
- Pliers (needle-nose)(For removing and seating fittings)
- Adjustable wrench or small socket set(For nuts and clamps)
- Cable ties or electrical tape(To secure routing and protect ends)
- Lubricant spray (light)(Helps smooth movement at pivots)
- Safety gloves(Protect hands during removal and installation)
- Owner’s manual or model diagram(Locate correct routing and part numbers)
- Rags and degreaser(Clean surfaces before reassembly)
Steps
Estimated time: 30-60 minutes
- 1
Identify cable type and model
Check the mower model and review the manual to confirm whether you need a throttle, choke, or safety cable. Inspect the existing cable for end fittings and length, and measure to verify compatibility with the replacement part. A correctly matched cable ensures proper operation and alignment with guides and levers.
Tip: Double-check compatibility with your exact model before purchasing. - 2
Disconnect power and safety systems
For electric mowers, unplug the power cord. For gas mowers, remove the spark plug to prevent accidental starting. This step protects you from a sudden engagement while you work on the linkage.
Tip: Always disconnect power first to avoid accidental starts. - 3
Remove the old cable
Loosen clamps and detach the cable ends from levers and pulleys. If possible, take a quick photo of the routing path to use as a reference when installing the new cable. Keep small fasteners organized in a labeled container.
Tip: A photo helps you reproduce the exact routing later. - 4
Install the new cable along the same path
Thread the new cable through guides and pulleys, then attach the ends to the levers or actuators. Secure with the correct fittings and ensure there are no twists or kinks. Verify the cable sits cleanly in all guides.
Tip: Avoid sharp bends; gently flex the cable as you route it. - 5
Set tension and verify alignment
Adjust tension using the built-in adjuster or by positioning clamps as required. Check that the lever returns to its rest position without slack and that the cable moves freely. Align the cable with pulleys and ensure it does not rub against any edges.
Tip: Make small, incremental tension adjustments and test frequently. - 6
Test in a safe area and recheck safety features
Power the mower in a safe outdoor area and operate the lever to confirm correct engagement. Confirm that the kill switch or blade disengages properly and that there are no unusual noises. If anything feels off, recheck routing and tension before mowing actual grass.
Tip: Always test away from bystanders and trained professionals if uncertain.
Got Questions?
What is a replacement cable for lawn mower and why might I need one?
A replacement cable connects the mower controls to the engine or blade mechanism. You might need one if the lever feels stiff, the engine won’t respond, or the cable shows wear. Replacing it restores control and safety.
A replacement cable connects the controls to the mower’s engine or blade. If it’s worn or stiff, replacing it restores control and safety.
How do I know which replacement cable to buy?
Identify the model number and review the cable routing diagram. Measure the old cable, note the end fittings, and match the replacement part number. If in doubt, confirm compatibility with the retailer or manufacturer.
Check the model and routing diagram, measure the old cable, and match the end fittings and part number.
Can I replace a lawn mower cable myself or should I hire a pro?
Yes, many homeowners can replace throttle or choke cables with basic tools. If the linkage is complex or multiple cables are involved, consider professional help to avoid misrouting or safety issues.
Yes, DIY is usually feasible, but for complex linkages, seek professional help.
What safety steps should I follow during replacement?
Disconnect the power source, remove the spark plug on gas mowers, wear gloves, and keep hands clear of blades. Do not attempt replacement with the engine running.
Always unplug or disconnect power and remove the spark plug before starting. Wear gloves and keep clear of moving parts.
How do I test the new cable after installation?
Operate the lever to check responsiveness, then start or test the mower in a safe outdoor area. Ensure the throttle or safety function engages and disengages correctly before actual mowing.
Test the lever for responsiveness, then test in a safe outdoor area.
What are common signs a cable needs replacement?
Fraying, stiffness, excessive play, or difficulty returning the lever to rest are common signs. If the cable moves with noticeable resistance or catches, plan a replacement.
Look for fraying, stiffness, or excess slack as signs that a replacement is needed.
Watch Video
The Essentials
- Verify model compatibility before purchasing.
- Disconnect power and safety systems before work.
- Route and tension the new cable carefully.
- Test in a safe area and recheck safety features.